Installation of entrance doors, do it yourself
Even if you are not going to install the doors on your own, knowing how and in what sequence this is done will never hurt. At least in order to monitor the work of the installers and to be sure that in the future there will be no problems with the operation.
Since today steel is most often placed at the entrance, it will be discussed about their installation. Moreover, the installation of the entrance door made of wood is almost the same as for the interior one.
If you put a new door instead of an old one, the order of work will be as follows:- Dismantling the old.
- Cleaning the opening of the protruding elements.
- Installation in the box opening.
- Fastening hinge rack.
- Hanging canvas.
- Final fastening of the box.
How to dismantle the old door
Dismantling should start with the removal of the canvas. This is done simply, regardless of which loops it hangs on - collapsible or non-separable. In the first case, the door swings wide open and lifts until the upper part of the hinge slips off the bottom.
Tip: If the hinges are non-separable, unscrew the screws that hold them in the box.
But with the dismantling of the box can be a problem, especially if it is metal. First of all, pull out and unscrew from it all fasteners that you can - nails, anchors, screws.
Then the wooden stands can be cut in half and torn off using a crowbar, after which the lower and upper parts of the box can be removed. To pull a metal box out of the opening, you will most likely have to use a grinder to cut off the fasteners that are firmly seated in the wall and cut the stands.
Installation stages of the entrance door
Cleaning opening
After dismantling, the opening looks frightening - pieces of plaster, old heat insulation, nails, cuttings of steel fixing rods can stick out of it. All this needs to be removed. In addition, replacement may require expansion of the opening (see Dimensions of entrance doors).
If you need to move the front door, then the opening will have to be partially or completely laid, and to disassemble part of the wall in another place. In any case, try not to weaken the wall structure, but make the slopes as smooth and vertical as possible.
Box mount
Usually, installation of entrance iron doors is attempted in such a way that it is in line with the surface of the outer wall. To do this, mounting plates with holes are welded to the box on the side of the apartment, through which fasteners are driven into the wall.
Most often, these are anchor bolts with a length of at least 15 centimeters and a thickness of at least 12 millimeters. But instead of them you can use steel rods or trim rebar. They are riveted or welded to the inside of a metal box.
Welding is carried out through the mounting gap between the box and the opening, which with this method of attachment should be 15-20 mm.

Less common installation in the depth of the opening. In this case, the thickness of the walls of the opening must be more than 15 cm, and the box is fastened through the holes in it by the same anchor bolts or steel bar.
If the manufacturer did not take care of these mounting holes, they will have to be made independently. This installation method requires leaving a technological gap of 5-15 mm between the box and the wall.

Council Each of the described methods has its drawbacks, so when installing the front door it would be nice to use a combination of them.
Installation in the box opening
Having decided on the method of fixing the box, you can go directly to its installation in the opening. To do this, prepare wooden or plastic wedges, the thickness of which should be a little more left technological gaps.
With their help, the box is fixed in the opening and leveled by level.
Mounting hinge rack
Direct installation begins with the alignment and fastening of the rack box, on which there are hinges.
So:
- Apply the construction level to the outer and side edges of the box, achieving its vertical position in two planes.
- Then through the holes in the box or mounting plates, drill a wall to a depth of at least 12 cm, and drive pins into them.
- Check the stand verticality again., and only then weld the pins or rivet them, firmly fixing the rack in the desired position.
Hanging door leaf
Grease the hinges. If the hinge design requires it, place small steel balls in them and hang the canvas on the hinges. If the accessories are not installed on it (see. Accessories for entrance doors - useful information), now is the time to do it.
Final stage
So:
- Align the lock stand of the box.
- Cover the door and, moving the rack, achieve a uniform gap of 2-3 mm between her and the door itself.
- Fasten the lock stand in the same way as the loopback. - by welding the pins hammered into the wall or tightening the bolts.
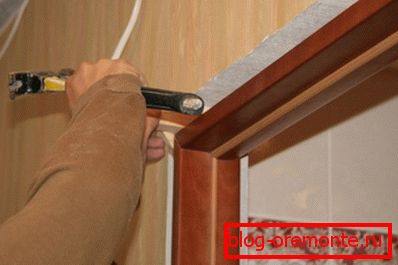
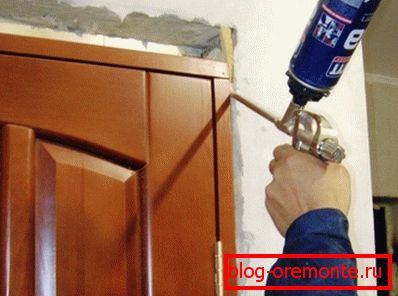
- Paint over the box with masking tape., and moisten the door opening with water from a spray bottle.
- Install the foam bottle into the special gun., which allows dispensing foam, and fill the technological gaps around the perimeter of the box.
- After 24 hours (the time of complete drying of the foam) cut off its excess and the protruding parts of the wedges and plaster the wall against the box.
- Install the access door (see How to install the door access door: workshop tips).
If, after reading the article, you are still not sure that you understood how to insert the front door correctly, watch the video in this article.