How to make an arch: all the details of the process
Today, we will give you practical recommendations on how to make an arch with your own hands and analyze this whole process "on the shelves." It will be about the arch in the doorway, which is made instead of the door between the rooms.
Recently, arches have become very popular. They give elegance to any room, as well as retain a place in small apartments, which take away the door leafs when opening and closing. Make them in the kitchen, in the corridors, between the living rooms.
In their form, the arches in the wall can be different. Also used a variety of material for their manufacture. Most often it is drywall (GCR). This material is more convenient and it can be bent without any problems.Для начала ознакомьтесь с этапами, которые нужно пройти при монтаже арки в квартире или доме (см. Arch do it yourself):
- We make measurements of the doorway and calculate the size and shape of the future arch.
- We prepare the necessary finishing materials to create an arched structure.
- Cut out the front part of the arch.
- We make the frame of the profile or of wood.
- Attach facial arched elements.
- Cut the bottom of the arch and fasten it.
- We carry out finishing works: we fasten an arched corner with perforation and we putty all the surface of the arch.
Preparation for the installation of the arch
Doorway measurements
So let's see how to make the arch yourself. Let's start with the fact that we make measurements of our doorway. We need to know its width and height from the floor.
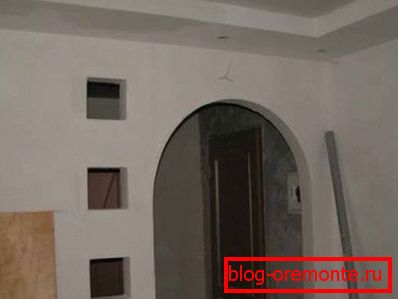
Need to know! When making the arch, keep in mind that it will reduce the height of the opening by approximately 10–15 centimeters. If the initial height is less than two meters, then you may have to give up your idea. In this case, you can frame the doorway with decorative products from foam.
So:
- The width of the arch should be equal to the internal distance between the opposite walls of the opening.
- We measure it and divide it in half. The resulting number is useful to us for the manufacture of a flat semicircle.
- Перед тем, how to make an interior arch нужно определить ее форму.
- We will consider the process of making a classic semi-circular construction of plasterboard.
- Special attention should be paid to the fact that the walls were strictly vertical. Otherwise, the arch will look awkward.
- If necessary, the inner surface of the aperture should be level with a putty or plaster on the beacons.
Arch manufacturing materials
Below is a list of necessary materials for self-manufacturing of a plasterboard arch opening:
- Guide profile 27? 28 mm.
- Rack profile 60? 27 mm.
- Dowel with screw 6 × 60 mm for fastening the profile frame. Dowels are needed only if the walls of the opening are made of brick, concrete or plaster.
- If the walls are wooden, then the profile can be fixed on the screws on a tree of 3.5 × 55 mm.
- Drywall, 9.5 mm thick.
- Self-tapping screws for GKL fasteners - 3.5 × 25 mm.
- Screws with a press washer of 4.2? 13 mm.
- Needle roller for bending plasterboard sheets.
- Arched corner with perforation.
- Drywall putty. For example, latex.
Making the front of the arch
One of the most important tasks in the question of how to properly make an arch is the cutting of the arch “face”. The task is complicated by the fact that two absolutely identical pieces are needed. It doesn't matter if you make your arch from your hardboard, from plywood or drywall.
The principle of marking and cutting is the same for any finishing material.
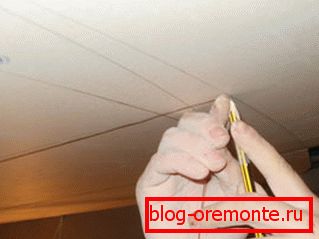
There are two methods for making an even semicircle:
- With the help of improvised means. In this case, it is proposed to use what is usually in every home: a tight rope that does not stretch and a simple pencil.
- First of all, tie a rope to a pencil.
- Next you need to mark the middle of our circle. That is its radius. To do this, we recall the number that we calculated when measuring the width of the doorway. If you do not remember, then read above.
- For example, the width of the opening is 1 meter. Then the radius of our circle will be 50 centimeters.
- We measure from one edge of the sheet (where the top of the arched opening will be) 60-65 cm and draw a line. Here the numbers are taken from the rate of 50 + 10 (15) = 60 (65). 10–15 centimeters is the length from the top of the opening to the top of the future arch. Less than 10 centimeters is not recommended.
- Now you need to cut a sheet of drywall to the width of the doorway. In our example, it is 100 cm.
- Further, we note on the previously drawn line the middle, that is, 50 cm from any edge. This will be the point for the shape of our semicircle.
- We take a pencil with a rope, measure 0.5 meters of the length of the rope and draw a semicircle from the last mark. That is, we made homemade compasses. If all steps are done correctly, then you should have an even semi-circle.
- Now with a stationery knife with a retractable blade or electric jigsaw, we cut out a semicircle along the markings. That is, you should get a rectangle with a cut out semicircle. Its width will be 100 cm, and its height - 60 (65) cm. And at the narrowest point in height you should have 10 (15) centimeters.
- Before you beautifully make the arch in the second way, you need to get something long and flexible.
For example, a PVC panel or soft plinth. It is this auxiliary element that will help you to quickly outline a semicircle on a gypsum plasterboard.
- First, cut a rectangle 100? 60 (65) cm. Then we measure 50 cm from each of the edges and draw two lines.
- Where the lines come together, put a point.
- We take our auxiliary tool and bend it from two sides to the width of our opening. That is, in the end, we get a semicircle. At the same time, the most convex part of it should be flush with the point marked by us, and the edges should converge with the edges of our rectangle below.
- Outline the resulting arc and cut it.
Need to know! If you decide to use the second method, how to make a door arch, then invite an assistant in advance. One will be hard to make accurate markup.
Making the main frame for the arch
Now we come to the question of how to make a frame for the arch. For this we need a metal profile, which we have prepared in advance. The main frame is made of guides 27 * 28.
So, here is a step by step instruction:
- Measure out the two guides on the width of the doorway (in our example - 1000 mm). They will be mounted on each side of the opening parallel to each other.
- Fasten them with dowels-screws (concrete or brick surface) or screws on wood (wooden walls).
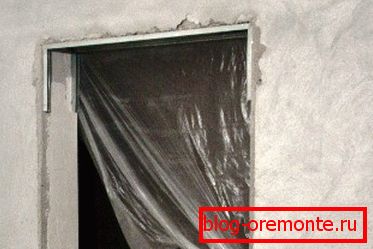
Need to know! In order for your arch to be flush with the rest of the wall, the frame is fastened a little bit deeper into the opening by 11-12 mm. That is, after fixing the drywall 9.5 mm and applying putty 1.5-2.5 mm, the surface will level out.
- Now we need to fix two side parts of the frame on each side. Their length for our example will be equal to 600-650 mm. The only thing that needs to be done is to cut the lowermost part of the profile at an angle. Since the arch is narrowing down, and part of the profile will be visible if this is not done.
The main part of the frame is ready for us and now it is possible to fix prepared frontal arched elements on it with self-tapping screws for 3.5 * 25 metal.
Если у вас возник вопрос, how to make a beautiful arch оригинальной формы, то вам просто придется смонтировать более сложный каркас для нее. Тут уже все зависит от конфигурации каждой отдельной конструкции.
We complete the main installation of the arch of the HL
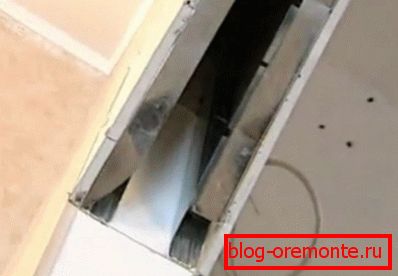
At this stage, our repair school will teach you to bend drywall and make curved structures from the guide profile. It remains for us to close the lower (end) part of our arch.
To do this, perform the following actions:
- First you need to make a frame on which the curved strip will be mounted. We will do it from profile 27? 28.
- We need scissors for metal. Preferably with a spring mechanism, which itself pushes back the handle after the cut.
- In order to give the profile an arched shape, we will cut it. And his two sides out of three.
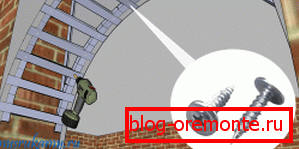
- The profile itself is U-shaped. Now turn it clockwise to the side. That is how it will be inside the already fixed right front of the arch. The second one should be located opposite it in a mirror image.
- Now we make cuts of the upper and middle part of the profile every 40–50 mm. After we have made such a “snake” of the required length, we fasten it along the very edge of our semicircle.
Need to know! The steeper the bend, the more often cuts are made on the profile.
- It is necessary to strengthen the resulting structure. To do this, we make the cross and insert them into our serpentine frame. Crossbars are made of rack profile 60

? 27 mm. Fasten them with short screws with a press washer.
Now we need to cut a piece of drywall a width equal to the thickness of the walls of the opening. If it is an interior partition, then the size of the walls is small. But if you decide to make an arch in the bearing wall, then the sheet will be quite wide.
Need to know! The length of the strip is better to do a little more than necessary. Better then cut off the excess.
Next, we need to bend the drywall strip.
For this:
- We moisten one side of our strip with water.
- Pass it with a needle roller. Not much pressure on him.
- Leans the strip at an angle to the support (for example, against a wall).
- After the sheet starts to sag, take it and fasten gently to the frame.
Make an arch do-it-yourself: video
Arch Finishing
We solved the question of how to make an arch at home and now it only remains to bring it to mind. In order to give our design a more regular shape and to hide small “shoals”, we fix an arched corner with perforation along the entire bend.
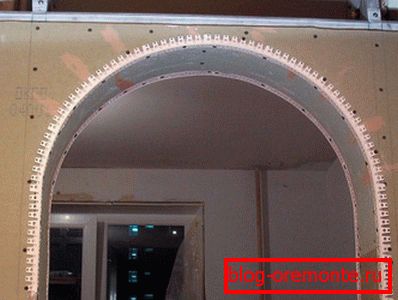
After this, we ground the surface with a deep penetration compound. We are waiting for 30–40 minutes until it is completely dry. After this, the arch can be puttyed, painted or pasted over with wallpaper (see How to paste over the arch with wallpaper).
Так же для выделения формы и защиты углов можно приклеить декоративные арочные уголки с каждой стороны проема. А how to make a wooden arch? Очень просто. Нужно пройти все те же шаги. Только вместо гипсокартона использовать фанеру, ДСП, а для изогнутой нижней части лучше всего взять кусок ДВП.
You can also buy a finished arch of MDF. She, of course, looks beautiful, but note that under it you will need to customize the doorway itself. And this is not always convenient. We hope that our advice on how to make the arch yourself were useful to you, and you will be able to create a masterpiece at home.