How to make a wicket for the fence itself
The question is not quite simple. First, you need to put the pillars. The foundation of the pillars set depending on the geology of the soil.
If the soil is rocky, then the foundation is simpler; if the marsh is more difficult. The foundation is a very special question. Therefore, we will not discuss it yet.
Pillars
Gate posts
Before you make the gate and the gate for the fence, you need to put pillars.
Gates must be made at least 4 meters wide. That is, each leaf is 2 meters wide. This is quite a serious weight, and given the torque, this is a very serious load on the pole.
There are cases that the pillars “walk and even fall. Often, the upper loops simply come off under the weight of the gate, or when the owner tries to move them in the winter.
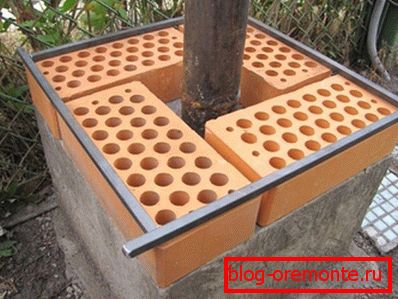
Best of all, the pillars of the gate should be made of brick with a “weave” thick-walled steel pipe inside, that is, a diameter of 108 mm. It is possible also with a pipe of square section 100? 100. We weld or fasten the hinges of the gate to the steel pipe, then lay the pole.
We need 3 pillars:
- Two for gates with a distance of 4 meters between them;
- The third pole at a distance of 1 meter for the gate.
Pillars забора
They can be made easier, for example, from an asbestos-cement pipe, or from a round steel pipe with a diameter of 60 mm with welded “ears”.
Wooden part
Fence
One of the most important tasks when constructing a wooden fence is to protect the tree from rotting. Wood has a fibrous structure and absorbs moisture like a sponge, especially in the longitudinal direction, from the ends.
Therefore, the ends must be lifted from the ground so that rainwater, snowy water, as well as moisture from the soil does not penetrate into the capillaries:
- We make the foundation (see Foundation under the gate: we do it ourselves) with a high base and lift above the base.
- If you don’t make a foundation with a plinth, it is still raised above the ground, at least by 30–40 centimeters. And between the ground and the main fence we mount several rows of boards parallel to the ground. They will rot in a few years. They can be replaced, and the main fence will last several decades.
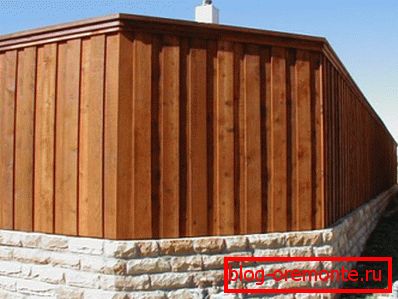
On top of the fence, too, it would be nice to make a cover, for example, also of wood:
- We make this cover in a section in the form of a pyramid so that rainwater can flow.
- The cover will take over most of the precipitation, snow, and the main fence will take much less moisture.
- Otherwise, rain will pour on the ends of the vertically standing boards, there will be snow, and the ends will absorb this water.
Goal
So:
- We make the skeleton of the gate from a solid bar with a cross section of 150? 70, or close sections (see. Doing the wooden gates with your own hands).
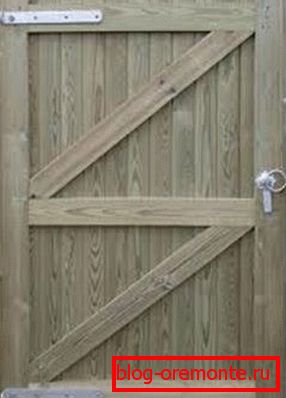
- First we do the strapping, then we do the diagonal. The diagonal should always look in the "heel".
- We tie the strapping on powerful steel corners with screws (can be studs) with a nut and a washer. Corners in size 500? 500, or close size, not less than 3 mm thick, better even thicker.
- Ready frame we sheathe board.
Gate
How to make a gate in the fence? At the gate, you can stop more. First, determine the size.
Height
Перед тем, how to build a fence gate, надо решить, какая она будет: глухая, прозрачная, высокая или низкая.
Suppose you want to look * at a guest or postman who came up to the gate:
- Then the height of the gate should be 150 cm from the ground.
- Raise above ground by 10 cm.
- It turns out the height of the product is 140 cm.
- At 20 cm at the top and bottom we produce trim panels (shtaetiny).
- We get the height of the frame 1000 mm.
* If you want to make a wicket higher (lower), then simply add (subtract) the required size.
Width
- We left 1 meter between the brick pillars.
- We attach “boxed” bars with a thickness of 40 mm to the pillars.
- 1000 - 40 - 40 = 920 mm.
- Accept the gap on each side of 10 mm.
- We get the width of the wicket frame 900 mm.
We need boxed bars for several reasons:
- It is easier for them to attach wicket hinges.
- In the tree, it is easier to make a nest under the larva of the wicket lock
- The feigned element of the gate will rest against this bar.
Manufacturing frame
So, we have calculated the dimensions of the frame of the future gate 900? 1000 mm.
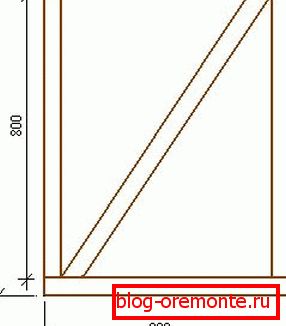
- We take the bar of 100? 50 mm.
- We are facing two bars of 900 mm each and two bars of 800 mm each.
- We assemble the frame, from the ends twist one screw of 150 × 6 mm each.
- We check the diagonals, and nails 30–40 mm on two corners with a kerchief made of pieces of plywood or hardboard (hardboard). The diagonals must be equal to each other, then the figure will be a rectangle.
- Then we mark with a pencil a bar for bracing, carefully cut it off with a hacksaw.
- Insert brace, try on. Making sure its tight fit, we disassemble the design for finishing.
Pay attention to the place of assembly of the frame:
- This place must be smooth and flat.
- If you collect the frame on a curved surface, then the gate will be a curve.
- It can be a workbench, or a wide table. It can even be a flat floor.
- It is possible to put a shield, a piece of thick plywood, a formwork shield, an old door on two even “goats”.
- It is very convenient if you attach two slats at a 90-degree angle to the two edges of the shield. In fact, get the assembly slipway.
Finish
The gate should please you for many years (see. We choose the design of the gate and the gate).
It must be very well painted for two main reasons:
- Every day you and your guests touch the gate.
- The durability of any wooden thing standing on the street depends on the quality of the finish. And not only wooden things, but in general any.
Process:
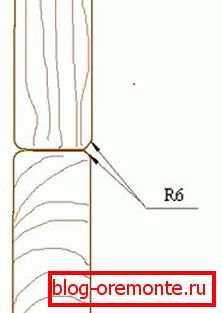
- We pass all the edges in a circular hand mill. Best of all, a radius of 6 mm. Absolutely all edges, including the end.
Note! There should be no sharp edges. The fact is that the paint layer begins to break down precisely on the sharp edges.
- Grind carefully.
- Putty is not necessary, because in the rain and snow putty will soon fall off anyway.
- Priming and painting in accordance with paint instructions. (see How to paint the gate).
Pay attention when buying:
- Paint should be just for outdoor woodwork. It must be written on the bank.
- Not bad, if the bank says that it is paint for garden furniture. She is by definition:
- weatherproof;
- resistant to ultraviolet radiation;
- resistant to abrasion;
- does not stain clothes.
- Not bad if the paint can be applied with a roller or brush. This should also be written on the bank. Sometimes right on the bank draw a brush. This icon indicates that good paint spreading occurs when applied with a brush.
- Quick-drying paints and varnishes (with an interlayer period of 1-3 hours) are easy to use and give a better quality of the painted surface, due to the fact that in the “sticky” period less dust accumulates on them.
Frame assembly

Colored items finally collect:
- We reassemble the frame, from the ends we twist one screw of 150 × 6 mm each.
- We check the diagonals, and nails 30–40 mm on two corners with a kerchief made of pieces of plywood or hardboard (hardboard).
- Insert brace.
- From the end we fasten it with screws of 150? 6 mm, as shown in the figure.
- Add a screw from the ends. The shape becomes stiff.
- Remove kerchiefs.
- We put steel corners 300? 300? 5 on screws of 40? 6 mm.
The frame is ready.
Sheathing
Calculate the number of trim panels.
- We have planed boards of 120? 20 mm.
- Gate шириной 900 мм.
- 900 divided by 120, we get 7.5 boards.
- If we put 7 boards, then 60 mm (half the width of the board) is divided into 6 intervals, then the gap will be equal to 10 mm.
- If we put 6 boards, then 180 mm (one and a half board thickness) is divided into 5 intervals, then the gap will be equal to 36 mm.
- We are spinning the selected number of boards.
- We trim them in the same way as the frame details were painted: radii, polishing, painting.
- We choose a gap, we make two bosses, 10 mm or 36 mm thick.
- These bosses are used as a template for assembly.
- We fasten the outer skin boards on the screws. Put the selected template, then fasten the second board.
- And so we go from the edges to the middle.
Installing the lock, hinges and hanging
- We put an invoice lock on the inside of the gate (see Installing the lock in the gate);
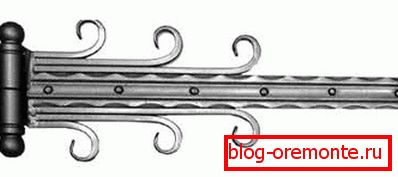
- We put beautiful loops;
- Hang the gate.
А how to build a fence gate, если забор уже существует?

- Cut through part of the fence
- Put the pillars
- Make a gate.
We have sorted out how to make the gate and the fence. There is nothing supernatural and impossible in this task.
It is very important not to succumb to some unintelligible materials from the Network, where the “advisers” talk about “wooden pins” and “metal-toothed plates” when making a wooden wicket.
Better listen to Russian professionals.