How to make a doorway from drywall
The installation of a plasterboard partition with a doorway makes it easy and quick to make two small rooms from a large room. In the simplest version, this is a common working partition with a door installed in it, but with a creative approach to business, this design can very much decorate the interior.
Of course, to make independently such an option, as in the presented photo, the beginner will not immediately. First you need to learn the basics of working with drywall, and you need to start small. For example, you can make a doorway in a plasterboard partition - and help you with this, the instructions proposed in this article.
How to organize the process
One of the most popular concepts of modern interior design is the constructive separation of space, which allows dividing it into several zones. But if you look at things more realistically, then most residential property owners are not up to design.
They often need to put a partition with a door in order to select, though not large, but a separate room for the grown-up child, or a young married couple, who still have to live with their parents. How to adequately cope with this rather difficult task?
On request: "Do it yourself video door drywall", you can find and watch videos with master classes from professionals. But we think that theory also does not hurt - especially those who have never come across such work before.
Required materials and tools
Making a doorway for drywall, of course, requires a certain skill, but before you begin this work, you should stock up with the necessary tools. First of all, you will need two planers specifically designed to work with GCR. They are called: peeling and edging: the first is the cut line of the sheet, and the second is necessary in order to cut the bevel on it at a certain angle.
- Sheets of drywall are covered with a knife with a reinforced blade, but in some cases use a special hacksaw, which you see below. For cutting the profile, you can use ordinary metal shears. Otherwise, general construction tools are used, which are in the arsenal of each owner: a perforator with drills, a screwdriver, a hammer, a set of screwdrivers.

- To sheathe the doorway door drywall is the easiest way - the main thing is that the frame is correctly installed under it. The main role here is played by correct marking, which is impossible to perform without a building level, a plumb, a coloring cord, and tape measures with a magnetic hook at the end. Professional installers use a completely different tool for this - but they also have the appropriate amount of work.
- From the materials you will need two types of metal profiles: a guide mounted around the perimeter of the partition (floor, walls, ceiling), and rack-mount, on the shelves of which are provided ribs. Profiles of domestic production, labeled Mon and PS, the import profile, marking UW and CW, respectively.
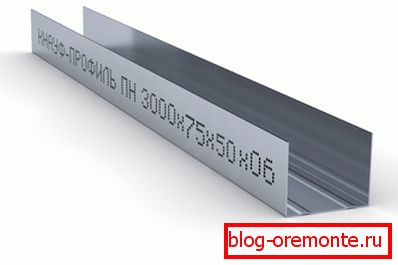
Note! During installation, the profiles are joined, so you need to match them in a pair - so that the height of the rack shelf coincides with the width of the back of the guide - for example: UW 75 * 40 mm and CW 75 * 50 mm.
- The bearing capacity of the profile depends on the size of the section, and the longer the span, the thicker the partition will be. It must also correspond to the width of the door frame, which is installed in the opening, therefore the size of the profiles must be appropriate.
- In order to strengthen the doorway from plasterboard, you will need a couple more wooden boards. Since they will have to be inserted into the pillars framing the aperture, the cross-section of the timber must correspond to the size of the profile. And, of course, you can not do without fasteners. For fixing the guides, you will need dowel-nails 6 * 40, for mounting the casing - screws of drywall-metal 3.5 * 25 mm.
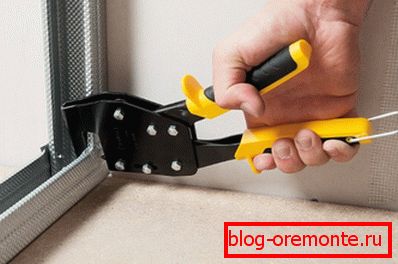
- The fastening of the frame elements between themselves, produce metal-metal fine screws, but if you buy a profile cutter, you will be able to make joints by cutting with a bend. The price of such a tool is not so great - you can buy an inexpensive option within 580-980 rubles. But the connections are more rigid, and the work is progressing much faster.
- It remains only to buy basalt mineral wool 60 cm wide, which is used for the internal filling of the structure and, in fact, the cladding material. To mount a plasterboard doorway in a working partition, you need to take a wall plasterboard with a thickness of at least 12.5 mm.
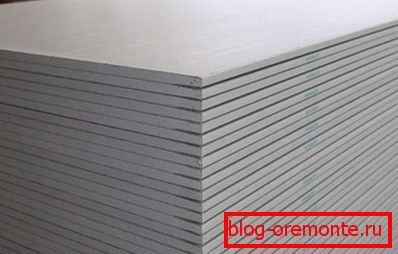
- Better yet, it’s not gypsum plasterboard, but gypsum-fiber sheets (GVL) that are used - they have greater strength, since they are reinforced with asbestos fiber throughout the whole mass. The width of the sheets is standard: 1200 mm, but the length is selected depending on the height of the partition.
If it is higher than 2500 mm, then it is better to take sheets of 3000 mm in length - so you do not have to insert narrow strips along the top. Accordingly, before sheeting the doorway with drywall, the sheet is oriented with the long side of the sheet vertically.
Frame part of the design
So, everything that is required for work is prepared - now we will understand what and how to do. You need to start with the preparation of surfaces. Of course, they will not have to be leveled off, but you may need to remove the floor covering, dismantle the wall or ceiling cladding, if such is the case.
Mounting guides
The first mounted guide profile on the floor, for which the starting line is beaten off with a marking cord. On it should measure the distance between the walls, after which you can cut the profile into pieces of the required length.
Even under a small partition, the lower guide profile cannot be solid, since there will be an opening in it, which means that you will have to cut at least two pieces.
So:
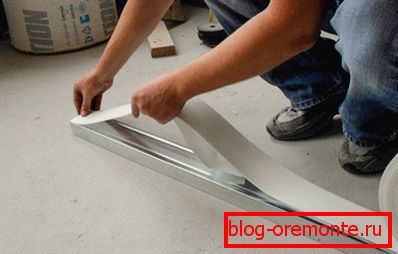
- When cutting a profile, you should always minus 5-6 mm so that during temperature expansion it does not rest against the walls. Then, on the back side of the profile shelf, you need to stick a sealing tape made of polyethylene foam. The tape is needed to improve the sound insulation design, as well as serves as a kind of cushioning substrate.
- Now you can install the profile. For this purpose, it is applied to the marking line, and holes for dowels are drilled right through it. Drilling is performed at intervals of one meter, but in any case, each profile must be mounted in three places.
- After the guide is installed on the floor, the level marking line is transferred to the ceiling. The installation of a profile on it is carried out in a similar way; only its length should be measured on the ceiling, and not on the floor, since due to deviations of the opposite walls in height or vertical, serious errors can occur.
- The same applies to the carrier profile. Before you cut it, for each rack you need to measure the height of the room exactly in the place where it will be installed. When cutting profiles, not 5 but 10 mm should be taken away from this figure - after all, in addition to thermal expansion, it is also necessary to take into account the thickness of the metal of the guides.

First, they mount wall profiles, just putting sealing tape on them, as was done on the floor and ceiling.
When the base is concrete or brick, then the dowel-nails are used as fasteners. If the vertical guides have to be mounted to a plasterboard lining, then the fastening is done by self-tapping screws into the profile of the wall, or special butterfly-shaped dowels are used.
Racks and lintels
As soon as the frame along the contour of the partition is ready, proceed to the installation of the door frame racks. We have already mentioned that their reinforcement is done using wooden bars, but there is another way.
If the door is not too heavy (no more than 30 kg), or it will be just a passage, without a door, then the experts do it.
- Support stands in this case are made of two profiles by the nozzle method - that is, the shelves of one profile lead inside the other and press them well together. Then their ends of the double profile lead into the guides, and fasten with screws or a chopper. Between the vertical elements of the opening should be a distance corresponding to the width of the door unit.

- Once the racks are securely fixed, you can proceed to the installation of a horizontal lintel opening. Cut it out of the guide profile. The length of the lintel is the sum of the distance between the uprights, plus 10 cm of bend margin, which is necessary in order to dock the lintel with the vertical elements of the frame. How to cut and bend the ends of the profile, perfectly shown in the picture below.
- Now you need to strengthen the jumper. To do this, you need to install one or two short racks above it, which will connect two horizontal structural elements. The number of racks above the lintel depends not only on its length, but also on how drywall is mounted around the doorway.
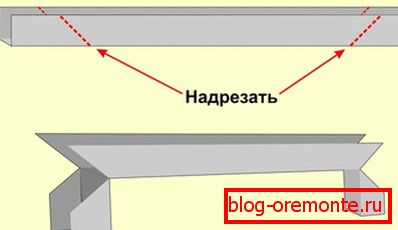
- If it is a solid sheet, completely covering the opening, then one stand is enough. In this case, the extra part of the plasterboard, which closes the opening, is cut out with a hacksaw after the sheet is attached to the frame. If the plating elements are cut in advance, and then joined, there must be at least two posts above the web.
- Next, mount the intermediate vertical frame elements. The pitch between them should be no more than 60 cm so that the sheet, which is 1200 mm wide, is fixed both along the edges and in the center. For this to be possible, the backs of all profiles must be facing the front of you.
Where you have to dock the sheets horizontally, you must install the same jumpers as above the doorway. All supporting elements of the frame must be doubled. This is necessary so that they can be trimmed on both sides - otherwise, you will have to install two parallel frames.
Sheathing partition walls
Suppose you want to make a backlight, install sockets or switches on the partition. After the "skeleton" of the partition is mounted, it's time to lay the wiring in it.
The cable should be perpendicular to the racks, and pass it through specially prepared holes in the profile shelves. Laying wiring inside profiles is not allowed!
- Then you can proceed to the installation of drywall. Cutting the sheet along the length should be made so that it is less than the height of the room by 10 mm. GKL is fastened to the rack profile with self-tapping drywall-metal screws of 3.5 * 25 mm. Fastenings along the stand are made at a maximum distance of 250 mm, and begin to fasten the sheet from the center to the edges.

- The end of the sheet, on which the chamfer was cut, should abut the ceiling surface, and the extreme screw should be at least 15 mm away from it. Fastenings performed on the joined sheets must be shifted by about 10 mm. Self-tapping screws should be included in the GKL directly, and go into the rack not less than an inch.
- When performing fastenings, it is necessary to ensure that the heads of the self-tapping screws enter the thickness of the drywall by about 1 mm, which is necessary for the subsequent puttying - one should not overdo it too much. The sheet adjacent to the wall must be cut to the width, cut edge, and make a chamfer.
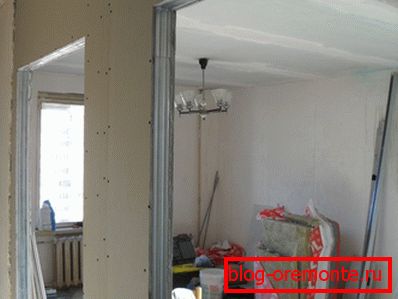
- If the sheet goes beyond the perimeter of the doorway, it is very easy to cut it after it is fully secured. Make it a hacksaw, pre-piercing it with a sharp end, a sheet in the corner of the opening. When doing the plating, it must be remembered that the joints of the plating elements should not be placed on racks along which the door frame should be mounted.
Now that one side of the partition is fully prepared, fill its cavity with mineral water. It is a heater (see. A heater for doors: types and parameters) - but in this case, it plays the role of a sound insulation layer.
Next, it remains only to close the other side of the structure with the casing - and your partition is ready for puttying and finishing. For information on how to do this correctly, you will gather from the video in this article.