How to install trim on the door
No matter how beautiful the door, but without an element that not only hides the joints of the box with the wall, but also serves as a framing decor for the opening, it is impossible to do. Decorating the door trim is a logical completion of installation work.
A lot depends on the shape, color and quality of the slats: how harmoniously the entrance group will look on the facade, or how the opening of the interior door fits into the interior. With the help of the video in this article, we will talk about how to install the door trim panels, and present you with an overview of their options.
Choice of platbands
As well as any other product, the platband for doors is classified by certain indicators. First of all, they are distinguished by the materials used for their production as raw materials. Decorative strips are selected depending on the type of door installed in the doorway: wooden, PVC or metal (see Do-it-yourself installation of metal doors: tips from practitioners).
So:
- They may even be stone or ceramic., but use these options only in cases when walls are trimmed with the same material. It is quite logical when the installation of door trim in the bathroom, or kitchen, lined with tiles, is performed using ceramic elements for framing the opening.
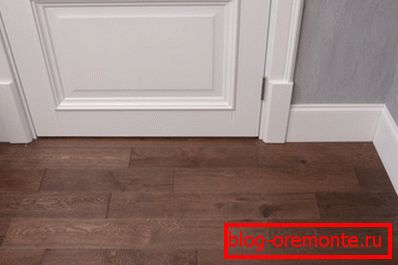
- There are also polyurethane frames, which, in general, are suitable for any doors, and are used in the design of the premises, complete with floor and ceiling plinth - the photo above shows an example of such a combination. Due to the excellent flexibility of polyurethane platbands, they are also suitable for circumventing arched openings.
Framing elements for doors: what are the differences
Regardless of the material from which they are made, the platbands differ in the configuration of the section - they can be flat, spherical and figured. Flat models are a simple plank with a rectangular cross-section, and in spherical variants the edges are rounded.
Metal and PVC platbands often have a flat or rounded contour, wooden can be any.
- The third category (figured), include strips with facial milling, as well as the trim carved on the doors and windows. As a rule, wooden and polyurethane moldings are often profiled. And although they are made according to different technologies, both of them have beautiful geometric or artistic relief on the front surface.
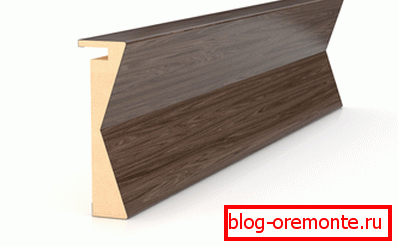
- The price of wooden platbands depends on the type and class of wood from which they are made: there are options for 150 rubles, and there are also for 1050 rubles / m. By the way, the door trim, like the door itself, can be made not from solid wood, but from MDF, which allows manufacturers to reduce the cost of these products.
Note! The cost of polyurethane casings is influenced mainly by their width and complexity of the relief. We can not say that it is cheap, as their prices are from 700 rubles. apiece (2,3m) just starting. But on the other hand, it is very convenient to purchase a set for framing the opening, which includes: a door jamb - two pieces, plus a capital or sandrik (horizontal elements above the door).
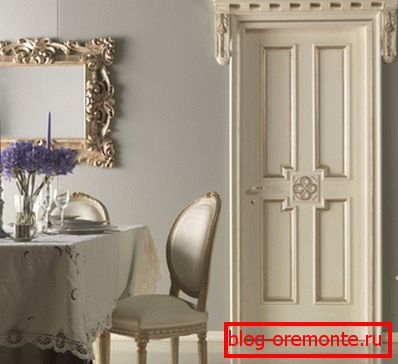
- On average, such a set is 4500 rubles. - A little expensive, but the end result is worth it. First, the beautiful reliefs, in appearance resembling gypsum stucco, allow you to design rooms in many historical styles. Secondly, such a frame can be painted with contrast: white doors (see. Bright doors in the interior: choose the right option), black trim, combining this option of finishing, for example, with the design of a suspended ceiling or wall decor.
- Similar framing for a door made of beech wood or, say, Canadian cedar, looks no worse. But, wooden decorative platbands, as a rule, are sold covered with veneer, or already painted in colors corresponding to the wood scale, and choosing plinths or other interior accessories can be quite problematic.
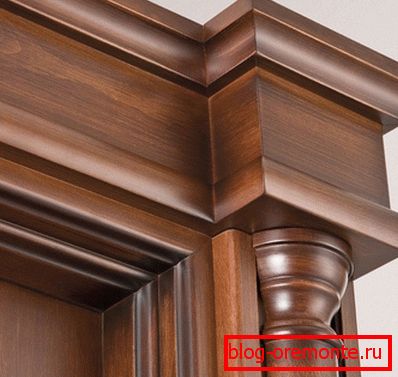
The third indicator that distinguishes the door trim, is the method of their installation. There are only two options: patch slats that attach directly to the base of the aperture, and telescopic - they are mounted to the door frame. About how to install trim on the door of a particular design, we will tell in the next chapter.
Ways of installing platbands
Installation of metal and plastic doors is usually made by the specialists of the company that manufactured or sold them - respectively, and they install the door trim panels. Most often, these are doors at the entrance to a house or apartment, and, by the way, quite often there are no platbands on them at all - they are replaced by the visible part of the frame.
- But as for the interior doors, which in the overwhelming majority are wooden, there is no way to do without the frame of the opening - it would be just ugly. And every time a repair is made in the house, the owner has to dismantle with his own hands, and then re-install the trim.
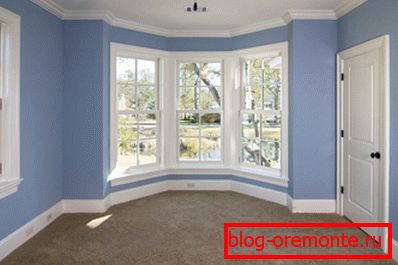
For those who have never come across this work, the easiest way to do this is to type in the search box: “Install door trims on the video door” and watch one or two videos. Visual information is always absorbed better, but the theory also does not hurt.
Overhead Planks
As mentioned above, the frames have three options for the section. Beginners easier to work with the usual smooth bar, since it can be faced at a right angle.
As for the rounded and shaped platbands, they should be cut only at an angle of 45 degrees, otherwise the cut will not look aesthetically pleasing.
So:
- The craftsmen, of course, have at their disposal a miter (circular) saw, which makes it possible to make a cut quickly and accurately without damaging the decorative face coating. In the absence of such a tool, you can use the usual carpentry miter and hacksaw - but it is more time consuming.
- The length of the slats, usually corresponds to the standard height of the door, which, depending on the width of the opening, varies between 2-2.3 m. Your task is to cut the vertical elements of the frame in accordance with the height of your door, but for installation in width, the platband is cut in half.
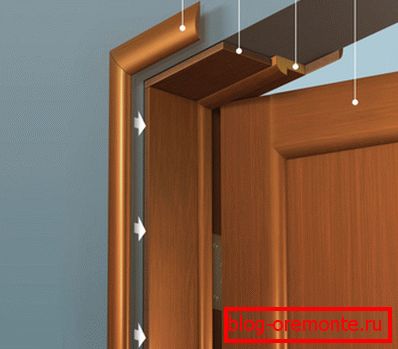
- If the box is just installed, you need to wait until the mounting foam, with which the joints are filled, hardens. All that protrudes beyond the limits of the wall plane must be cut off with a stationery knife - that is, in this way, the surface is leveled.
- It often happens that the depth of the opening exceeds the width of the door frame. In this case, the additional strips are installed first, and then the perimeter of the opening is framed. By the way, dobory and trim for doors are usually sold in the set, as their texture and facial design must match perfectly.
Note! The platbands should adjoin the wall so that their edges completely cover the ends of the box or the additional panels. Before cutting the docking corners, try them on and make appropriate marks on the front side. You need to start with a horizontal element: mark the cut point on its lower edge, focusing on the line of the corner joint of the box elements.
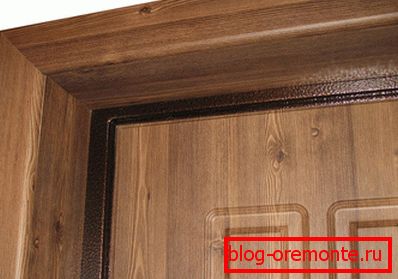
- Then you should make a fitting, putting the parts so that you do not interfere with the door hinges and the strike plate of the lock - sometimes you have to make samples for them. We note in particular that the bottom casing should rest against the clean flooring, and not with the plinth!
- Further, you mark the line of the angular cut and number each detail - this is especially important when you have to install the trim plates on several doors at once. Now it is possible to make an angular cut on the marks made - the angle should be 45 degrees.
- Before final installation, two strips of foam are applied on the back surface of the platbands, and give two to three minutes to set. The foam compensates for small irregularities of the wall, and when the casing is nailed, it will not hang out.
- To frame the elements of the frame you need in the same order as you tried on: first of all, the horizontal part. First they fix it only in the middle, after which they put up vertical platbands. Their corners are carefully and without a gap docked, and only then fixed with nails.

The number of mounts may vary as needed. Tap the casing - where it is loosely attached to the box, you need to drive a nail. Nails, though small, can ruin the appearance of the frame.
Specialists in installing doors, working with a pneumatic gun, equipped with microchips. Studs go deep into the sweat, and the holes from them can simply be sealed with furniture wax.
Telescopic trims
What is the difference between the telescopic casing, from the usual, overlay casing? It has a special shelf, which gives the product L-shaped. When mounted, this shelf is inserted into the groove on the door frame.
- The advantage of this type of trim is that it is easy to remove them, if we assume, you need to finish the walls, and just as easily put in place. In such a situation, overhead trim when dismantling during repair, as a rule, have to be replaced with new ones.
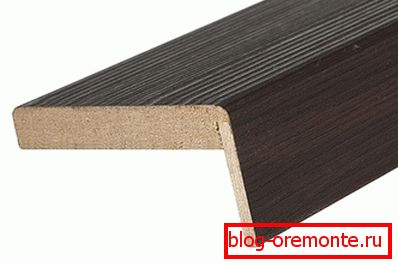
- However, the telescopic platband also requires careful handling, starting with sawing. L-shaped shelf, which he has, does not allow to lay the bar exactly. Therefore, you have to use a liner, specially cut from the scrap bar. Its thickness should correspond to the height of the flange - then the casing will lie flat, and the correct cut will be obtained.
- And you also need to keep in mind that in order to avoid the formation of ugly burrs, cut the casing with a decorative coating, should be on the front side. Actually, cutting and fitting telescopic platbands can be considered the only difficulty that arises in the process of their installation.
- Then everything is done simply: the corner shelf is inserted into the groove of the box, that's all. Due to the fact that the casing can be planted a little closer or deeper, it is possible to compensate for the slight difference between the planes of the wall and the box. If the difference is large, then here, in the same way as with the use of overlaying casings, additional strips are used. Only this should be specially designed slats with a groove.

- Due to the complexity of cutting, telescopic platbands are often joined at a right angle, which looks, in general, not very aesthetically pleasing. When using the underlay bar, which was mentioned above, it is not difficult to make the correct cut - well, the markup before cutting is done on the same principle as the overlay casing. So it is better to cut at an angle.
- It remains to clarify one question: "Is it necessary to additionally fix the angular platbands?". Manufacturers claim not to. Most of the masters involved in the installation of the doors, and, accordingly, the trim, are sure that without mechanical fastening they will fall out, or simply, gaps will form in the carefully fitted joints.
Given the ability of any material to expand and contract depending on the ambient temperature, we tend to agree with them. And here it is up to you to decide whether to put the framing elements of the opening on liquid nails or polyurethane foam, or fix them at least in three places with micro-studs or small nails.