How to install the interior door yourself - detailed
For a specialist installation of the interior door is not a problem. But if you make repairs yourself, you may have a question: how to install the doors yourself so that they reliably perform all their functions.
This article will help you understand this issue. Immediately, we note that we will focus on wooden doors from the array.
The technology of installing veneered doors differs only in that before sampling the recesses for hinges it is necessary to cut and remove a layer of veneer with a sharp knife to avoid damaging the coating.
As for expensive interior doors, in the absence of installation skills, it is better to entrust this work to specialists. So, let's look in detail: how to install yourself.
- 1 Interior door functions
- 2 Materials and tools
- 3 Installation steps
- 3.1 Installing the door frame
- 3.2 Installing the door leaf
Interior door functions
In addition to decorative interior decoration, they reliably perform practical functions:
- Provide light and sound insulation.
- Isolate the living space from each other.
- Maintain a comfortable temperature in the room when using heaters or air conditioners.
How to install the door itself so that it does not creak, closes easily and opens and does not warp over time? To solve this problem, besides the desire to save, you need patience, since the installation process requires diligence, accuracy and attention. As well as the availability of special tools.
Materials and tools
Wooden box and trim usually come complete with door leaf. If you bought only the canvas, you will need to separately purchase the door frame (see How to assemble the door frame without problems), additional elements, trim, as well as screws for assembly.
In addition, you will need the following materials and tools:
- Anchor bolts for fixing the box in the opening.
- Wooden or plastic wedges.
- Polyurethane foam.
- Building level.
- Drill or screwdriver.
- Hacksaw for wood, miter box and chisel.
Before getting started, carefully read the instructions on how to install the interior door yourself + watch a video that will help you better understand the details.
Installation steps
Door frame installation
This is the most important stage, the quality of which depends on the reliability and aesthetic appearance of the door. The size must be precisely adjusted to the size of the door leaf, not forgetting to leave gaps of 2-3 mm on each side for easy movement of the door.
Attention! If you install the interior door before the floor is finished, or if you plan to put a carpet in the room, consider the thickness of the floor covering and add 8-10 mm to it for the gap between the floor and the door.
So:
- Lay the door leaf on the floor as it will stand in the doorway, and adjust the box size to it by inserting strips of hardboard or thick cardboard between it and the canvas to maintain the technological gaps. Do not forget the gap at the bottom of the door.
- Fasten parts with screws, if necessary, sawing off with a hacksaw too much.
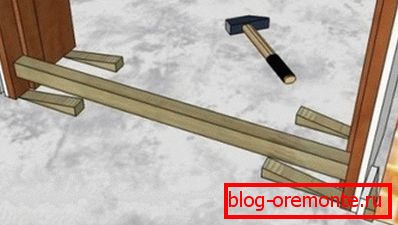
- Install in the doorwayby fixing it with spacer wedges at the top. It should be located in the middle of the wall thickness.
- The most crucial stage is leveling. Using a construction level, first align the loop strut of the box in two planes, fix it in a predetermined position using wedges. Then, in the same way, level the feigned stance and take a control measurement of the width along the top and bottom.
- Make sure the top is horizontally horizontal., once again check all the dimensions, putting the door leaf in the box, and only then fix it to the slope with anchor bolts. Fill the holes formed or close with decorative corks.
Door leaf installation
There are a lot of instructions on how to install interior doors, but there are a lot of nuances that come with experience.
Let's try to give detailed recommendations.
- At a distance of 20-25 cm from the top and bottom edges, make a marking for the hinges (see Hinges for interior doors) on the box and the end of the door leaf, accurately matching all sizes and not forgetting the technological gaps.

Tip: To avoid errors, perform all measurements with the same tape and at one time. For example, if the length of the door is 2000 mm and the height of the hinges is 100 mm, you should mark 200 mm, 300 mm, 1700 mm and 1800 mm at the end.
- Using a milling machine or chisel, make recesses under the hinges. The plane on which the hinges are attached must be perfectly flat.
- Disassemble the hinges and fasten their lower parts (with the sleeve) to the box, and the upper parts (with the leg) to the door.
- Lubricate the hinge legs with graphite grease or engine oil and hang the door leaf. Check that the installation is correct by setting the door to a half-open position: it should not open or close at random.
- Before you fill the gap between the box and the opening with mounting foam, put additional spacers just above the door handle and next to the hinges. Apply the foam in a thin layer, having previously covered the door with a film and moistened the opening with water from a spray bottle.
- After complete drying of the foam, cut off its excess and protruding parts of the wedges.
The final stage of the installation of doors
Now you know how to install interior doors yourself. But in order to make them look aesthetically pleasing, something else needs to be done. If the thickness of the opening, in which the interior door is installed, turned out to be wider than the box, then the box will have to be “expanded” by dobori (see Installing interior doors with an additional door).

To do this, a quarter of 10x10 mm is selected in the box using a milling cutter for attaching an additional board to it. Finally, the door must be framed with platbands.
Measure their length, cut the corners with the help of the miter at 45 degrees and nail the trims to the box with finishing studs. Or stick them to the wall with “liquid nails”.