How to install interior doors: tips practitioners
In this article you will find detailed instructions on how to properly install interior doors in the openings of various building materials.
In short, the installation process is as follows:- Choosing and buying doors, boxes, trim and additional items (if necessary).
- Selection and purchase of hinges, lock or door handles.
- Dismantling.
- Preparing the opening.
- Build the box.
- Inset loops.
- Insert hinge mating on the door leaf.
- Preliminary fastening of the box and hanging the door on it.
- Exposure and final fastener in the opening.
- Insert lock or pens.
- Fit and fasten cashes.
Despite a fair amount of points, understand how to properly install interior doors under the force of anyone. But this should be done carefully and without haste. Let's take a closer look at each step and make sure of it.
Choosing a new door in the store
Before buying a new one, you need to measure the width of the old one. Provided that the opening will not change in size, take the same width.
You should know! If the door is replaced in the doorway of the plasterboard partition, then you should not get a heavy wooden one. A poorly reinforced frame can not withstand such a load!
The box and trim are matched to the color of the door leaf. Variants of the box can be different: MDF, wooden, laminated.
Purchase of hardware for the new door
First of all, you need to decide which loops you need: left or right. To do this, imagine which side of you they will be on the door if you open it on yourself. It also takes into account which hand you take on the handle.
For example, you open the right hand (the handle is on the left), while the hinges are on the right. In this case, you need exactly the right loop.
You should know! Russian and European masters define the left and right doors in different ways. We take into account the opening on themselves, and they - from themselves. It turns out that our left door they will be right.
When choosing a lock, please note that the thickness of its body should not exceed half the thickness of the door leaf.
Dismantling the old interior door
To dismantle the interior door will need the following tool:
- crowbar nail puller;
- small hatchet;
- hammer;
- crosshead screwdriver;
If the dismountable door is installed in the opening from the metal profile, then it will be enough to remove it from the hinges and unscrew the screws from the box that hold the box with a screwdriver.
If the box in a brick or concrete opening is fastened with nails, then a crowbar with a nail puller and a hammer will work. The hatchet can be used for more convenient removal of a cloth from loops.
To do this, we slip it narrowly under the lower gap between the door and the floor and lift it up by the handle - it will be removed from the hinges.
Preparing the doorway
Here we come directly to the solution of our problem: how to install interior doors. Before proceeding with the installation, you need to prepare an opening for it.
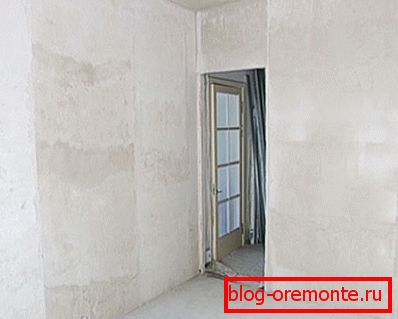
If the dimensions of the old sheet and box are the same, then you can safely proceed to the next step. Well, if not, then you will need to give the opening the necessary dimensions.
This will help you our table:
| Width linen (mm) | Opening width (mm) | Opening height (mm) |
| 600 | 670-700 | 2045-2065 |
| 700 | 770-800 | 2045-2065 |
| 800 | 870-900 | 2045-2065 |
| 900 | 970-1000 | 2045-2065 |
You should know! Fitting and assembling the door frame before installing the interior door, it is necessary to measure its width and height to the nearest millimeter! Sizes may vary from those stated by the manufacturer. Prepare the opening taking into account the actual dimensions, so that later you would not have to redo it twice.
Assembly is more convenient to produce on a flat plane. The ideal surface will provide the table. Or you can do it on the floor, pre bed pure cardboard.
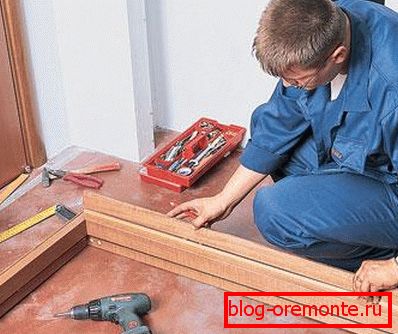
So:
- We start by fitting the upper transverse part. To do this, we saw off her across the width of the door leaf plus 6 millimeters.
Here is a table for clarity:
| Detention (mm) | Width полотна (мм) |
| 600 | 606 |
| 700 | 706 |
| 800 | 806 |
| 900 | 906 |
- Next, we saw off the vertical parts of the box so that a gap of at least 10 mm remains between the floor and the door leaf. This is the case when the door without a threshold. If a threshold is planned, the length of the posts should be equal to the height of the leaf + 6 mm. Do not forget to take into account the thickness of the vertical parts.
- The exact width of the horizontal part you have to be equal to the width of the canvas + 6 mm + thickness of two rack bars. For example, if the width of the blade is 800 mm and the thickness of the box is 30 mm, then the transverse bar should be cut off in size of 866 mm (800 + 6 + 2 * 30).
- The next step is to cut crossmears and racks at a 45 degree angle. For this you will need a hacksaw with a small tooth and a miter box.
- Now you need to fasten the upper part of the box with two lateral screws with wood screws.
You should know! Before you install the screws, you need to pre-drill the holes for them. The diameter of the drill should be one quarter less than the thickness of the screw.
Fastener hinge parts на коробку и дверь
How to install interior doors: video
It is more convenient to cut the hinges before you attach it in the opening.
For tapping in the hinge parts you need the following tool:

- Fraser or well sharpened chisel.
- Ruler.
- Drill with a thin drill.
- Screwdriver or screwdriver.
- Paint brush.
The hinges are mounted at a distance of 20 centimeters from the edge of the canvas. On the box there should be a feigned part of the hinge (with a pin), and on the door itself - the response part (with a hole for the pin).
For recess under the hinges, a milling cutter or chisel is used. First you need to attach a loop to the place of its attachment, circle the pencil. After this, a groove of about 2.5 mm is made.
After the bed for the loop is made, fasten it to the surface. In this case, do not forget about the need to first drill the holes for the screws.
You should know! All open areas of wood must be treated with a protective varnish! This will save the box and the door from drying out.
Fastener boxes and door hanging
The next step is to fix the assembled box of the interior door (see How to assemble the door frame without problems) against the wall and hanging the door on it.
This will require:
- drill with pobedit drill (if the opening is made of brick or concrete);
- screwdriver;
- hammer;
- level;
- wedges.
Before fixing the box we make holes in it. Next we ream through them in the opening holes for dowels.
And after that we fix the screws to the wall as follows:
- First the top.
- Then level expose the bottom. At the same time monitor the size of the opening.
- Fix the top and bottom of the vertical part of the box with screws.
- Вставляем wedges.
Now you can hang and zapenit gap. Use for this better professional foam (under the gun). She has a low coefficient of expansion. To ensure that the expansion of the foam does not lead to the bulging of the box, insert a piece of plywood between it and the door leaf.
Inset lock in the interior door

After complete freezing of the foam (about 12 hours), you can hit the lock in the interior door.
For this you will need:
- drill with a wood drill bit;
- chisel or frezer;
- varnish brush;
- screwdriver;
The order of work is as follows:
- measure 1m from the bottom edge of the door;
- mark at the end of the canvas border of the lock;
- ream a niche under the body with a drill bit;
- with a router or chisel we make a recess for the visible part of the lock from the end;
- we process the resulting groove with varnish;
- insert the lock and fasten it;
- we mark on the box the boundaries of the porch of the castle;
- we drill a cavity under it;
- we process a varnish;
- insert and fasten the porch.
Installation of cash out for interior doors
The last step is the fixture of the trim (see Installing the trim of interior doors: quickly and easily).
For this:
- we measure and saw off vertical and horizontal parts;
- with the help of the mash we make a gash at an angle of 45 degrees for aesthetic appearance
- nail the cashing with finishing nails (with a reduced cap) to the box.
Now your door looks beautiful and ready to use. And you know in practice how to install correctly.