How to embed the lock in a wooden door, professional
If you don’t know how to insert a lock into a wooden door or install it in a new one, it will be easy to do it after studying this material.
The wooden door can be entrance and interior, swing and sliding. Therefore, before deciding how to put the lock on a wooden door, you need to choose it correctly.
How to choose
According to the method of installation, they are overhead, mortise and mounted. Suspended today are installed only on the door of outbuildings, so they are not interested in us.
Overhead for wooden doorways are superimposed on them from the inside. In principle, they can be installed on the front door, but not on the interior door, as it is unlikely to decorate it (see Lock insert in the interior door).
The best option is the mortise, which is installed in the door body, and only the keyhole or latch pin is visible from the outside. In turn, mortise locks can be with a latch, with a deadbolt or with that, and with another constructive element.
On the interior door is enough to put the latch, if you do not need to lock it from outside intrusion. It can be mechanical, with a falev latch, or magnetic - with a magnetic latch.
Its latch is actuated by a push handle: when you press the handle, the latch hides in the lock and the door opens, when you return the handle to its original position, it slides out and locks in the strike plate on the door frame. In the reciprocal bar of the magnetic lock is a magnet that attracts the latch when the door is closed.

There are also special locks for sliding door openings, the latch of which has a hook shape that clings to the counterpart and securely locks the door in the locked position

In the front door, of course, you should install a lock with a bolt. The presence of a latch in it is not necessary, but desirable, since it simplifies the operation of the door - you do not have to hold it in the closed state when there is no possibility to immediately close it to the constipation.

It remains only to say that the mortise can be designed for "right" or "left" doorways, or it can be universal, independent of the direction of opening. The lock latch in such a lock can be turned over for use on any door.
Installation
Once you have chosen constipation, take care to acquire all the necessary tools, and you can proceed with the installation.
Required Tools
In order to insert a lock, you need the following tools:
- A simple pencil.
- Drill.
- Drills of different diameter.
- Hammer.
- Stameska.
- Round file
- Screwdriver.
These tools are needed to install mortise. With the way things are much easier.
Installation врезного замка
The most convenient way is to locate it at a height of about 1 meter from the floor level. It is at this level that manufacturers usually install an additional beam, into which it also cuts.
This applies to frame interior doorways (see Classification and types of interior doors). If we are talking about the input, then it is all made of solid wood, and you can choose the place to install at will.
The sidebar is done like this:
- Attach the lock with the back end to the end of the doorway at the chosen level and circle it with a pencil. The resulting drawn rectangle should be located exactly in the center of the end.
- Choose a drill that has the same diameter or slightly less than the thickness of the lock. It can be twisted or feather.
- Measure the width and lay it on the drill, marking the depth of the drill. To make the mark clearly visible, wrap the tape in this place. Insert the drill into the drill.
- Starting from the upper boundary of the contour, drill several holes in the end, placing them close to each other.
Attention! To lock inset did not cause problems, try to keep the drill exactly, strictly parallel to the surface and perpendicular to the end when drilling.
- Having reached the lower boundary of the drawn contour, set aside the drill and trim the walls of the resulting groove with a chisel and a hammer. Act very carefully so as not to cut down the excess wood. You should have a hole of the right depth with smooth edges.

- Try on the lock by inserting it into the prepared hole. He should enter it tight enough and until it stops. If necessary, clean the walls and bottom of the groove again.
- Having inserted the lock into the groove until it stops, draw a face pad with a pencil, then remove the lock again.
- Using a chisel and a hammer, cut the wood inside the newly drawn contour to the thickness of the lining. Try on the lock again and make sure that its lining is flush with the plane of the butt.
- To properly lock the lock into a wooden door, you must very accurately mark the position of the larva or keyhole and the holes for the installation of the handle. To do this, attach the lock to the door leaf exactly opposite the slot made and mark with a pencil the centers of the future holes.
Council Do not rely on your eye. It is better to transfer the contours of the groove to the surface of the door leaf with the help of a building square and attach a lock to them.
- Drill the required holes with suitable drills.
- Now finally insert the lock into place and secure with screws through the holes in the lining.
- Insert the larva into the lock, fasten it with the bolt supplied with the lock and check how the lock works. If the key turns freely, fasten the handle in the door and install the trim.
- Lubricate the ends of the bolts and latches with any dye, close the door and rotate the key in the lock so that the bolts abut against the door jamb and leave a clear mark on it.
- Drill the wood over the marks to the depth of the girders and trim the hole with a chisel, as you already did at the end of the door.
- The inset of the locks in the wooden doorway is almost complete. It remains to prepare a notch for the striker, so that it stands flush with the surface of the box, and fasten it with screws.
Теперь вы точно знаете, как change the lock in the wooden door. Если же вы не хотите ставить врезной замок, справиться с установкой накладного будет намного проще.
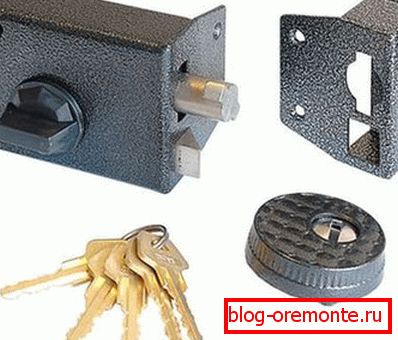
Installation of the padlock
Now overhead locks are most often placed in the event that the wooden door does not close due to the old padlock that has fallen into disrepair, and I don’t want to put a dead lock.
In this case, try to buy a lock of the same size and design as the old one.

If the installation of locks in a wooden door is necessary, then the work is as follows:

- Attach the constipation pattern to the door. and mark the holes for the cylinder and mounting holes. Drill a hole through the cylinder or keyhole with a suitable drill.
- From the outside of the door, insert the cylinder and the retaining ring into the hole.
- Screw the mounting plate on the inside.so that its leading edge is flush with the end of the door.
- Unlock the lock, align the connecting rod with the slot on the back of the body of the lock and screw the lock to the mounting plate with screws.
- Close the door and mark the position of the locking part on the door jamb. At the end of the box, make a recess so that the locking bar is flush with it. Holding the locking part, try to close the constipation. If the wooden doorway does not close, there may be a bias that needs to be fixed.
- Secure the locking plate on the door jamb.