Framing the doorway: possible options
Sometimes combining the space of adjacent rooms is the most optimal planning solution. The reason is both a banal lack of space, in which every square of living space is counted, as well as considerations of aesthetic perception of the interior.
And then, if to judge purely practically: the door is not always necessary - so why spend money on its purchase. It is much easier, in accordance with the concept of the interior style, to frame the doorways with stucco molding or revet them with wooden slats.
We recommend also watching the video in this article, the theme of which is the framing of the doorway made of polyurethane.
The easiest way to refining the aperture
If you just take and remove the door from the hinges, a bare box in the opening will not look good. Half loops and a reciprocal level of the lock will be an eye blistering, and disturb the harmony in the interior. To avoid this, an opening in which there is no door can and should be tiled beautifully, after which, as they say, it will become the very “cherry on the cake”.
Using door dobor
The first question that may arise from the reader is: “Is it necessary to dismantle the door frame when refining the opening?”. It can be left, but only in one case - when the opening is refined by wooden dobory, and provided that the old box is installed exactly, and is firmly held in the opening.
- If the tree is worn out, it is better to remove it, and to level the opening with usual planed boards with a thickness of 15-20 mm. Their width is selected according to the wall thickness. The workpiece under the horizontal bar is sawed off across the width of the opening, and the two side racks are cut to its height, minus the thickness of the cross member, which will rest on their ends.
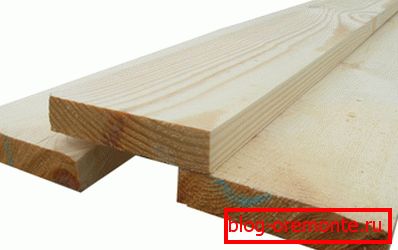
- If the door slopes are uneven, then wooden wedges are inserted under the leveling strips, checking the correctness of their position in the level. The gap formed between the board and the surface of the slope is filled with mounting foam, allowed to dry, and only then proceed to cutting and installing decorative strips.
- Their role is played by dobora used for facing slopes in deep openings that can not be covered with a box. In our case, they are installed on top of the old box, or the frame of the board, which is done solely for the sake of alignment.

- If the opening is even, then in principle, it is possible to mount the panels directly to the base. But then they will have to drill holes for dowels, which, no matter how hidden, will be visible. You can use decorative caps, but they are regularly lost, leaving the attachment points in sight.
Note! When the dobor is mounted to a wooden box, then micro-studs can be used as fasteners, which go into the thickness of the strip and remain practically invisible. But for this you need such a tool that you see in the photo above.
- Cutting and installing dobori is performed similarly to the elements of the alignment frame. Now, when you have perfectly smooth slopes, it is easier to mount the cladding with your own hands on them. The main thing when cutting is not to damage the front surface of the decorative strips.
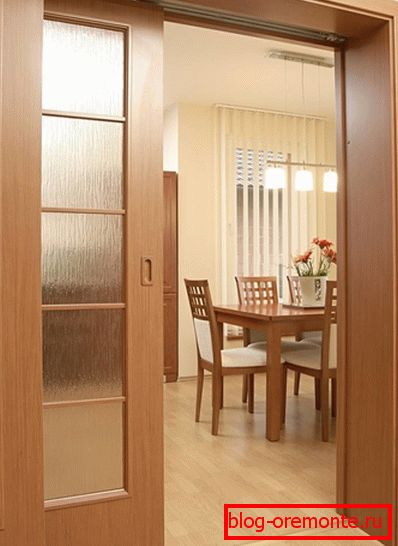
In addition, it is very important to make high-quality cuts, which does not always work when working with a hacksaw. It is best to use miter saw for this purpose. It is simply irreplaceable in the case when framing door openings of stucco, which will be discussed in the next chapter.
Framing polymer stucco
Plaster moldings from gypsum today are used except for the decoration of rooms in the rococo style, empire style or renaissance - and even then, designers have long interpreted them in a modern way. It is more difficult to work with gypsum, and the price of such finishing is higher, so the best alternative to it is stucco made of polyurethane, made in the best traditions of classical architecture.
Duropolymer or polyurethane: what is the difference
Relatively recently, there was such a thing as duropolymer stucco. What is it and how does this material differ from polyurethane? And this is a composite, which under high pressure is made of polystyrene. It has a high density - and accordingly, the strength than favorably differs from the foam.
- The negative qualities of products from duropolimer include a greater weight than that of polyurethane, and a rather poor assortment. The benefits - excellent mechanical strength. This property is doubly valuable when it comes to doorways, because it is clear that in the process of entering the room furniture in the room, there is always a danger to hook and damage the decor.
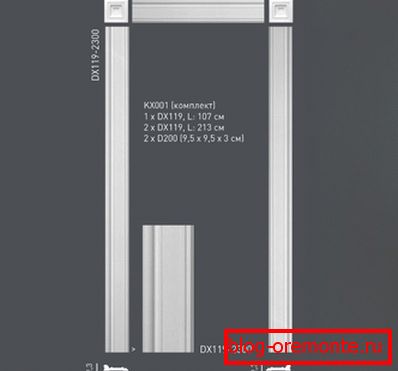
- In appearance, the facing of Duropolimer is almost impossible to distinguish from polyurethane stucco. This kit, which you see in the picture above, costs about 3,600-3,700 rubles. To revet the opening from two sides, two such sets are needed, plus two long and one short internal panels.
- The door frame of polyurethane moldings is usually not sold in the kit, but is made up of individual elements to the taste of the customer. It can be a composition of sandrik or cornice, moldings, which in this case play the role of platbands, as well as consoles, rust and keystones. All the details can be selected by style and size, and alternate them when facing as you like.
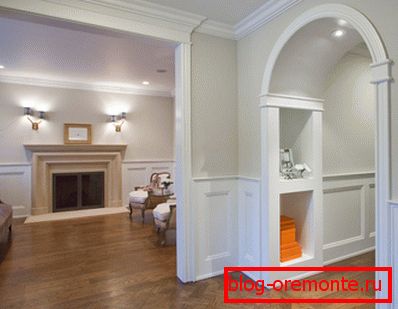
- For the design of the side surfaces of the slopes, as well as the walls adjacent to the aperture, you can use panels imitating door panels, beautiful bas-reliefs. Importantly, the flexibility of polyurethane products allows you to revet not only straight, but also spherical surfaces, and in the vast majority, they are used today for the decoration of arches.
- The use of stucco facing for openings allows you to show imagination - but, of course, it should not be a chaotic set of details. The drawing of the opening should be well thought out, correlated with the finishing of the room as a whole, as well as with the design of the door panels, if they are installed in the opening.
- Both duropolymer and polyurethane door decors are mounted in the same way: adhesively, on a flat, puttied and primed surface. The alignment of the slopes in this case can be done both wet and dry.
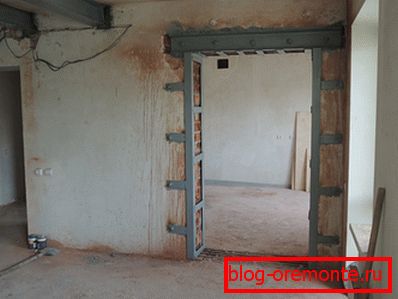
For example, if initially there was no opening in the wall, and it had just been cut out, the metal frame, which is made for the purpose of reinforcement, can be hidden only under the plaster. Applied on a steel grid, it is in this case part of the technology, and is carried out even when the walls in the room, and accordingly the openings, are sheathed with plasterboard (see How to make a doorway from drywall).
A little bit about the installation
A small instruction presented in this chapter will help you understand the installation of polyurethane moldings. By and large, there is not much difference where it is installed: on the wall, ceiling or in the opening - the technology will be the same.
So:
- Before decorating openings, products need to be adapted to the environmenttherefore, it is necessary for them to lie down for a day or two in the room. Since the installation of the decor is done in an adhesive way, it is very important that the surfaces that the glue comes in contact with are clean. Therefore, it is desirable not only to remove dust from them, but also to degrease them with a solvent (not just acetone) on the back side of the products.
- Works should be performed at temperatures above +10 degrees. Installation of stucco decoration is recommended before proceeding to the finishing of ceilings and walls. When cutting moldings you need to take into account that cutting of corners takes about 10 cm of their length. It is also necessary to keep in mind the repetition of the pattern, if there is one on the front surface.
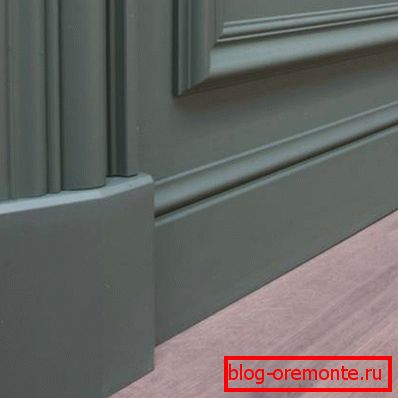
- When working with polymer moldings, tools such as level, protractor, tape measure, furniture stapler, set of rubber spatulas, glue gun, handsaw, miter saw, and stationery knife should be at hand. As for consumables, you need to have two types of glue: mounting and docking.
- It is very important that the plastered or plastered base, on which the stucco will be glued, should dry out well. Otherwise, the decor can peel off, which will spoil not only the work, but also the material. On the basic basis, the products are put on mounting glue, and when joining the decorative elements to each other, they use glue to dock.
- Construction adhesive is applied on the end of the molded product with a layer thickness of about 5 mm. Stucco should be firmly pressed to the wall, and the surplus protruding outward should immediately be removed with a spatula. After joining the horizontal and vertical elements of the frame with docking glue, they are additionally attached with metal brackets.
- After about a day, but not before, it will be necessary to cut off the excess docking glue.. This is perhaps the most painstaking work. It should be done very carefully, since the joints should not be visible - the appearance of the door frame depends on it. Products from polyurethane are sold already primed for painting, so that after removing the glue, you can proceed to puttying.
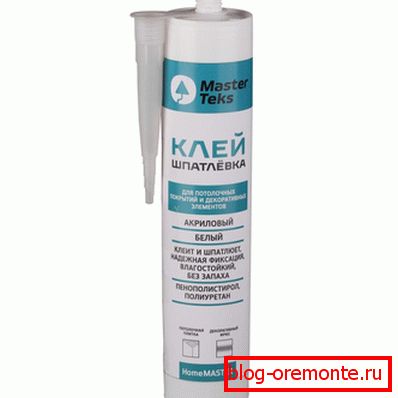
For this purpose, either a special elastic putty for finishing polyurethane is used, or a white glue-putty, which, like “two in one”, can be used for the installation of stucco molding and for puttying the joints. After the joints have dried, the surface needs to be sanded with sandpaper, fine dusting, dust removed, and you can start painting.