Entrance wooden door with his own hands: the power of any
The entrance wooden door can be made by any person with correctly put hands. Doors are one of the main elements for the interiors of most buildings.
They have certain functions: protection from unwanted visitors, heat preservation, protection from excessive noise, etc. Entrance doors at the present time are increasingly made of metal, but the interior is almost always wooden.
Let us dwell on the manufacturing process itself.
In short, what will be discussed:- Keys and wooden doors
- Paneled
- Blocks
- Block mount
- Platbands
- Pins
- Setting loops
- Types of loops
- Clearances
- Regulation
- Locks
Quick Installation Guide
So:
- Measurements. Before buying a door, take measurements of the width and height of the opening (see Dimensions of entrance doors). If there is no finishing flooring, add its planned height to the calculations.
- Assembling the door frame. Lay out the box details on the floor, look for the presence of all the details. Re-measure. Do not forget, one mistake, and the work will go down the drain. Glue the parts in the corners, securing them with screws.
- Zapenivanie. Put the box in the opening. Fix the frame with wedges in the corners and in the center. Check the level of the installed frame. Install hard struts against wedges. Then fill the cavity between the wall and box foam.
- Installation. Wait until the foam dries, after 12 hours you need to remove its sticking pieces. Then remove the wedges, remove the struts. Now came the turn of the platbands. Cut down the pre-required length at an angle of forty-five degrees, drill holes for nails. Attach the crown to the opening, fix it with finishing nails. The door can be hinged.
- Pens. After all the work is completed, it remains to fasten the handle. Embed lock better in advance.
Tip! If the surface of the blade is scratched during installation, clean this area with fine sandpaper. Then cover this place with a polishing varnish and carefully rub it with a cloth. Grind to a homogeneous mass.
Material
Keys and wooden doors

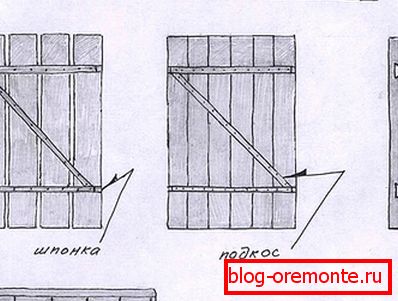
The main structural elements for the doors are the boards, which form a panel, the keys in a number of two pieces and a strut, which is located diagonally and serves as protection against distortions.
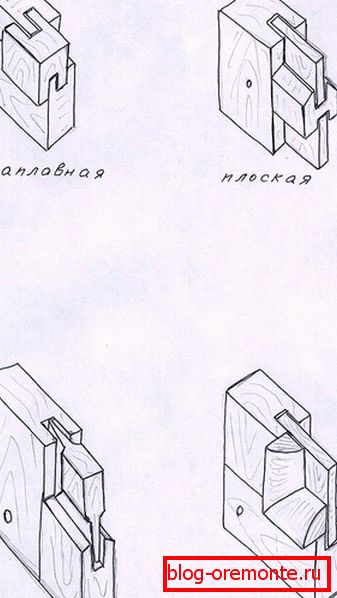
Usually the slope and the keys are on the panel. For this, bars are used. In more complex cases, the keys cut directly into the boards. For these purposes, the keys are made in size as shown.
The saws are made by circular electric saws, exposing them under the desired bias (about 60 degrees).
Paneled

The wooden door with his own hands is likely to be paneled. Wooden paneled door - smooth, carved or profiled shield, inserted into the harness. Such a shield is made of several (or one) boards.
The groove is made in the bars, and the panels of the panels on the ends have a profile that is included in the trim groove. Pincers are assembled from ordinary, high-quality processed straps (bars), with the subsequent insertion of panels in them.
Door panels exist:
- flat
- floating
- with folding kalevka (curly profiles, combining straight and curved lines),
- with figareymi (end, выструганные фигурно)
Often framed doors are made with glazed.
There are external and internal:
- The outer have a thickness of from 40 to 60 mm.
- Internal - less than 40 mm.

Door blocks
What is made
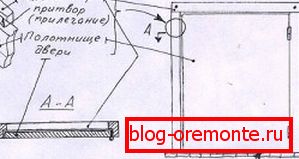
Wooden doors consist of a door panel and a frame. All of this is generally called a door block.
Exterior doors have a frame from a bar approximately 75-150 mm thick. On the inside is used timber 40-50 mm thick.

The wooden entrance door made by hand (if it is external or bath) should have a lower bar, designed to improve the insulating properties.
The frame is selected (on the inner surface) in a quarter. This is necessary for a more snug fit of the cloth to the frame. Thus, sound protection and heat retention is improved.
The gap under the canvas is necessary not only for the purpose of ventilation, but also to compensate for sagging during its operation. You also need a gap in case you cover the floors with laminate, linoleum, etc.
Frames for wooden doors in the log houses, which are prone to subsidence, have grooves on the vertical bars, in combination with spikes on the walls of the log house.
Mounting blocks
In those buildings that are not subject to draft (frame-shield), the door frame is attached to the wall posts with screws and nails located in the quarters. In this case, they are less noticeable, as they are covered with a canvas. The grooves are greased with putty or closed with plugs in color.
Blocks are fastened exclusively in terms of level both horizontally and vertically with the help of wedges. For vertical bars use at least three nails. In the log cabins mount is made on the lower crown. The final attachment is made in a year or two (after the draft).
The frame in the stone houses is attached to the mortgage bars. There are other methods (anchor bolts, reinforcing pins). The gap between the walls and the framework can be sealed with tow or cement mortar.
Door trim
There are external and internal trim. Internal have a width of 60-200 mm. They must be wider than the box bars by at least 200 mm. The classic look of the platbands has a 5 mm groove in the inner side (see Installing the platbands).
The outer side can be both simple and relief. The corners of the platbands form a "mustache" under 45 degrees. At the beginning, the vertical platbands are filmed and installed on the level.
Then under the upper part of the upper platband is substituted (horizontal). The corner is marked with a pencil on one side, sawed off. Then also done with a different angle.
Wooden entrance doors do-it-yourself fixing the platbands with finishing nails or screws.
Door pins

The defects most commonly encountered are warping due to dry material. If there are pins, then in the case of warping it will not crumble. The absence of pins is unacceptable.
Door hinges
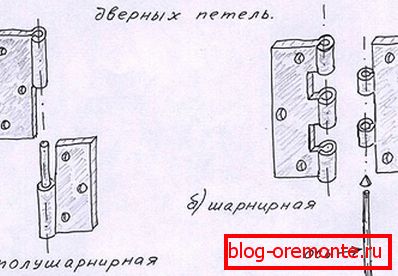
Делая do-it-yourself wooden entrance doors, не обойтись без петель. Петли бывают более 20 видов (см. Петли для межкомнатных дверей). Высота петлей может колебаться от 30 до 40 см. Для домашних дверей достаточно 75-150 см.

The most common are semi-hinged removable, consisting of two cards (one with a rod, the other without). Sometimes hinge hinges are used. Loops can be left and right, as well as universal.
Door clearances
Before installing the hinges, the panel is laid so that there is no gap in the loop line between the opening and the panel. To do this, use trimmed hardboard or the same slats, placing them so as to have a uniform gap.
The hinges cut at a distance equal to their height, measured from the inner corner of the frame. If there are thorns in that place, you need to retreat 1 cm from them.
After installing the gaskets, measuring the distance at which the hinges will be located, the cards are outlined with a pencil along the contour, the nests for the hinges are selected with a chisel based on the depth of the hinge thickness. The hinge surface should be flush with the door panel and also the rack bar.
Полезный совет! Door hinges прикрепляются саморезами. Если используются цветные саморезы, то нужно знать, они непрочные. Черные саморезы для дерева лучше закалены, более прочные.
Door adjustment
If they start loose with time or close with a creak, they need to be adjusted. Adjustment (see How to adjust the front door: take care of it properly) is a lubrication loop, tightening screws, replacing screws to longer ones, install wedges in the holes from screws (if they are loose).
Lubricants are thick and hard consistencies: pieces of graphite rod, grease, graphite lubricants. After removal or as a result of its lifting, you need to push the lubricant into the loop hole in the right quantity. If, after a while, the lubricant begins to stand out from the loops, then it is put too much.
Sometimes they sink heavily, clinging to the floorboards. In order to eliminate this, it is necessary to place washers of a certain thickness and the required inner and outer diameter between the loops of the cards.
You can also rearrange the hinges above, or to strip the lower end of the door leaf. It is necessary to make a moderate structure in order to keep the minimum clearance with the allowable humidity of the room.
Making your own wooden entrance doors, you need to keep in mind that if there are gaps between the panels of the cloth, you need to glue them and putty, or bust, or close the slats.
Helpful advice! To avoid the door hitting the wall with a canvas or a handle on the wall when opening, you need to fix the buffer (stop) on the floor. The further it is located from the loops, the better, since then it will not create a loosening of the loops.
About door locks
It is better if there is no lock, but there is a door handle. In the case of the correct fit, the handle is enough to close the door with a good density. If the door opens a little, leather stuffing is stuffed on it.
The hemming is stuffed with the desired thickness on the cloth closer to the handle, or on the upper end. The handle must be attached to the strapping, but not to the board, as it will be stronger. Installing the handle, it is removed away from the opening, so as not to injure the opening of the hand.
Locks are installed on the external doors. The most frequently used padlocks with the presence of a loop-ears, as well as overhead and mortise. The easiest option is trailing, but they are less reliable.
Also on the external doors can be installed door chains, closers, latch, bolts, eyes and other elements.