Doorway: how stone finishes
The decoration of the stone doorway looks quite nice and many people want to decorate the room with this material. This paper will be devoted to our article.
Instructions for performing this work will be offered. On the video you can see the progress of the work.
Many believe that this is an expensive pleasure and refuse such a construction. But if you do everything with your own hands and without resorting to outside help, then the price will drop significantly.
Choosing a design
This is a fairly crucial stage of work, which should emphasize the entire interior of the room. And this work is worth doing correctly.
On this topic there are some tips that will help to do everything right:
- Finishing stone doorways is best done under the conethat is, the bottom should be wider than the top. This applies to openings that have a rectangular appearance. Then it will look more natural and will help make a correct and imperceptible transition to a different finishing material;
- The decoration of the arch form (see How to finish the arch with your own hands: simply and efficiently) is better to perform at the top. This will emphasize the entire structure, the more it will attract the visitor's attention to the upper radius;
- If the opening does not provide for fixing the door, then it is better to do the facing on three sides. Then it will look quite harmonious;
- If you use a stone for finishing the room, then you should apply it not only to the opening, but also to finish in other parts of the room. For example, for the design of the mirror;
- A more natural look design will give an uneven edge.. Make a step for example.
Choosing a material
For this type of finish you can apply two types of material:
- A natural stoneIn this embodiment, you get a durable construction that will be quite attractive. But there is a drawback, and a significant one. It is heavy and therefore will have to do the mount quite tough. And if the opening is large, then this is a difficult job that will require certain skills;
- You can apply and artificial optionwhich imitates almost any natural stone. In this case, you get, too, durable design, but at a lower price. Yes, and the weight will be several times less and the processing is easier.
Note: If you choose natural parts and the mount will be carried out in the arch, then it is much more difficult to do. It will not work in one day.
Stone arch decoration
Once you have chosen the desired design from the photo, then you can proceed to perform the work. Now and will be offered instructions on how to perform the work.
All it is done according to certain principles and in compliance with the rules of the work.
Surface preparation
When performing arches in the doorway, stone trimming should be done with high quality. Moreover, it has a certain weight, which it will be necessary to withstand glue.
Moreover, if there is a door in the opening, then as a result of the wall oscillations, the stone may fall off. Therefore, this work should be done with all responsibility.
So:
- First of all, we completely clean the surface from the previous coating. To do this, use a brush on the metal. We look, if there was plaster and began to peel off, then it should be knocked down. The surface must be hard and clean. If you want to make an arch, then follow the contour and cut off the stone. We draw a radius and perform work with the help of a grinder and a circle on a stone ;;
- Now we apply a layer of primer on the plane, for this we use a roller or spray gun;
- We have all the details must be firmly fixed. To do this, put on the surface of the grid. This is especially required when finishing the entrance door. It will allow you to securely fasten the elements;
- We make holes in the wall using a perforator and screw the screws there;
- We apply the grid and do not forget to put the washers on the caps, they will not allow the grid to slip off.
Preparing the solution
Work can be done in two ways. This finish without seams or with the use of a seam. In the first embodiment, the work is much easier. It is sufficient to fit the plane of attachment.
In the second case, you need to use plastic crosses, which allow to withstand a flat seam and the correct angle of installation. In both cases, you need a quality solution.

So:
- First, let the dry mixture through a sieve, so we will separate the pebbles and trash;
- Now we fall asleep powder in the container, in the best way the bucket from under paint will approach. It has an even bottom and walls;
- Add water and stir;
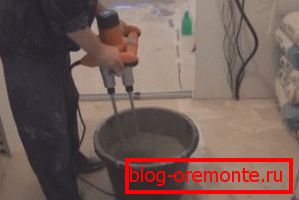
- Now we need to make the solution completely homogeneous. For this, a drill with a nozzle is best used. That it will allow to make the composition uniform and quality.
Facing the plane
Now that everything is ready for installation, we need to put everything on the floor. Check the correct placement of elements and determine the pattern.
All work is done according to certain rules, which we give:
- The first row is the bottom. First try on the elements and then apply the mixture with a notched trowel;
Warning: You should never make a stone mount without trying on a dry one. It is necessary to place all the elements of the series. After this, fit and only then glue.

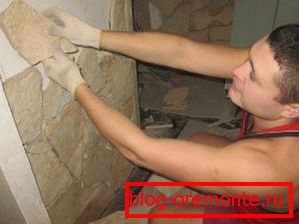
- We apply and press, while the solution should come out at the seams, do not allow the formation of air in the masonry;
- First, let the solution dry, but not completely, and clean the seam with a spatula angle;
- After processing the entire plane, let the surface dry completely and fill the seam. To do this, the craftsmen simply cut off the edge of the bag and pick up the solution there and then squeeze the solution along the seam;
- When finishing the arch in the upper part of the elements are not attached immediately. They fall from their own weight. Here come as follows. Just take a wooden rail and is mounted on the plots. Fasten the elements and we press them about using the slats and a piece of drywall.
After the arch is completely finished, do not forget to treat the surface with a wax coating. It will make the appearance much better, giving volume to the elements.