Doorskin door upholstery: how to update an old canvas
Despite the fact that the shops delight customers with the widest range of entrance and interior doors, the front design of which is carried out using the most modern technologies, not every apartment or house owner hurries to make such a purchase. The high price of many models is half the trouble.
The problem is that the replacement of the box requires at a minimum the repair of slopes, and / or the replacement of wallpaper on the wall - and this is a completely different cost. In addition, the old door can still be quite strong, and therefore it is a pity to change it. In such a situation, the door upholstery with dermantine is one of the best ways to upgrade, which can be done with your own hands.
What you need for upholstery
Before we talk about how to sheathe doors with dermantine, let us introduce some clarity in one question. Since dermantin is more correct than leatherette, in our country it has been used for up to 90 years as upholstery, we used to call it a soft door upholstery, without going into particular detail.
However, there are fundamentally other materials, which in everyday life still out of habit are called dermantin.
In fairness, let's clarify what is the difference between them:
| Upholstery type | Brief information about the material |
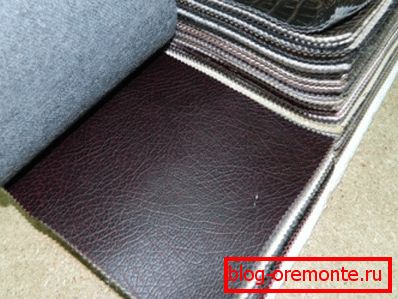
| This material is a type of artificial leather. It is based on cotton fabric or knitwear with nitrocellulose coating, which is why it received the second name: nitro-leather. The coating can be applied on one or both sides. This is the cheapest finishing material, the price of which starts from 200 rubles / m. Thus, the entire door upholstery with dermantine, together with fasteners and insulation, will be no more than 1,500 rubles. |
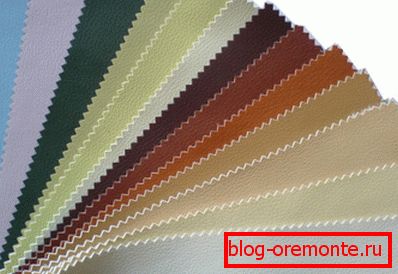 | Since nitro-leather is not distinguished by high aesthetic qualities, and is rather quickly abraded, more resistant polymers began to be used as a coating for the knitted base: PVC and polyacetate. Vinyl artificial leather has practically no shortcomings of its predecessor, and outwardly often imitates natural leather. So, leatherette for door upholstery, which you looked after in the store, most often is not nitrous. Focus on the price tag: even if it says "dermantin", keep in mind that when the price per meter is 600-800 rubles. and more, it is vinyl leather. |
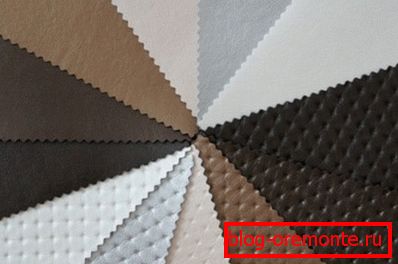 | This option is not artificial leather. It is more close to genuine leather, as it is a composite of leather and latex. This material is made of scraps of leather, ground into powder, bound by polymer. For durability, elasticity and appearance, it is very similar to natural leather. A beautiful texture or embossing can be made on the surface of the composite leather. From this material even sew shoes. And the upholstery of interior doors with dermantine, as well as wall panels or upholstered furniture, using recycled leather instead of dermantine, will look just gorgeous. |
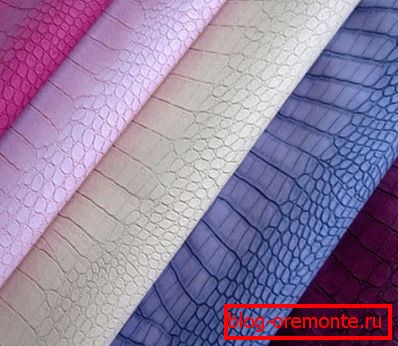 | This photo shows a kind of artificial leather on a non-woven base, made on the basis of polyurethane. Ecoskin has the highest characteristics regarding durability, wear resistance, thermal conductivity, and even frost resistance. So it can be safely used for the upholstery of a street door. |
Tools and consumables
In addition to the decorative material that will go on the upholstery of a wooden door, you will also need a foam backing with a thickness of 10-15 mm. It will help to solve two problems at once: to insulate the door and create a beautiful relief on the upholstery.
- You can, of course, use other dermantinovye door insulation: batting, felt, synthetic winterizer, but it is foam that allows you to make upholstery really soft, and make the drawing, performed with the help of banners, and nails, voluminous.
- When trimming is done from two sides - especially if it is an entrance to an apartment or a house, around the perimeter there are usually made rollers that decorate the ends of the canvas, and at the same time prevent the penetration of cold air through the gaps. For this, too, foam rubber is used, only round - in the form of a rope with a diameter of 2-3 cm.
- From the fasteners will need furniture nails with a wide hatwith which the rollers and upholstery and decorative nails are fastened along the perimeter of the canvas. They can have a figured metal or plastic hat.
Note! Best of all, the close-fitting of the door with dermantine looks when nails with hats covered with leatherette are used. They can be matched in color, or in contrast. And even more convenient, buy a ready-made kit for upholstery, in which everything that was said above is there. It costs at least 850 rubles. on one side, and it depends on the quality and design of the attached material.
From the tools, you will need a tape measure with a pencil, a hammer, pliers, a chisel, a knife. When fastening around the perimeter is not done with nails, but with staples, we also need a stapler.
In principle, the door upholstery with dermantin do it yourself is a simple matter. Not only men can cope with it, but also the hostess, since for this it is not even necessary to remove the canvas from its hinges. Although, it is more convenient to work on the removed canvas, of course. Next, we will introduce you to the process, and offer as a visual aid video in this article.
How to make it so beautiful
The maximum width of the door leaf is 100 cm, and the width of upholstery materials is at least 140 cm. So, the width of the two sides is the required margin, and there are still strips from which rollers can be formed. Bands 13-15 cm wide, under the rollers is enough.
So:
- The height of the door, leatherette cut also with a margin of 10-15 cm on each side. The amount of overlap depends mainly on the thickness of the insulation, but do not forget that it is better to cut off the excess than not enough.
- As for the insulation, it is cut out exactly the size of the canvas., and nailed to it with small cloves or planted on glue.
- Considering the fact that the door is decorated with an old one, before starting work, it is necessary to eliminate all faults.preventing it from closing normally; if necessary, strengthen the box; sand and color the hinges.
On request: “door trim with dermantin video”, you can find a lot of clips that show not only the plating process, but also tell about how to repair and other preparatory work. For example, it is very important to beautifully decorate the butt of the door, which is not closed by the covering, and will spoil the whole picture.
And in general: if you do not stint on the purchase of material with an interesting texture and original fasteners, as well as do everything correctly - your door will look no worse than the examples presented above as a sample.
The main nuances of the work
As already mentioned, the door trimming with dermantin can be performed without removing them from the hinges. But if you want to create a beautiful geometric pattern, it’s better still if the canvas is conveniently placed in a horizontal position.
Figures can be used as traditional, most of which are presented below, and come up with something of their own. Just do not improvise in the course of work - it is unlikely that this will produce something good. It is better to think well and draw a scheme, and already on it to produce trim.
Before fitting the leatherette, all the accessories must be removed from the canvas: a peephole, handles, a lock. If a door closer stands at the top of the door, its body can be left untouched, but be carefully bypassed by making a corresponding notch in the sheathing material.
Roller sheeting
For the formation of rollers using either flat insulation, rolled into a tube, or a round foam plait. To wrap it, you need strips of upholstery. As a rule, these are trimming of dermantin cloth - it is from them that the work begins.
The strips are applied to the canvas with the front side and fixed to one face with simple studs or staples so that the other side hangs freely. Next, cut off the foam wiring of the desired length, and wrap it in a strip, securing the second end to the canvas.
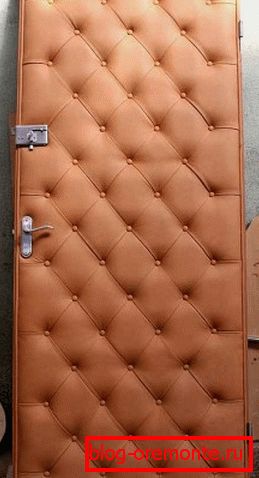
Depending on the volume of round foam rubber and the elasticity of the upholstery material, rollers with a diameter of 5-6 cm are obtained. However, the procedure for their formation may be different.
If you do this before the main door trim is made with dermantine, the roller anchorages will be hidden under it. What is the result, we see in the picture above.
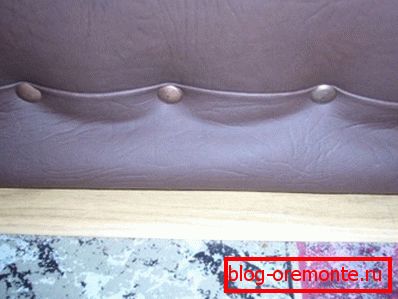
The following example shows a variant in which the roller is formed after the fabric is sheathed. Then the width of the strip should be such that it can be done under the bend. In this case, the front fastening is done with decorative nails.
Note that the roller can only be made from the outside of the door - and then only on the condition that it opens to the street or the landing. Otherwise, the roller will interfere. On the inner doors there is no need for it at all, because it is not made for beauty, but for eliminating drafts.
Facing main
Without a roller, everything is much simpler, and it looks neater. First, the insulation is attached. On the removed door, glue can be used to fix the foam rubber. When the door leaf is in an upright position, it is much more convenient to use a stapler for this purpose.
So:
- Fastenings are made in such a way that the foam will be unbendled at the edges - the indentation size is 5-6 cm. It is necessary in order to fill the ends of cladding material under the insulation before you begin to mount it with decorative nails.
- In general, there are different ways to fix the soft trim on the door leaf. If it is not removed from the loop, then it is better to first fill the dermantin under the foam, and fix the middle nail with a decorative nail.
- After that, the cladding material is well stretched, and is fixed first in the corners and around the castle, and then around the perimeter. At the same time, in addition to nails, it is possible to use moldings matched to them in appearance, imitating a solid nail mount. This simplifies the work, and gives the skin some originality.
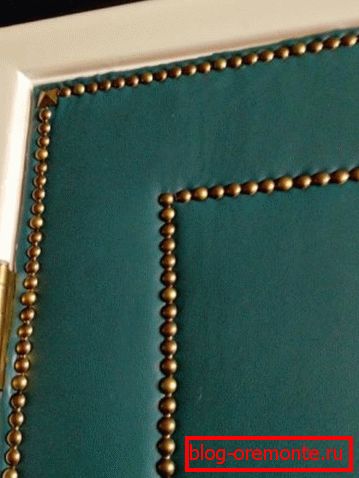
- This is the easiest version of plating, which is absolutely for everyone. Complex patterns are performed on the removed canvas, and the procedure depends largely on the pattern. And by the way, it may not be at all.
- When the exterior door is upholstered, many craftsmen begin to fasten the dummy from the loopback side. The material is first put face down and baits on the edge with a stapler, then the insulation is laid, the upholstery cloth is wrapped in the desired position, and pass along the edge with decorative nails.
- When one long side is ready, the material is well tensioned, and, bending along the edges, fasten the end sides. With such a pattern of upholstery, the roller is also formed, but only from the side of the lock. Therefore, a strip of fabric is nailed here beforehand, and then, when the main upholstery is already completed, a roller is formed. His goal is to hide the edge of the trim and decorate it beautifully.
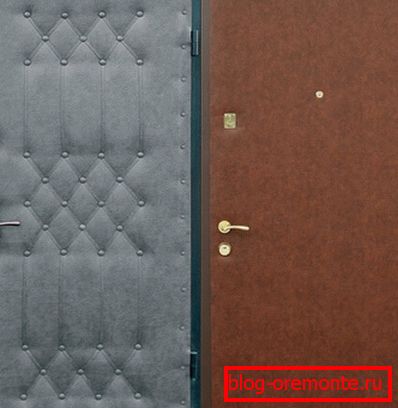
When ready-made kits are used, in which there are decorative nail-covered decorative nails, which imply the performance of a beautiful pattern, the order of work is somewhat different.
Note! Such nails are not quite usual - they are not hammered. They are detachable, and consist of two elements: a flat base with a threaded pin, and a decorative cap screwed on it. This design of fasteners allows you to cladding with leatherette not only wooden, but also a metal door.
- To draw a picture, the appropriate marking is applied on the door leaf. For this purpose, it is better to make a pattern from the same leatherette, on which holes will be made, corresponding in diameter to the size of the nail head. The contours of these holes are also applied to the door.
- In those places where there should be decorative fastenings, an element with a pin is planted on glue, which is also often present in the kit. Also in some sets there is a special profile, which is glued around the perimeter, and the canvas should be filled into the grooves of which. They cost more, but the upholstery is much more accurate.
- When nail pins and profiles are glued, the insulation is spread and cut to size, and upholstery material is laid on top of it. Facing together with foam rubber is put on nails pins, and then caps are screwed on them. Start from the center, and in accordance with the pattern move to the edges.
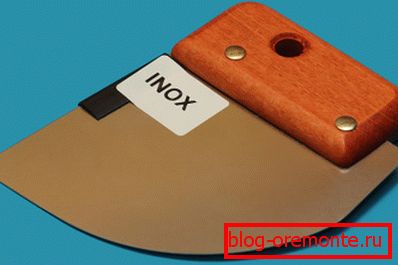
Last but not least, the edges of the upholstery are tucked into a profile. This is done with a round spatula, which is usually used for mounting fabric ceilings. Excess material is cut off after it is filled into a baguette around the perimeter - and the skin is ready.
Finally, we note that when do-it-yourself dermantin door upholstering is done - the video viewed before starting work will make it possible to orient and master the technology much better.