Doors made of clapboards and all about it
Doors of eurolining with their hands do not many, but sometimes this design is perfect for a particular room. How to make such a door, we will understand today.
Of course, nobody does the door for the wardrobe closet, unless it is a utility room. But for the decoration of a country house and a bath, it will fit without a doubt.
It is about the process of doing this work and our article will be. Also on the video in this article, you can see the diversity of this material and choose what you need.
What attracts
First of all, you need to figure out how this design will suit you. After all, the rooms are quite different and the requirements for the doors too.
- Entrance doors, made of clapboard, look stylish and aesthetically pleasing. This is true for country buildings or individual households, and for urban housing.
- Moreover, the material is characterized by a long service life, ease of installation and availability.
- It is quite possible to make doors from the wall paneling with your own hands, as a result of which the price can also be reduced.
- This design is perfect in rooms with high humidity. For example, for a bath (see. Wooden doors for a bath and their types), because after steaming, the tree produces beneficial substances.
We do doors of lining
Door paneling clapboard is done in several stages. Each of which is quite important.
The choice of material will be important in any case, because different wood reacts to the external environment in its own way. Painting is also important. If it is done incorrectly, then the coating will not last long.
So let's get everything in order.
Stage one, preliminary
Before you go for the necessary materials and tools to the hardware store or to the market, you must carefully and scrupulously fix the dimensions of the door opening.
As a rule, the standard dimensions of openings in urban homes have the following sizes (height / width in millimeters):
- 1950s740;
- 1980s760;
- 2050x880;
- 2100x920.
However, standards are standards, but in each particular case the doorway can have unique dimensions. Especially when it comes to houses of old construction, individual housing construction or new buildings, built on an exclusive construction project.
- Therefore, it will be necessary to arm yourself with a tape measure or even a tailoring “centimeter”. It is absolutely unacceptable to determine the size of what is called "by eye" in the case of self-designing of the entrance door, regardless of its type and material of manufacture!
Caution: When taking measurements, never take off. This should be done with a margin. Also measure and diagonals, but it may be skewed.
- Of course, when measuring the doorway, it is necessary to take into account the space that will be occupied by the door frame. Often, a situation in which the frame of an old door fulfills this role is almost an ideal case. This allows you to achieve significant savings in financial resources, time and effort.
- However, it is necessary to take into account that the use of the old frame is possible only if it preserves its integrity, strength and corresponding appearance. Otherwise, the door frame (or, as it is called “the door frame”), will have to be constructed independently.
- Usually a wooden bar with a section of 100x100 mm is used for this. To put together a simple wooden door frame, it will be quite enough, in addition to the four bars of the desired length, a conventional hammer and a few nails. With the possession of well-known skills, this process does not take too much time, effort and money.
The choice of material for the door leaf
So, the door frame has taken its place, and all the necessary measurements have been made. Now you can safely go to the construction hypermarket or to the market. To create the front door you will not need to experience serious torment of creative choice.
The technology of building such a door implies, as a rule, the use of the following options:
- Use as a sheet of plywood sheet. It can be reinforced with wooden ribs or dispense with them. The lining boards or siding are attached to the plywood base, for which glue or special nails without caps are used.
- The use of wooden boards. They can also serve as a composite base, which is subsequently lined with clapboard.
- Using lining directly. That is, strips are nailed directly to the door frame. Such a door can be either one-sided (lined only from the outside) or two-sided.
The most aesthetic and economical option, in which lining serves as both the door leaf and facing material. It is about this option and will be discussed below.
Attention: If there is a high temperature and humidity indoors, then you should never use resinous woods.
Step by step work
Consider the step-by-step algorithm for constructing the front door of the clapboard, provided that the door itself will have dimensions of 180x80 centimeters. The instruction is as follows.
It will be much more convenient if all the necessary materials and tools are located in one place, in the immediate vicinity of the work site.
A set of such tools and materials is not so great:
- Electric jigsaw or regular wood saw;
- Any drill, cutter to it and drills of various diameters;
- Lining slats with a length of at least 1,800 mm and thickness from 4 to 6 mm;
- Two boards 180 cm long and 4 to 6 mm thick.
The process itself works as follows:
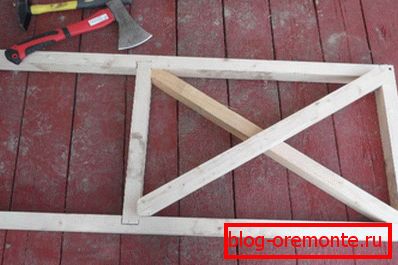
- First you need to cut off or install two ready-made strips 180 cm long, which will serve as vertical guides. In them, from the inside, it will be necessary to make three slots, "looking" at each other and being at the same distance in height.
Attention: The depth of such a groove should be 50 mm, and the width - 10. To drill these grooves, it is more rational to use a cutter fixed in a drill.

- After installing the vertical consoles, you will need to create three crossbeams from planks 70 cm long.
- The ends of these boards will need to be cut in such a way that they can enter into the newly drilled grooves. One of these transverse slats is installed in the lower pair of slots, and then proceed to the cutting of the wall paneling.
- Facing slats should be no shorter than 70 cm in length, so when buying lining you need to choose the dimensions with a reasonable stock of material. In our case it is not less than 2100 mm. It is best to use a jigsaw for cutting lining, since it leaves smoother edges when working and virtually eliminates rejects.
- The space between the lower bar of the frame and the transverse bar is first sheathed with the cut 70-millimeter strips; then the same operation is repeated in the upper part of the future door.
- The use of a third transverse bar, which is set at exactly half the height of the door, may seem, at first glance, superfluous. But it is precisely this solution that makes it possible to impart additional rigidity and strength to the door structure in its most vulnerable middle part.
- For fastening laths lining can be used as ordinary small nails and screws. After finishing the door trimming, one or both sides will only have to attach the door hinges (see Door hinges: their types and rules of choice) and install the structure in the place due to it.

Tips for processing doors from lining with paints and protective coatings
Despite the fact that the door from the wall panel itself looks quite aesthetic, any wood-based material requires additional processing. Especially, if we are talking about the front door, forced to experience the effects of temperature changes, high humidity and other adverse factors.

So:
- Before painting the wall panel and applying a layer of paint, varnish, antiseptic or impregnation on it, it is necessary to remove the layers of the old coating. For this, it is best to subject the slats to relatively high temperatures. For this, a building dryer, a portable heat gun or even an iron, the working surface of which is insulated with foil, is quite suitable.
- As a result of short-term heating, old layers of paintwork materials are easily removed with a conventional trowel or fine-grained sandpaper. In addition, you can use special solvents or chemical-based compounds (so-called "washes"), which today can easily be found in any serious hardware store or in the markets.
- To avoid flaking and “refreshing” the appearance, it makes sense to cover the slats with a 2% soda solution, which is diluted in warm water.
- After drying, the wall paneling must be covered with a layer of varnish - this will increase the door's ability to effectively resist moisture, aggressive environments, mold, fungus and various parasites.
- After the oil-based "primer" is completely dry, you can start applying varnish or paint, which is recommended to be applied in two layers.
Attention: If you put the door in the bath, then read the instructions before buying. After all, some compounds at elevated temperatures can release harmful substances.
Paint coating
So:
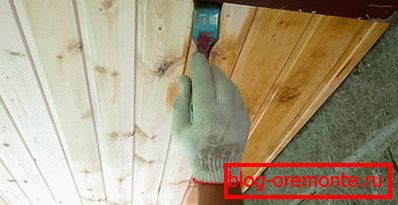
- In order to paint or varnish lay on the cladding material with a thin and uniform layer, the movement of the brush should be confident, but smooth.
- It is more expedient to make the application of paintwork from the top down - so it will be possible to avoid as much as possible drips and irregularities.
Attention: It is also necessary to remember that painting the finished door should be done at a temperature of at least +15 degrees Celsius. This is especially true for the entrance door of a country house or country house.
By the way, about country houses and buildings.
- It is there that the lining entrance doors experience maximum loads associated with wind conditions, temperature changes, exposure to sunlight, weathering and the effects of various pests. That is why, in addition to painting, it is strongly recommended to coat the doors of the wall paneling with a layer of special impregnation or an antiseptic.
- In addition, if the door is painted in the open air, it is best to perform such work in the evening, when the heat is not so intense, and the humidity of the air has optimal parameters that contribute to the rapid drying of the composition. After finishing the painting, it is necessary to cover the surface from possible rain to its complete drying.
Attention: Do not neglect the recipes and recommendations that manufacturers of paints and varnishes are placed on the packaging of their products. Including in the part of safety.
- In the course of work on applying to the newly created door from a lining of various compositions, one should not forget about the use of headgear, gloves to protect the skin of hands and special glasses.
- In the same cases, when a varnish, paint or impregnation did get on the skin, ordinary vegetable oil can come to the rescue very effectively. It is enough to rub it into place of contact with paintwork materials, hold for 5-10 minutes, then rinse with ordinary warm water. This will avoid irritation, itching and other troubles.
Doors clapboard clapboard - the process is quite laborious. Here pay special attention to grinding the surface. And most importantly, do not rush, look at the photo and select the desired model. After that, the instruction will tell you everything.