Door panel: how to make and install
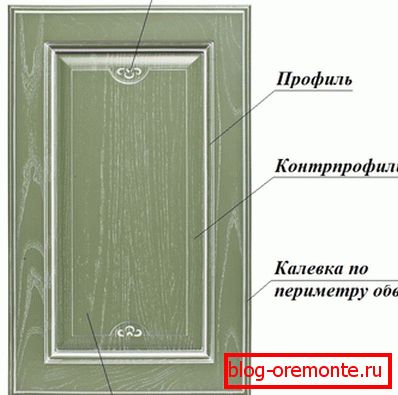
Structurally, the doors are divided into two main types: panel and panel. With the first option, everything is clear - this is a frame with a filler and lining, forming a solid shield. But perhaps not everyone knows what the door panel is: this is how decorative elements are called, which are inserted into the frame of the canvas.
They are able to turn the door into a true masterpiece of carpentry art. In addition, they can be put not only on the door, but also used, as shown in the photo above, in the integrated design of furniture and walls.
With the help of the video in this article, we will tell you how to make panels and assemble the panel door - this is a task for those who like to create useful and beautiful things with their own hands.
Panel door features
Before understanding the manufacture of the panel, you need to understand what the panel door is, as such. As you already understood, this is an insert, through which the door leaf can be given an attractive appearance.
The structure of the canvas is not simple, and the panels, especially wooden, can have a rather complex architectural form: milling, carving.
The design of such a door can be considered a frame, as it consists of a strapping, forming a contour frame, center pieces (transverse crossbeams), and filler liners that fill the resulting cells. The more mediators on the door and, accordingly, liners, the more interesting the door looks, the higher its strength, and, accordingly, the price.
The structure of the canvas
The binding of a cloth consists of bars: and the lower, that is, the empty part, can be thicker and consist of several type-setting parts. This is necessary in order to secure a protective plinth to it.
The insertion of the panels is carried out in specially cut grooves on the strapping and intermediate beam. Well, since there are grooves, it means there must be grooves: they are around the perimeter of the inserted elements - only here they are called figareas.
So:
- Today, on sale you can see such doors, the lining of which only mimics the panel. Manufacturers or sellers may call them fillets, but in reality it’s just a honeycomb molding. The buyer, to put it mildly, is misleading - and we think that our instruction will help you to figure out: what's what.
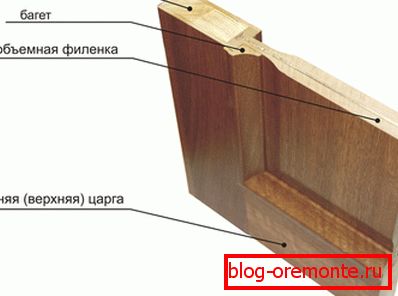
- Real Fillets Should Only Be Inserted. They can have a fairly simple flat shape, smooth, or vice versa, the bulk surface, which, in fact, has long become a classic of door manufacturing. In a more complex version, these are inlaid liners, representing a lamella layout, joined by the tongue-and-groove method.
- In wooden canvases, the panels most often have a figare design. That is, in the middle they are thicker, and thin along the edges, so that you can make an insert into the groove. The junction is closed with a bead (kalevka) or decorative baguette.
In metal doors, and doors made of precious wood, panels are usually floating, but for a beginner to make this option is difficult. We'll talk about doors with figarenykami panels.
What is required for work
In the manufacture of panel doors, often interior doors, glass is often used as a filling. But on the deaf wooden doors, which are placed in the bathrooms or at the entrance to the apartment, the panels can be made from solid wood, or from plywood or chipboard.
The door box, as well as the binding of the canvas, in low-cost versions is made of glued pine timber, but if the cost of the source material does not really matter to you, you can use oak, alder, or, for example, ash in your work. In any case, if you want to get a reliable design, its frame should be made of high strength material.
Material and tool
The size of the bars and slats depends on the size and design of the door, therefore, to calculate the amount of material, you must first make your own sketch, or use the finished drawing. Mark on it the dimensions of the canvas with the box, as well as the size of each part - so it will be much easier to work.

So:
- We will not speak in detail about the doorframe now, since the topic of this article is panel canvas. So, if you are guided by the existing standards, then you need a bar 55 mm thick for strapping the web, and 45 mm for the middle ones. Their width may vary depending on the design of the door, especially since the mediators in general can be curvilinear - therefore, it is impossible to give any recommendations here.
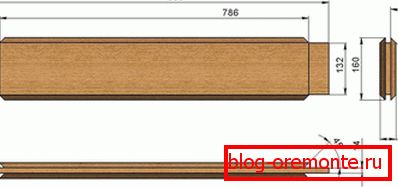
- Calculate the width of the bars need without layouts, but taking into account the gauges - shaped profile framing the panel. Between the bars knit a double spike, and if you have not encountered this before, watch the video from the professionals. Connections carried out on glue, or additionally secure pins.
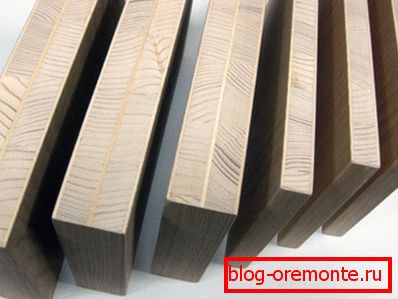
- With a 55 mm thick strapping bar, for panels made of solid wood, or for glued joinery plates that you see in the picture above, the thickness should be between 22-23 mm. If it is plywood or chipboard, you can use sheets 18 mm thick. Then you should stock up with the necessary fittings for the door, small carpenter nails and transparent glue for wood, for example: Moment Joiner.
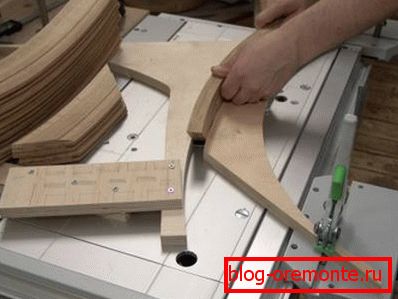
And of course, for such work a normal woodworking tool is needed - you cannot make a beautiful door with a single hacksaw. At a minimum, it is necessary to have a circular saw and a hand mill, and in order not to sand the wood with sandpaper, it would be good to use a sander.
Everything else: a drill with drills, a metal square, an awl, a level, a chisel, a set of screwdrivers and a knife - should be at hand with the tree at hand in any case.
The nuances of making the door
So, we will assume that you designed the sketch, stocked the tool and materials, and made the door frame. What next?
Before proceeding to the production of panels, it is necessary not only to make the details of the door leaf, but also to assemble a part of the frame. To do this, connect one vertical stand with two horizontal parts of the frame: the profile of the discharge and tsargoy (top strapping).
So:
- In spite of the fact that you have a drawing with dimensions, intermediaries and future panels need to be measured in fact, as it may well turn out that there are some deviations. This is especially true of models where the horizontal strapping of the strapping is curved. First, the middle part is set on the frame: the spikes are cut on the bar on one side, they are tried on, and then the second end is processed on the pencil mark.
- Depending on the structure of the door, the cross member is inserted with spikes into the grooves of the binding parts. If there are 6-8 file on the door, there will be several middle ones. The length of the horizontal elements usually corresponds to the width of the canvas. At the same time, vertical mediators are short, and their height is equal to the distance between horizontal mediators.
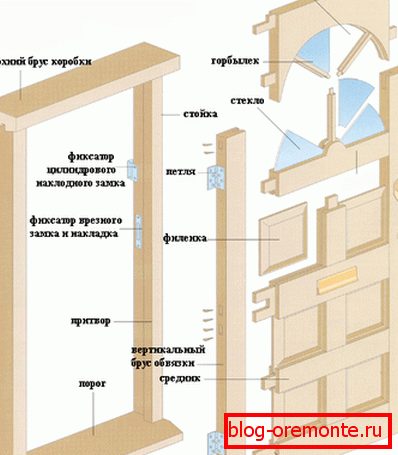
Manufacturing and installation of mediators is carried out in this order: first, the long parts, and then, after measurement and fitting, short. Only after all the mediators are in their places, you can mount a second vertical rack on the frame. Now the frame is fully assembled, and you can begin to manufacture panels.
Panels
So, in front of you, leaning against the wall, stands the frame of the door leaf - now you need to remove the dimensions of the future panels. This is best done with the help of pieces of slats, which, if there are several identical panels on the door, will play the role of a template in the future.
When measuring, it is necessary to take into account the temperature gap, so that as the wood expands, the panels do not rest on the harness, and do not tear the stands off the tenon.
Note! The template rail inserted in the cells of the panel should move freely left-right, but it should not fly out of the groove. The difference in its length and the distance between the bottoms of the opposite grooves should be about 6-8 mm.
- Now, with the help of template rails, one more template needs to be done - now for the panel itself. This particularly facilitates the marking process, when curvilinear cuts have to be made on the tree. The template is cut out of thin plywood, hardboard, or hard fiberboard, try on the cell, and only then proceed to the implementation of blanks under the panel.
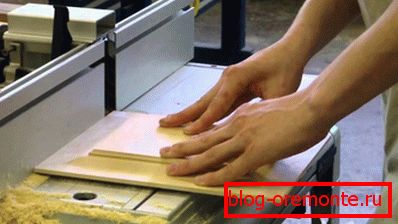
- It helps to do without numerous measurements, as well as to avoid errors when cutting the material - including the tolerances for thermal expansion. Cutting the size of the workpiece, you can begin to cut the field of field - for this you need special tips on the router. They are different, so the finished ends of the panels may vary in configuration.
When they are milled, the volume part of the workpiece is removed, and along the edges, thin ridges (figarees) are obtained, which, when installed on the frame, are inserted into the grooves of the binding bar. If on them places irregularities turned out, they are eliminated by the grinder. It remains only to insert the finished panels into the frame of the canvas, press it with kalevkami - and your door is ready for decoration.