Door insulation with dermantine: rules for doing work
Warming the door cracks, this is probably the first thing that they start to worry about when cold weather comes. In this article, we will describe how to do door warming with your own hands with the help of dermant.
This is perhaps the most popular material that is used to finish the door. You can watch the video on how to do the work, as well as detailed instructions will be given for proper finishing.
We study the pros and cons
В наше время есть не один материал, которым можно утеплить жилище. Один из их это дермантин. Его довольно часто применяют. Давайте для начала взвесим все за и против данного материала.So:
- The price of such finishing is quite democratic and everyone can afford it. Moreover, such products are now produced fairly high-quality and sometimes it is even difficult to distinguish them from the skin;
- This coating perfectly tolerates moisture and temperature changes.while the quality of the material does not decrease;
- After completing the work, you will receive not only its insulation, but also significantly increase the sound insulation (see. Sound insulation of the entrance doors with their own hands in the house);
- If you have an old door, then you can perfectly hide its defects;
- Coverage can be taken in almost any color and with a different texture.
Now consider the disadvantages, which are also available:
- The coating itself is susceptible to mechanical damage. It is strong, but if there is a gap, then it will not work just to fix it, you will have to change the coating on the entire plane;
- It is not necessary to place this material in direct sunlight, it just burns out and becomes unusable.
Do the door trim with dermantin
Immediately it should be said that to warm, it is not easy to take and upholster the door. This is a set of activities that should be performed. Only then will you achieve the desired effect.
We warm the box
Warming gaps in the doorway begins with the box. We ate cold air through it, then it would not be possible to just warm the door.
So:
- We make inspection of the box. First you need to knock off putty on the edge. Sometimes you just can't see it, but you can even hear the cold air coming through the box. The builder does not care about heat supply and you can simply find cavities through which cold air simply penetrates;
- There is a second option. The gaps are simply smeared with mortar, but in the process of time and the door strikes it flakes off and gaps form. It must be eliminated. You just need to remove this gap with a chisel and a hammer;
- Now we fill it with insulation. To do this, the cavity is filled with the selected material.
Attention: It is best to use mineral compounds for warming. First, apply the glue to the surface with a brush and then install the insulation. Natural materials are strayed over time. When synthetics millet is still planted on glue, then it serves for quite a long time.
- Now, after warming the box, the gap can be treated with a solution. This is done with a spatula.
Door upholstery
Before work, you must first prepare the site for the job. Better if it is raised in relation to the ground. Some simply lay on four chairs. We need to lay it steadily.
So:
- Remove the door from the hinge and put it on the prepared place;
- We remove from a cloth a former covering. At the same time it is necessary to remove the fittings and everything that will interfere;
- We put the material on the surface and try on we mark the contours of the section. It is necessary to add about 15 cm on each side, this material will go to the height of the insulation;
Attention: when marking, you should take into account the magnitude of the turn-up, because this will also take place. Also provide a pattern. When re-threading, the material also decreases slightly.
- Now we look at the canvas, the work depends on the material of its manufacture. If the door is wooden, then you just need to handle the gap, if necessary, it is puttied with putty on wood. Apply rubber spatula;
- If the door is made of metal, then it must be treated with sandpaper. After which it must be degreased and apply a layer of primer;
- After the surface is completely dry, it is necessary to try and cut the insulation. Only here it is necessary that it should not be cut flush, you must leave a place for the attachment of dermatin. This distance is not more than 10 mm;
- Now apply glue to the surface. It can be applied and strips. Its function is not to allow material to stray;

- We put dermantin on top of the insulation and beat it along the edge. Pre-tuck it;
Attention: we make insulation fixings on one side and then on the opposite side. Otherwise you will not be able to evenly tighten the dermantin.
- We act differently with the metal door. Glue is applied on the edge of the canvas and dermantin is applied to it. After that, it’s good that you place a batten of wood on top of this place, only it should be flat on the plane. After that, we press it to the canvas with a clamp. Then the material is glued exactly and does not move. So glue around the contour.

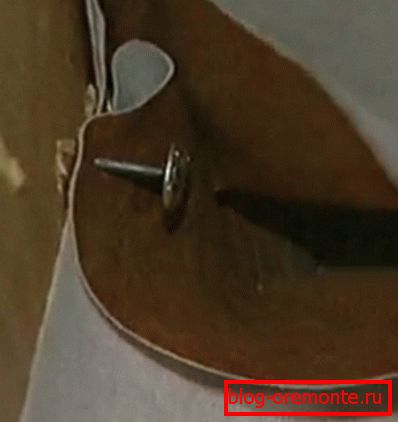
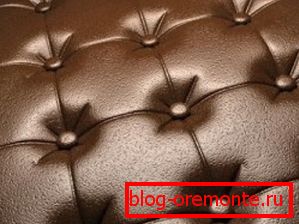
- After complete drying, you can decorate the door. To do this, just pull the thread. To do this, mark up the plane and a nail with a large decorative hat is nailed at the right points. After that, the thread is tensioned and wrapped around the nail. Only you first do not drive a nail into the canvas. Lightly thread it and wind the thread. After this evenly across all planes, start gradually to drive in, then you will get a plane with dutikami.

As you can see, this is not a difficult question, the main thing here is not to rush and do everything carefully.