Door hinge for wickets: how to choose and how to install
The usual internal door hinge for wickets, is only suitable if they are small and light enough - for example, made of thin shtaketnik or plastic. Heavy wood or metal products she will not hold.
Let's see what canopies can be used, equipping the entrance to the site.
Overhead hinges
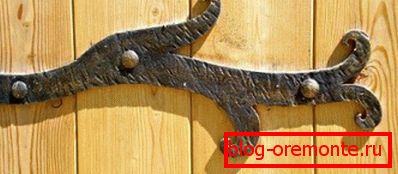
In contrast to the inner, fastened to the end of the door leaf, the outer hinges are nailed or drilled to its front plane or strapping bars. It is the most ancient type of canopies, intended for type-setting wooden doors.
Design and scope
Overhead hinges are designed for hanging wooden cloths of different designs and weights.
One “wing” of the hinge can be of different lengths, up to the entire width of the door leaf. In this case, it becomes part of the door structure itself.
The device overhead loops and the principle of their action:


- Swivel axis, around which the gate or door rotates when moving. It is riveted to one of the plates of the loop, therefore it does not fall out of it under the action of gravity;
- Door frame support bar or wicket pole;
- Door leaf;
- Fixed part of the hinge, fixed on a pole or door frame;
- Fasteners - screws or nails;
- The movable part of the loop, attached to the door leaf;
- Tightening horizontal bar. Door hinges for gates are attached to them at the level of such a bar - especially if the length of their movable part is less than the width of the canvas.
For reference. Previously, overhead canopies were exclusively forged, and were attached to the door with nails. Now cast loops are more common, and it is easier and more reliable to fix them with self-tapping screws.
Of great importance is not only the quality and reliability of these elements, but also their appearance, since they are located openly. Therefore, forged hinges are still very much in demand, despite the fact that their price is disproportionately higher compared to factory stamping.
Selection and installation
The length of the loops and their number are selected depending on the size and weight of the wicket. The longer the boom, the more fastening holes on it, and the more weight it will sustain, not allowing the canvas to sag under its weight.
As for weight, then:
- For a cloth up to 40 kg two canopies are enough, located at a distance of 15-20 cm from the upper and lower edges;
- At 40-60 kg you need three loops already, and the third is mounted below the top by 20-30 cm;
- If the canvas is heavier than 60 kgIt is recommended to hang it on four loops, located at equal distance from each other.
Hanging the gate is easy to do by hand. For this, the long part of the loop is first screwed to the web.

Then the gate is installed in place and fixed with wedges, clamps or other devices in the design position.
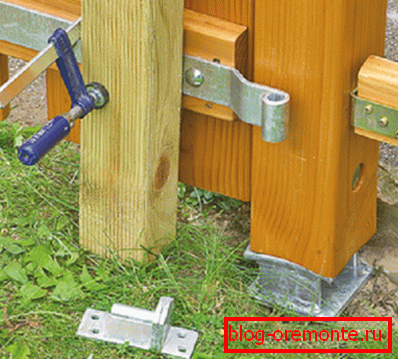
After that, the second part of the canopy is attached to the pole or box.

Council If, in time, the canvas still slackens, or the support pole changes its position, it will be easy to adjust the work of the gate. It is enough to unscrew the screws, align it and tighten them again.
Welded hinges
Metal gates, as well as any other, in a metal frame are attached to the supports with special welded hinges.
Kinds
Welded door hinges for the gate differ from each other primarily in size and material production. In addition, there are differences in shape, design and ability to bear a certain load.
In form they are:
- Cylindrical;
- Hexagonal;
- Teardrop.
By design:
- Ordinary - with removable or fixed "finger";
- Ballpoint - with a metal ball that provides easy opening of the gate by reducing the friction force inside the loop;
- Bearing - with the bearing between the two halves of the product.
By load:
- Simple;
- Reinforced - with welded plates, allowing you to distribute the load on the loop more evenly. What increases reliability of fastening of a gate, and increases service life of canopies.
The required number of loops
The overall dimensions of the welded hinges, as well as their number, are selected in accordance with the weight of the gate. The harder it is, the more they should be. Or they themselves should be more powerful.
The recommended amount is given in the table:
| Make and height of the loop, mm | 610-4 (100) | 610-5 (125) | 613-4 (100) | 613-5 (125) | 500-4 (100) | 500-5 (125) | 401-4 (100) | 700-4 (100) | 700-5 (125) |
| Weight, kg | |||||||||
| 30 | 2 | ||||||||
| 40 | 3 | 2 | 2 | ||||||
| 50 | 3 | 3 | 2 | ||||||
| 60 | 3 | 2 | |||||||
| 70 | 3 | 2 | |||||||
| 80 | 3 | 2 | 2 | ||||||
| 90 | 3 | 3 | 2 | ||||||
| 100 | 3 |
Mounting wickets on welded hinges
It should be noted right away that it is very difficult to do this work on your own, and it is simply impossible if you have no experience. Welding is a difficult, time consuming, dangerous process for a beginner. Therefore, you can take up the installation only if it is not the first time you see and hold a welding machine in your hands.
Besides him, do not forget to stock up on electrodes, a mask and personal protective equipment. As well as the necessary tools:
- Metal brush for cleaning work surfaces from dirt, rust, old paint;
- Grinder for stripping welds;
- Tape measure or ruler, pencil;
- Construction level;
- Clamps or other fixtures for fixing parts.
Council Before starting installation, lubricate the door hinges for the gate with grease or other lubricant. And the areas to which they will be welded, clean of rust or paint.
Next, you need to make a markup on the door leaf, depending on the number of hinges. The top and bottom should be placed no further than 15-20 cm from the edge.
It is much more convenient to weld them when the gate and the box are in a horizontal position.
A detailed description of the process is shown in the table:
| Picture | Description |
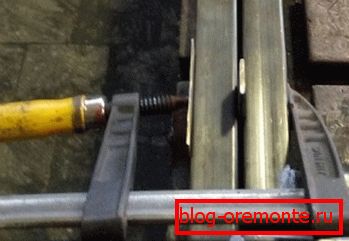 | Lay the gate or its frame and support column on a horizontal plane so that between the pipes to which the hinges will be welded there is a gap of 3-4 mm. To do this, lay between them spacers of metal pieces or waste circles from the grinder, and clamp the clamps. |
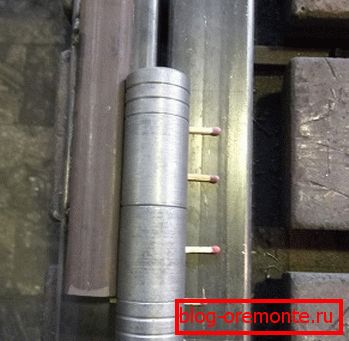 | On the welding line, draw a line parallel to the edge on the support tube and fix along it an even bar or length of pipe. You can clamp clamps, or grab a spot welding. Laying a loop close to the bar, place matches or pieces of wire under it to provide clearance. |
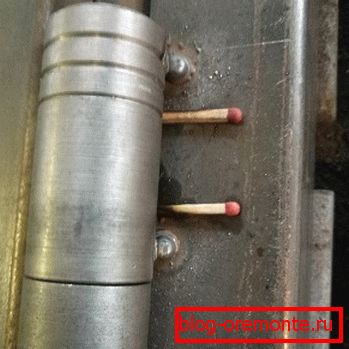 | Holding the cylinder pressed to the bar, grab its upper half in two places to the frame tube. |
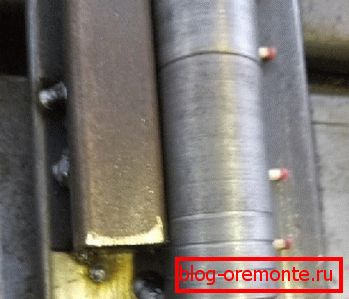 | Then grab the bottom, and remove / cut off the temporary bar. |
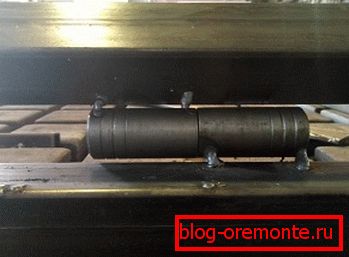 | Remove the clamps holding the gate and box together, and check the stroke of the blade. If everything is normal, return the spacers and clamps to the place again to weld the hinges thoroughly. |
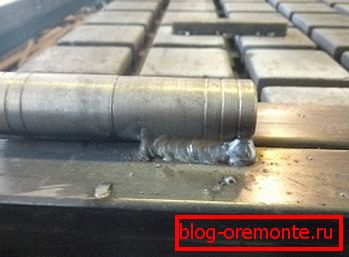 | Boil both seams with continuous welding. |
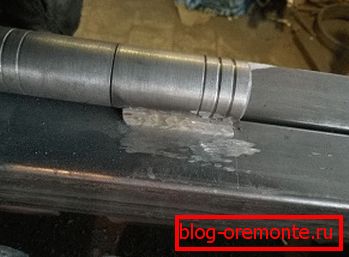 | Strip the seams with a grinder so that there are no nodules left. |
 | Open the gate and boil the seams on the back side. Strip them out. |
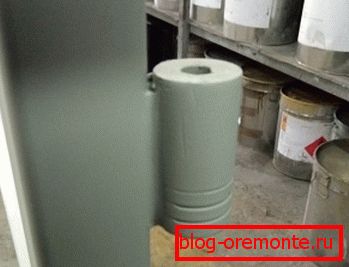 | To give the design a complete aesthetic look, prime and paint it. |
For reference. This is only one of the options. Each welder has his own secrets, how to ensure uniform gaps between the hinges and the frame, how to arrange them all along the same vertical axis, etc. Watch a few videos and choose the most appropriate way.
If the wicket pillars are already standing, installation is carried out using a different technology. The instruction recommends that you first accurately mark and weld the upper parts of the hinges to the sash of the gate.

After that, as in the case of overhead canopies and a wooden wicket, the sash is installed in the opening, and fixed in it with the help of linings and wedges. The verticality of the installation, and being in the same plane with the box, is checked by the building level.
Then, the lower part is inserted into the upper part of the loop, and its position is marked on the supporting pole with chalk or construction pencil. Or she immediately grabs in two places by spot welding.
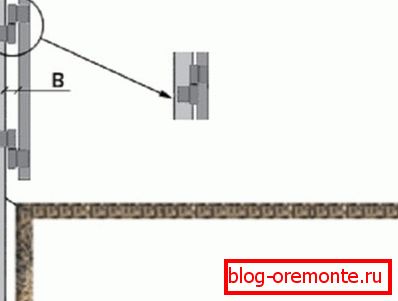
Taking all the loops, you need to remove the wedges and linings, and check the progress of the gate. Only then can you perform vertical solid seams.
And then everything is the same: internal seams are boiled, they are cleaned, after which the whole structure is painted in the selected color.
Conclusion
Now you know what are the door hinges for the gates, and in what cases use this or that type. And if you wish, you can make the installation yourself. It will be even easier to do this after attentively watching the video in this article, as well as other video clips made by experienced builders and welders.