Do-it-yourself wooden gates: what can be done
Many people make wooden gates with their own hands. After all, this material is quite attractive in many ways. How to make a gate of wood with their own hands, we consider today. Also on the video in this article and photo, you can choose not only the desired type of gate, but also decide on the design.
Wood advantages
Such gates have their undeniable advantages, which allow you to make a choice in this direction of the material:
| Price | Prevalence and affordable cost. Shops and building materials markets offer customers a wide range of wooden boards and beams. Their cost, in comparison with products from metal, will pleasantly amaze any person. |
| Easy processing | Simple processing. You can easily make your own material for the gate. The difference between wooden products and metal products (see Metal doors of the gate are the options) is that they can be processed with the help of hand tools from the home collection. Tools such as an electric hacksaw and a grinder are commonly used. |
| Durability | If you properly care for the gate, then they definitely will serve you a solid number of years. Unlike metal, wooden products are not characterized by rusting, but gradually they become worn out. That is why it is recommended to process the wood with the help of strengthening agents and apply paint on the places that require it. And if you notice damage to the door leaf, then do not worry, it will not take long for you to put other boards in this place. |
According to your needs, you can build a variety of gates by yourself. For example, sliding gates or mechanically lifted are suitable as garage doors.
But the most popular type of gate is a swing gate. Their mechanism is so simple that every person, even in no way connected with construction, can install them.
Choose the type of gate
Doing wooden doors with your own hands should be started after choosing the right version of this design. The photo shows the possible options and you can pick up what you need. Or use the individual elements of design.
Swing gates
This type of gate has a fairly low price: 1 m2 on average costs from 3 thousand rubles. The optimal width is 4 meters, but in the extreme case you can make 3.5 meters: there will be enough space for the car to enter.
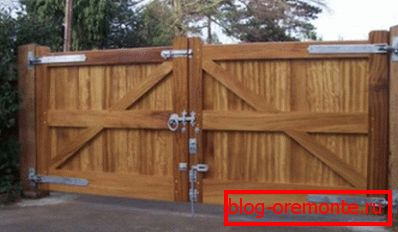
So:
- You should be attentive to the supports that serve for fastening the gate. It is necessary that their length was 20 cm longer than the length of the gate. It is advisable to use the visor above the gate, as it aims to prevent moisture at the ends of the valves.
- Before installing the visor, you need to think carefully about everything.. In the case of overlapping, cars with construction materials will not be able to enter your yard, or you will have to change trees. Install the visor at the height of the pillars from 3.5 to 4 m.
- Gate doors sometimes have a disproportionate size.. For example, the wicket (see How to make a wicket for the fence itself) may have a smaller size compared to other parts.
- The advantage of swing gates in their easy installation - mainly only hinged hinges are used (with the leaf size not exceeding 200 kg). If your doors are larger (starting at 200 kg), then use the hinges meaningless: the gate is likely to become oblique. To avoid this, use the bearing hinges, which completely disperse the load.
Swing gates имеют свои минусы:
- They need free space so that they can be opened. At the same time, it is necessary to ensure that there are no elevations on the ground that may prevent the opening of the gate.
- Another drawback is that in snowy weather, residents of the house will not be able to get into it until they clear the snow in front of the gate. And finally, the weight of the valves require only strong support posts.
To make your swing gates more modern and comfortable, you can install automatic equipment that allows you to open the gate with a button. The price is not high, but comfort is a pleasant thing.
Sliding gates
Sliding or sliding gates are a modern type of gate. Today, an increasing number of people prefer automatic gates.
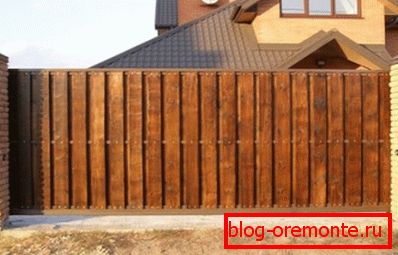
The advantages of such gates are:
- No need to clean the snow from the space to enter the yard
- The passage width limit is 11 m, which is significantly greater than that of the swing gates.
- The main load goes to the roller carriage
- The width of the gate depends on the relative position of the carriages
But sliding gates also have disadvantages:
- The main disadvantage of the gate with automatics is their cost, the lower bracket of which is 14 thousand rubles, and the upper one - 30 thousand rubles.
- This type of gate requires much more space along the fence (approximately 40-50% more than the width of the passage)
- It is better to install a gate at once to a specialist, since the process itself is quite complicated.
Preparatory process before starting work
Before you collect the necessary tools and materials, you must make a drawing of your future gate and accurately measure the places for their subsequent installation. Only after passing these two steps, you will understand how to build a wood gate with your own hands without the intervention of professionals.
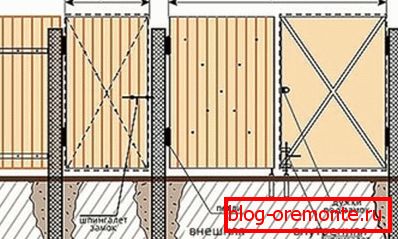
To build the gate with his own hand, it is necessary to accurately measure the opening, and in the context of the courtyard you need to measure the length between the fence endings.
After that, you can begin to do. To simplify and make the work as convenient as possible, we advise you to use a ready-made example. All you need from the finished picture is to replace the old numeric data with yours. Such a detailed sketch will allow you to accurately select the necessary components.
Cooking tool
To build the gate yourself, you should use the following tools:
- Wooden bars, whose diameter will be at least 5x5 cm. Or pipes made of metal, whose profiles will be approximately 5 cm;
- Boards;
- Hinges;
- Jigsaw or hacksaw;
- Meter, Roulette, Area, Level;
- Drill with drills;
- Plane;
- Stameska;
- Screwdriver;
- Self tapping screws and pins;
- Sandpaper;
- Ground fluid;
- Tool for welding (if necessary);
- Rods or anchor bolts;
- Paint or varnish for outdoor work;
- Tassels
If you are engaged in the creation of wooden gates for their installation in the courtyard, it is necessary to prepare in advance the pillars that serve as a support. In case of their absence, you can create them yourself. All you need is 2 oak beams or metal pipes with an approximate diameter of 15 cm.
Completing of the work
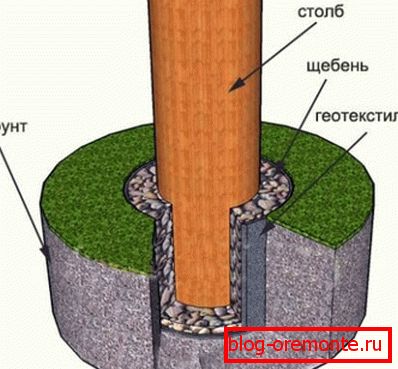
Doors wooden do-it-yourself are done in the following order:
- Mounted pillars.
- Then you need to give them the desired length. After this, make 2 pits at a distance indicated earlier. The depth of such holes should be about 1 meter. Proceed from the following principle: the stability and durability of the whole installation depends on the depth of the supplied supports.
- To avoid problems with the stability of the installation, you can fall asleep rubble in the grooves and trample the bottom.
- If you want to avoid subsequent decay, you can use wood beams. To do this, carefully handle the part of the beam, which go into the ground, by means such as mastic bituminous or epoxy. After processing, you can begin to set up support pillars, fixing the vertical with a level and filling the pits with rubble.
Warning: A useful action would be if you concrete them with cement. And in order to achieve absolute durability and excellent appearance, you can do the facing of the supports brick.
Gate manufacturing process
Once you have prepared and made sure that all components are available, you can safely begin the production of the gate.
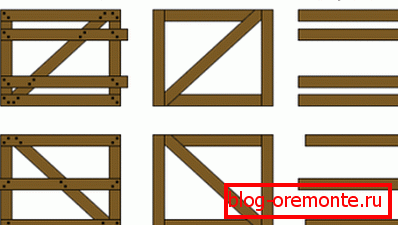
If you are planning to make a garage door, then the frame is assembled with your own hands. To do this, you need to cut the boards of wood, based on the measurements of the opening. After that, put them on the surface in square or rectangular form.
After this, make sure that the diagonals are even and use metal corners together with screws to strengthen the corners.
So:
- For the manufacture of the frame, you can easily use metal pipes or angular profiles. But in order to firmly secure them, you must use a welding machine. After that, you can safely fix the frame in the opening with dowels or anchors.
- After that, you need to do the creation of the frame of the valves. Initial work begins with sawing wood beams to the required length, followed by processing the upper part with a planer and placing them on a flat plane, as shown in the sketch. Remember that the front part of the gate should be 15 cm larger than the framework. In order to protect the gate from external influence, we advise you to cover the wooden materials with a liquid to be treated.
- Make sure that all the diagonals are the same size, install self-tapping screws on the docking points or create holes with a drill to insert pins that are responsible for the stability of the part. After all the structures are ready, fix the cross-beams in the middle of the cross beams. At the ends of the bars, make 45 ° cuts. And finally, reinforce the products with self-tapping screws.
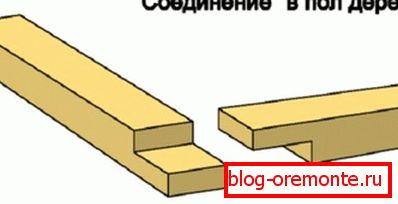
- You can mount metal frames on the frame. To do this, it is necessary to follow the same principles as when installing wooden boards. But as fasteners we advise you to use welding.
- Next, you need to do the preparation and processing of products in order to sheathe the front parts of the valves. Select the required number of boards and, using an electronic jigsaw, give them the desired length.
Attention: We advise you to use products made of pine, as it is not very heavy in itself, and most importantly, is not subject to external influences.
- Then join the boards together, and with the help of screws, fasten the place of contact. After this, engage in trimming uneven places and sanding sandpaper.
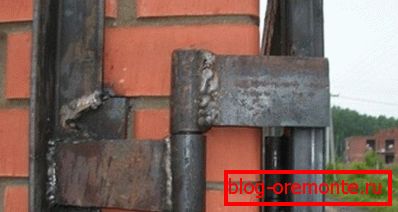
- Now that your gate is almost done, you need to install metal hinges. For gates intended for the garage, the hinges must be welded to the special places of the frame, and if you have a gate in the courtyard, then fix the fasteners to the supports.
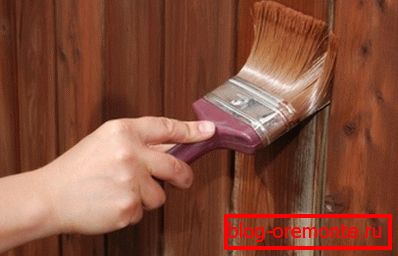
- In the final stages, apply primer to the surface of the gate with a special liquid, then paint it. In case of reluctance to use paint, you can turn to wood stain, which will provide an attractive shade. After that, cover the gate with varnish and, based on your own desire, you can put metal products on the front part of the gate.
- It remains only to install handles, locks and bolts on the gate. To install the deadbolts, you can resort to the use of rods fixed on the sash. To achieve their absolute fixation, make the grooves in the soil.
- Thus, the gates of wood can be easily made personally and at home. An important rule that must always be followed is to accurately measure, pay attention to the sequence of actions, use only proven products and pay attention to the gate.
- Since the gate is made of wood, the care of them is doubly important. Therefore, do not be afraid to use the paint and paint over the old places, and in the case of squeal loops, use grease.
Doing your own wood gates is not difficult; you just have to follow the instructions. And if you do everything yourself, this will be the key to quality work.