Do-it-yourself door repair
Each of us from time to time the question arises: "How to repair the doors in the apartment?". The causes of the problems that arise can be very different: loops creak, the handle loosens, binds the lock, or the canvas sags and pretends with difficulty.
An old door, especially a wooden one, may require a more radical intervention: the sealing of chips and hollows, a new lining or a complete replacement. We will try to answer the most frequently asked questions, and you will learn how to repair the door lock yourself by watching the video in this article.
Repair and doors
Before discussing how to renovate a wooden, or repair of an iron door, let’s focus on one very important nuance. Many readers are interested in: when to install the door during the repair?
The dilemma is this: if you first put the door, then when carrying out plastering and painting works, it is possible, if not damaged, then badly stained. If you first finish, then in the process of installing the door, you can spoil the finish is already covered. Next will be given a small instruction that will help to do everything correctly.
Procedure for repair with replacement of doors
Let's turn on the logic, and mentally go through the chain of technological operations performed during the overhaul of an apartment. Depending on the condition, the canvas may need repair - then it must be removed from its hinges, and the box remains in place.
Before beginning repairs in the apartment, you should remove the door trim. If they still look decent, and you are going to screw them back and then back, then remove them to the side, so as not to pollute.
- But if you want, for example, to glue over an old canvas with veneer, or to install a decorative overlay on it, you will also need to change the trim, choosing an option with the same facial finish. The box is dismantled only when you decide to make a full replacement. As a rule, if the owner of the apartment decided that it was time to change the doors, he would change everything at once - so that they were in the same style.
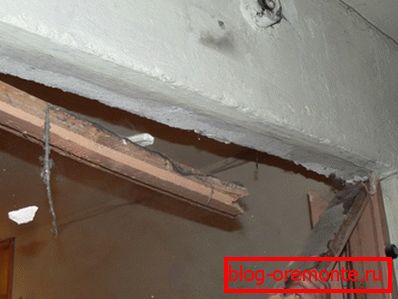
Pay attention to the procedure! After the dismantling of the door frames, the preparation of the premises for repair begins: the lighting fixtures are removed, the sanitary equipment is dismantled, the old decorative coatings are removed, the surfaces are cleaned, debris is removed, and wet cleaning is done. Then, a rough finish of all surfaces is performed, after which you can begin to install new boxes.
- It is very important that at the time of installation of the door frame, the walls should be leveled: be it a plaster screed, or a plasterboard lining. After all, it is only at the end of these works that the thickness of the wall can be accurately determined in order to select if additional strips are needed in size (see How to install doors on the door: workshop tips). After installing the door frame, all the available slots are filled with foam, allowed to dry, cut off the excess flush with the surface of the walls.
Next, hang the sash on the box, cut the latches or locks into it, install the handles. So that when finishing the finish does not stain the canvas, it can be closed with film, or removed and put aside along with the trim, which set in the last place.
Repair of wooden doors
In principle, if the old door is made of solid wood, then before throwing it out, you need to think a hundred times. To date, the price of a frame-frame fabric with a honeycomb filling varies from 5000 to 7000 rubles. Almost as many pulls a set of platbands plus a box. What to speak about the solid wood door, which can cost as much as 20,000 rubles!
Doors with oil painting
But the old wooden doors may well be updated so that they will look as good as the new ones. Their main problem is that they eventually begin to close poorly.
The reason may be, of course, the thermal expansion of wood, but most often the problem lies in the fact that there are so many layers of oil paint on the canvas that it does not so much ennoble the door as it prevents it from closing.
So:
- If the surface of the canvas is warmed up with a building hair dryer or a blowtorch, the paint will swell up and is easily removed with a spatula (see How to remove old paint from the doors and cover it with new material). This is done after all the accessories have been dismantled, and the canvas itself, taken from the hinges, is laid horizontally on a workbench or other equally comfortable supports.
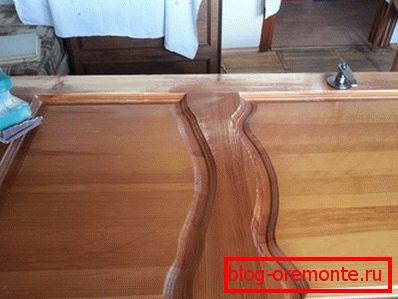
- It is very important that the heating is done uniformly, and the paint was removed quickly. Before you paint the door again, its surface must be sanded first with coarse and then fine-grained emery paper. Even better, if you have a grinding machine, which will greatly facilitate the process.
- By the way, the canvas, on which, after cleaning, a unique woody picture will certainly appear, it is not at all necessary to paint it again with oil paint. Today, there are many varieties of translucent tinting compounds that are both soil and decorative at the same time.
- After applying them, your door will look something like the photo above. You will need only to pick up new platbands to it, since the old ones, because of the profile surface, may not be able to clean paint and sand down properly.
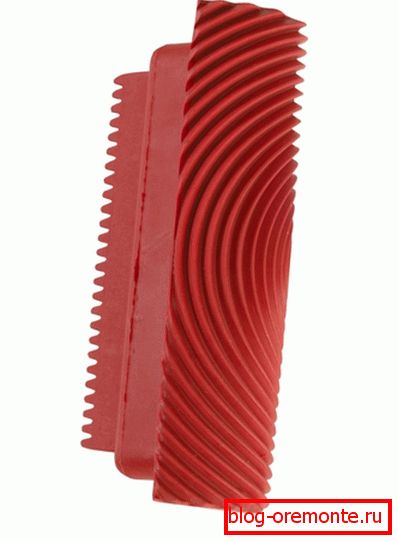
Even if the old door is not made of natural wood, but, say, its canvas is sheathed with solid sheets of fiberboard, you can imitate the texture of wood using a rubber stamp with a corresponding relief. It looks very nice - especially when dark or bright paint is used.
Varnished doors
To repair damage on a varnished door, it is not necessary to remove the coating over the entire area of the canvas. In this case, you need to start with sanding damaged areas that must be wiped with a solvent first.
In this paintwork partially erased, and to restore it, you need to use retouching marker with stain, matched in color, as well as a bar of furniture wax.
So:
- First, paint over scratches with a pencil., and then proceed to seal the potholes with wax, which is melted with a soldering iron or a special heater. If the color of the furniture marker is matched exactly to the color of the coating, then the wax should be a lighter shade, since the surface of the pothole filled with it is also retouched.

- When sealing a door section with extensive damage, you can use the correctors of two colors - this will give the opportunity to simulate the texture of wood as accurately as possible. After the restoration work is completed, it is possible, using a brush or spray can, to renew the lacquer coating over the entire area of the canvas.
- This repair option is ideal not only for wooden lacquered doors., but also from MDF, lined with veneer. In any case, when the door has a profile surface (panel, tsargovaya), to update it in another way and it will not work.
- But if it is deaf panel door, a distinctive feature of which is a flat surface, it can be restored and thorough - by sticking a new decorative coating in the form of laminatin or the same veneer. To eliminate the sagging of the wooden canvas, it is only necessary to trim it with a plane before upgrading.
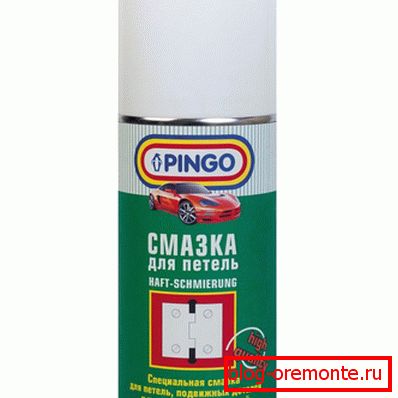
The creaking door hinges would be well treated with graphite grease, which, by the way, is also useful for lubricating the inside of the lock. The spray version allows you to do this more evenly, and allows you to get the liquid in hard-to-reach places.
Perhaps, after lubrication, no repair of the door lock is needed. In general, after the restoration of the door, the old fittings are: handle loops, it can spoil the whole look, and it may be better to simply replace it.
Steel doors
If the interior doors are mostly wooden, then at the entrance from the street into the house, or from the entrance to the apartment, metal doors are more often put. Repair of a steel door is usually reduced only to a cosmetic upgrade, such as painting or a new lining. But sometimes there are purely technical problems.
Troubleshooting and Upgrade
The creaking of the hinges is eliminated in the same way as on a wooden door - by using grease. In extreme cases, you can use the mount to lift the canvas, and insert a piece of graphite from a simple pencil into the loops. After the graphite is crushed and the powder is distributed over the inner cavity of the loops, the creak will disappear exactly.
- Kohl since we were talking about hinges, then we note that with their help you can easily eliminate the drawdown of a badly closing canvas. This requires small balls from the old bearing, which are simply inserted into the connector hinges. As an option, it is possible to make semirings from steel wire, which, after insertion, are connected to the ring with pliers.
- It would be possible to put a washer there, but for this, the canvas would have to be removed from the hinges, which is very difficult due to its considerable weight. As a result of the drawdown of the canvas, it may be that the lock bolt ceases to coincide with the strike plate, as a result of which the lock does not close properly. It is “treated” in the same way that was just mentioned.

- Repair of the Forpost door, or any other metal door, can only be reduced to replacing the contour seal. But in addition to insulate, and just to elevate the facade of the door, you can use the mounting on the canvas of the MDF profile panel. These are peculiar linings, matched to the size of the door, which imitate not only the relief of the panel canvas, but also the texture of the tree.
- If you decide to upgrade your door using such a panel, then keep in mind that it will also need to be supplied with trim. In order to install the cover plate, it is not necessary to remove the sash from the hinges - just remove the accessories.
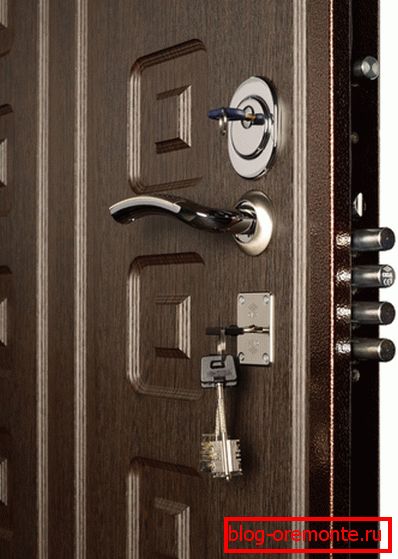
- Fasten it with screws, which are pre-drilled holes. Drilling is done with a thin drill bit, right through the panel attached to the door, and securely fastened with clamps. Along the long edge of the blade, 5 holes should be made for fasteners, and along the short 3.
- The lining is released from the clamps only after the contours of the holes that have to be done under the removed accessories are applied to it in the mirror image. The round holes for the peephole, the door knob and the keyhole are drilled using an appropriately sized core drill.
After the holes have been drilled, it remains to fasten the cover to the regular place with self-tapping screws, the length of which is selected in accordance with the panel thickness, and to close the attachment points with decorative plates. Well, if you decide to refine the old metal door by painting, then it will be performed in the same way as wooden doors.
Metal doors
Repair a plastic door with your own hands, most often comes down only to its adjustment. The problem of sagging the fabric is not only inherent in wooden and steel doors, and in all cases it is eliminated differently.
Regulations of custody
When repairing plastic doors, you do not need to plane or put anything in the hinges, since the position of the sash is corrected with the help of a hexagon or a spanner bent at a right angle.
Hinges for plastic doors, have a special design. At their end there is an adjustment hole, into which, in fact, a hexagon is inserted.
So:
- When it is rotated to the right, the canvas will rise, but if you turn the key counterclockwise, it will lower. Sometimes it is necessary to move the sash not up or down, but in one direction or another. Usually this is required to be done when gaps appear in the porch and through them begins to blow.
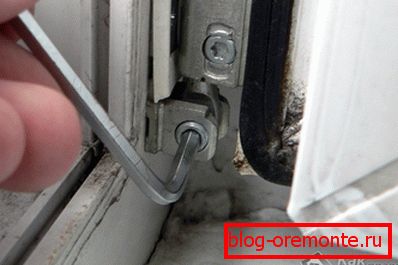
- Elimination of such a problem is also carried out by means of a hexagon, only now it is inserted into the holes on the hinges, which, as we see in the photo, are turned inside the opening. It is possible to push the sash to the frame, or vice versa, by rotating the hex key in one direction or another.
Instead of adjusting holes, clamping screws that rotate with a flat spanner may be provided around the door. Here a lot depends on the mechanism of opening the door. If this is a swing option, then they often have hidden loops with holes for adjustments. But by and large, there is not much difference what is there: holes or screws.
Replacement parts
Plastic doors may require more serious repairs, such as replacing a broken threshold, a broken filling sandwich, or a broken glazing. At first, when the popularity of plastic balcony doors only gained momentum, the thresholds were made of plastic, which, as time has shown, does not always withstand the weight of a person. The variant of the threshold, made of gypsum-fiber sheet, also somehow did not take root.
- But the threshold made of thick plastic window sill is simply impossible to push through. Recommended! The sill board is very durable, and not only does not break, but does not bend. Its surface is not afraid of mechanical effects - except that it may appear scratches that can be easily removed with the help of liquid plastic.
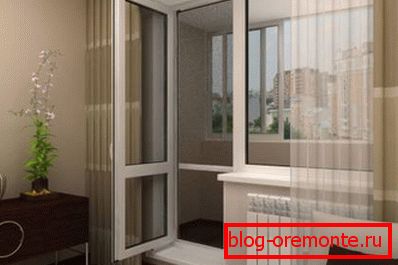
- To manufacture a new glass unit, in order to replace it with a damaged old one, you will have to contact the manufacturer. You need to go with the size, which you have to shoot yourself - and here it is very important not to make a mistake. When there is an opportunity, it is best to focus on the old glass, as some manufacturers indicate its size on the aluminum frame, located between the glasses.
If there is no such inscription, then it is necessary to measure up to a millimeter, be sure to remove the bead from the opening. First you need to pry with a spatula, or a chisel long beadings, and then remove the short.
The two should do this so that the second person will hold the glass sheet. After the opening is released, a new glass unit is installed in it, and the same beadings snap into place.