Do-it-yourself door repair: how it is done
The old door will spoil the whole interior of the room. And no one wants to make repairs without dismantling the old door.
After that, they need to be changed, but not everyone can afford to make a replacement with a new one, because the quality ones are expensive. Therefore, many of the design of the old door with their own hands change to new. Today we will understand how to trim the old doors.
Completing of the work
All work will be done in several stages. There is nothing difficult, but it is necessary to do the work qualitatively.
Everything will be done completely with their own hands, so the price of the door will not be high. Before starting work, you should look at photos and videos, decide on a new design and pick up material.
Need tools and materials
To do this, you will need to prepare some materials and tools:
- It will take a hacksaw, but only with a small tooth;
- Drill and drill bit set;
- To remove the paint will help a simple hair dryer;
- You also need a brush for metal and sandpaper with different grains;
- Get putty on wood, or just do it yourself. To do this, fine sawdust must be mixed with white glue;
- Primer;
- The paint that you picked up (see Paint for doors: choose and do the painting);
- Also need to be brushes. Small and big. Best if you have a spray gun.
Attention: surface preparation work can be done outdoors. For the painting will need to room.
Surface preparation
Now we will understand how to disassemble the old door. Pasting of old doors (see the Decor of old doors with their own hands according to all the rules) and their subsequent processing is done as follows.
So:
- First we remove the door from the hinges and lay it comfortably;
- We remove all the fittings and it will also be better for you to remove only glass (if any), but also beadings;
- Now we start to warm up the surface. We do it by the hair dryer. Heat until the paint begins to swell and peel off;
- We take a spatula and begin to remove it (see How to remove the old paint from the door and cover it with new material). Immediately she is not removed. Separate what we get and heat the new one. There are places with dents and there you have to do it with a spatula angle;
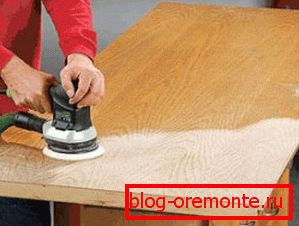
- Now take the sandpaper and begin to level the surface. First, with a larger grain and then we paper paper with small grain;

Warning: You should not just do the processing by hand. It is necessary to press the sandpaper in an even bar. We should have a perfectly flat plane.
You can watch the whole process of preparation on the video and photo:
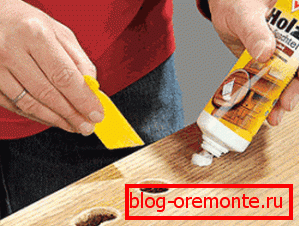
- After processing the surface with fine grain paper, you still have sinks and dents. These deficiencies should be eliminated with putty on wood. It is applied with a simple rubber spatula. Apply and wait for complete drying;

- We take the skin and grind again. If the level fails to be achieved at once, then this work should be repeated;
- Now we need to treat the surface with a primer.
Attention: It is necessary to do the coating with primer. Especially if you cover the surface with varnish or paint. This will be the basis. Just dye can be absorbed into the surface and not evenly. And then get a spotting. The soil will strengthen the surface and create the conditions for a uniform coating. Do it right right away, it will take longer and more expensive to redo it.
Door painting
The decoration of the old door is quite an important point. Many millet paint it. The fact is that in retail there are a lot of materials to do this work. Some simply create masterpieces.
Apply several dyes. Make a different basis. In general, fantasy simply has no limits. To do this, there are expert tips that are worth listening to.So:
- Most often on sale the dye is sold in the form of a concentrate, which must simply be diluted. There is the option of using water or alcohol. And if you have not worked with this before, then it is better to take with dilution with water. Instructions are on the package;
Note: There is a practical approach. An aqueous solution dries much longer from alcohol. You will have more time for troubleshooting. With the use of an alcohol solution, you may simply not be in time.
- You should never apply a dye to the surface without first testing it. The stock must also be prepared;
- On the brush or tampon is not necessary to take a lot of dye, otherwise you will have drips. If you want to make the color darker, then you need to apply a layer again. And this is done after complete drying of the first;
- Prefer dyes with a liquid composition. They will not have to filter later. They are a bit more expensive, but it will be much easier for you to choose a color;
- It is not necessary to pour out the remains of dye. It is stored any time. Before using it, you just need to shake it;
- If you make a mix of paint, then it should be written down on paper. If you later need to repair the door, then you can easily make exactly that color;
- If you want to give the color a lighter tone, then you just need to dilute it with a large amount of solvent;
After painting the door (see Painting the old door: how to do it) you only need to apply protection, for this it is best to use wax-based materials. They add shine to the product and serve as a reliable protection.