Do-it-yourself door for the bathhouse: choose and do
With their own hands, many people want to make the door for the bath. After all, when ordering, it is not cheap, but pick up the right size among the finished products and does not always work. Therefore, in this article we consider this question.
First, we will determine which door is right for us, see the door for a bath with our own hands on the video, we will see the photos of the work. The price of this design is quite different, everything here depends mainly on the material of manufacture.
Choosing the type of door to the bath
A bath is a building that has several rooms and several doors. And it is necessary for each room to choose the design of the door is the one that fits. Let's first determine where, where and what door you can put.
They can be divided into three types:
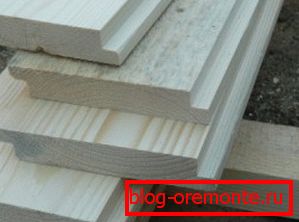
- Doors to the bath wooden deaf typeThis is a simple canvas that is made of wood. It is a board, which later upholstered clapboard. For such a product, it is best to use a tongue-and-groove material. Such a door with his own hands in the bath is done completely with his own hands and without resorting to outside help, which can significantly reduce the cost of the whole structure. There are one-frame and two-frame structures that have a fairly large thermal insulation;
- Doors are glass, This design is most often found in the sauna, for the traditional Russian bath it is used quite rarely. The price of such a product is much higher from the previous one; here, special glass is simply used, which is expensive. This option will not work out completely with your own hands, some simply use a combination of several materials. In the video you can see such constructions;
- Doors combinedThis option is perfect for those who can not decide in any way to the material. Here they use glass, wood or plastic and make real masterpieces.
Features of the door manufacturing
For each room will fit its own door and the material and form. Doors with their own hands for a bath at the entrance and in the steam room are completely different. Only there is one question that unites them, this is high humidity and this must be taken into account. And this is typical for the washing room, and for the rest room.
In this question there are three things that are worth paying attention to. For the entrance size we select, as for the usual room. But all the rest should be chosen from the calculation of heat conservation. After all, we spend money on it and achieve the greatest return.
For a traditional Russian bath, the following dimensions are usually used:
- Doors in the bath should have a smaller size and apply a height in the region of 150-185 cm, while using the width of up to 70 cm;
- Do-it-yourself bath-house doors are the most heat-intensive and use the appropriate material for this.The most commonly used wood that fully complies with all parameters;
Attention: Regardless of the material of the door, special attention should be paid to the threshold. Its height is applied at least 15 cm., Which must be sealed at the bottom seam. This is especially true for washing. Such dimensions are used only for steam room and washing.
Choosing the material for the door
Here, the choice practically comes down to the use of two materials, wood and glass, all the others are not suitable in many ways.
The most commonly used wood, for this there are three main reasons:
- The wooden door with his own hands for the bath when heated produces beneficial substances that enhance the positive effect of being in the bath;
- Such material is commercially available and its price is not high, practically anyone cannot afford it. Such material is quite simply processed, which allows you to make such a structure yourself, and this reduces the cost of the whole structure;
- A self-made door to the bath will not overheat at elevated temperatures and you will not damage the open areas of the body.

It should be used in the manufacture of only baths, it is deciduous. The price of this material is quite different and you can choose the material for any wallet. There is the possibility of buying and valuable valuable breeds.
Caution: If you want to apply an expensive valuable wood, but no money. Then you should think about special preparations that, after processing, change the structure of the wood and give it the appearance of a valuable breed. Only this should be considered in advance, the processing will take more than one day.
We select accessories
Doors to the bath with their own hands are done with the installation of fittings, which should be chosen correctly.
For this you need to use several tips:
- This material should be low thermal conductivity, as it should tolerate high humidity. In the steam room, for example, high humidity and high temperature, so you can also damage the body when touched;
- Most often you will touch the handles, so for their manufacture it is best to use wood. At the same time, the door should be installed so that it opens outwards, then the touch is least likely.
Make the door
It is best to make wooden doors for a bath with your own hands. There are significant advantages, you will do exactly what you want and you will not have to ask anyone.
And it will be equal only to the cost of the material and the time spent. This is not such a difficult job as it may seem at first glance.
Doors with wooden hands for a bath are made according to certain rules and with the observance of technology and if you do this, then everything will work out. If you have not dealt with wood before, then just try to practice a little on waste and then you can get down to work.
Materials and tools
With their own hands, the doors to the bathhouse begin to be made from the correctly selected and purchased material. Also for continuous work you will need to prepare the necessary tool.
So:
- Calculate correctly and purchase a tongue-and-groove board, preferably of hardwood. The width is perfect material in 50-mm. and with a thickness of 30 mm;
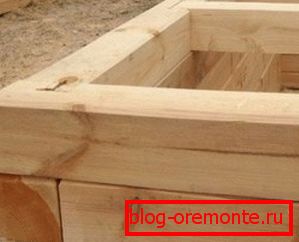
- For the manufacture of strapping timber is required, the best option would be 60/80, but this is not fundamentally important, you can choose a different size;
- Purchase the wall panel and the right amount;
- Loops in the amount of 3 pieces;
- Screws with sweat.
Attention: When buying a material, carefully calculate its volume and correctly. Be sure to consider all waste, it will be at least 10%, and in some cases much more. Take the material with a moisture content of not more than 12 percent.
Such a tool can be found in almost any owner, of course, with some exceptions:
- Circular saw, for the manufacture of this design will be better manual;
- A set of cutters and router. Some use a simple drill;
- Hammer and kyivanka;
- Screwdriver with bits;
- Level of construction, tape measure, square, plumb.
Making a canvas
First of all we are doing the canvas. To do this, on a piece of paper make a sketch with all sizes.
This is done in the following order:
- First we cut the grooved board into the required size;
Attention: correctly calculate the height, it consists not only of dense, there will also be a harness. Therefore, you should take the length of the canvas, but do not forget that you should add two bars, above and below.
- Now, on a flat plane, we put the trimmed boards into the required size and assemble the canvas; we do the assembly in the “thorn-groove” order. We make a set of canvas to the desired width. We get a plane wider from the desired width. We make marks on both edges and connect them with a flat batten. After that we do trimming with a circular saw;
- Now we are doing the final assembly of the canvas. We make the assembly with a spike in the groove, while applying PVA glue to the base of the joint;
- After complete assembly of the canvas on the table should be secured, and a rigid support bar. Between them we put the canvas and with the help of wedges we press. In order for the canvas not to stick out, but to be smooth, we put a chipboard sheet or simple boards on top and put weight on them. So leave to dry completely;
- After complete drying, we look at the plane and if there are glue flows, they should be removed with emery paper;
- We make a measurement of the canvas and set the mark, after which we trim in the desired size;
Attention: During the work try on the square about the kapron thread. You need not only the correct form, but you should also check the diagonal. It must be sustained otherwise the canvas will have an irregular geometric shape.

- Now we make a spike around the perimeter, we need it for fastening the strapping. To do this, we put the canvas on the plane and with the help of a caliper-compass apply marks and then select it with a router. Just remember, the canvas should not move and it should be firmly pressed with the help of clamps;
- Now turn the canvas on the other side and do the same. The spike can be made a little wider and it can be adjusted when landing, then the fit will be of the highest quality;
We sheathe clapboard
This work is done as follows:
- We cut the material to the desired size;
- Making fixing screws in the groove throughout the canvas;
- We put the contour on the casing, while lining should not interfere with piping. The ends should be hidden;
Attention: After assembling, you should number the lining sheets, otherwise you will simply confuse them after processing.
- Now we sort and cut the elements according to the drawn lines. This is done on both sides of the canvas;
- Now again we make the installation of blanks that fit. Each element is connected to the canvas with three screws. On paradise we do the fastening in such a way that the harness hides the connection. In order that the groove does not crack during fastening, it is first necessary to drill the hole with a drill of a smaller diameter and only after that make the connection.
We assemble the doors
Now we are approaching the completion of work and doing the assembly. We do this in the following order and we trim around the canvas.

So:
- We already have finished blanks and we insert them into the canvas from all sides of the finished canvas. The connection is done without a gap, it is better to have a fit. To do this, fit the spike or groove. The main thing is to make the connection as rigid as possible;
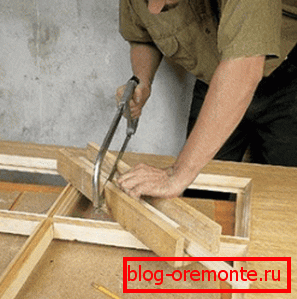
- The field of this is to glue the joining points with PVA glue and make the fastening of the harness using self-tapping screws. First, we drill the installation sites of the screws and then make the connection. Fastening with screws is done on the side faces of the harness, using a pitch of at least 200 mm. In this case, you should immediately make the markup of the installation of door hinges, self-tapping screws should not interfere with this connection. We also do the fastening of the trim parts in the corners;
- Zapily for timber we do with the help of a tuzla, then the connection will be of high quality.

Attention: When assembling the door, the lower profile should not be fixed on glue. This will interfere with the need to disassemble the door.
Finishing
After complete assembly, we need to make and finish the finish and give the door a marketable appearance.

So:
- We pass on the plane of the door with sandpaper. At first we apply average grain and we finish processing the smallest. Special attention should be paid to the sharp edges of the door, they should be smooth and slightly rounded;
- To give the door an original look, you can go through a shaped cutter and make a drawing;
- After that, you can apply for the decoration of various slats and decorative strips, which should be purchased in advance;
- After that, you need to install the door in the opening and attach the handles. When installing, you should use a plumb, you can then qualitatively set the perpendicular. And do not forget to put a heater on the contour. Keep warm.
Install the entrance door to the bath is made. Now you know how to do it and you can get to work.