Arch in the doorway: do it yourself
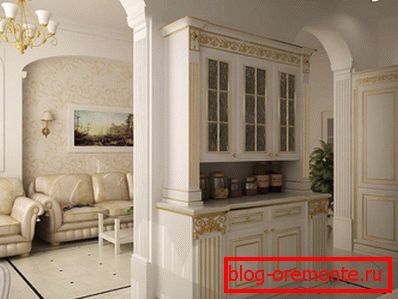
Nothing decorates the interior of a house or apartment like a wide opening with a beautifully lined contour. If the area of the room does not allow to provide such an arch, as in the photo - nothing can be done, you will have to be content with what you have. But even a small neat opening with a smooth, and preferably symmetrical, rounding off can become, as they say: “cherry on the cake” - you only need to treat its design and decoration with understanding.
Independently deal with the question of how to insert the arch into the doorways, the video in this article will help you. In it we will talk not only about how to build an arch, but also about what it is better to revet.
What are the arches
Any opening is provided in the wall or partition during the construction process, or as a result of redevelopment of the premises. At its core, the door arch is a semicircular lintel, crowning the passage between the two walls.
- There are about fifty different forms and styles of building arches. Here both lancet and horseshoe arches, parabolic, keeled, three-bladed and concave - and not count it all.
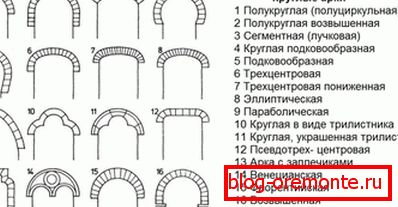
- They have cardinal differences in configuration, and the material from which the arch is built is of decisive importance here. It would be wrong to say that any of them can be built with your own hands if you wish (see Do-It-Yourself Arch - an original solution for the interior). But the most simple forms: semicircular, segment, elliptical - are quite accessible for laying out bricks.
- In any case, during the construction of private houses, the arches are laid out of bricks - even if the walls are built from concrete blocks. In this case, only three forms of arches are available. The arch of the semicircular arch, which is otherwise called the full arch, corresponds to the half of the circle - it is easier to draw, and, accordingly, to make a pattern.
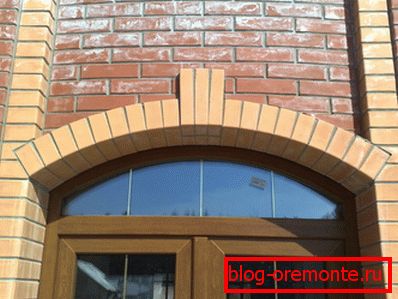
- The incomplete (truncated) arch is called the luchkovaya arch - we see it by example from above. Its arch is not a semicircle, but a segment of a circle, therefore sometimes it is called so - segmental arch. There is also a blade construction, which looks like a rectangle with rounded corners.
It is most difficult to fold it, so for beginners it is better not to take it, but to give preference to the first two options. How to build an arch in the doorway of brick, we will tell in the next chapter.
Brick masonry
The arches of the doorways begin to form after the piers are brought to the desired height. If it is an interroom partition, then it is necessary to correlate its thickness with the width of the opening. When its width exceeds 100 cm, supporting columns of one and a half or two bricks should be provided on each side of the aperture, because the arched lintel has considerable weight.
- Moreover, the supports are laid out symmetrically and in parallel: put the first row on one column - proceed to the first row of the second. To keep this very symmetry, you need to use a mooring cord, raising it as necessary to the required level.
- Ultimately, the shape of the arch on the doorway depends on the shape of the circle, which will be laid on the arch. In principle, the process of making a template is not complicated, but it can be said to be the key point. To do this, from a sheet of chipboard or plywood with a thickness of 20 mm, cut two identical parts.

- Their shape will correspond to the curvature of the arch, and the diameter will be equal to the width of the opening. Between themselves, these parts are fastened with wooden crossbars, after which they are hammered around the perimeter with a flexible metal profile. Finished circles are mounted on a wall or supporting columns, and fixed by means of temporary metal or wooden pillars with struts.
- The props are arranged at least in three places, but if the width of the arched opening exceeds 1m, they are placed every 50 cm. The arch in the brick doorway is built along the circular formwork installed on the supports. At the same time, it is necessary to strive to make a calculation of the arch quickly, in one step, on a cement mortar from one batch.
- Laying brick is made simultaneously from two sides, from the supports to the center. Before starting the laying on the template, it is advisable to make a markup to calculate how many bricks will be needed. They need to be arranged symmetrically, so that an odd number is obtained. The last brick is placed in the center and plays the role of a locking element in the arched masonry.
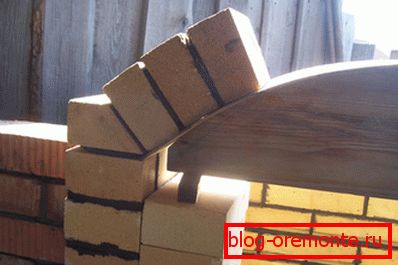
- The brick for the calculation of the arch is used maple, with the trapezoid section, and with a size of 230 * 114 * 65 * 45 mm. The first two digits are the length and height of the brick, the last two digits correspond to its thickness on the two opposite sides of the trapezoid. It is laid down with a narrower edge down, with the tychkovoy side forward, and observing the tilt within five degrees. Accordingly, the seams will also have different thickness: at the bottom 5 mm, and at the top - up to 25 mm.
In order to make the masonry tidy, the excess mortar is removed with a trowel, and after it seizes a little, the jointing is performed. The bricks are immediately cleaned, sweeping them with a dry brush, and then wiped with a damp cloth. Now masonry should be given time to build strength. At about the fifth day, the solution hardened enough to be able to dismantle the swirled.
Arch door of giprok
And yet, brick arches are more often provided for when erecting external and internal bearing walls. For simple zoning of premises, this method is practically not used. And why, if there is such a wonderful material, like drywall?
- With its help, the design is put quickly, of any configuration, and its cost ultimately depends not so much on the construction material, as on the finishing option (see How to create an arch - decorate it with your own hands). The simplest version of the arch is made in the already finished aperture, from which it was decided to dismantle the door - or in the passage, which has been decided to give a vaulted shape.
Frame vault: simple solutions
Due to the removal of the door frame, the passage becomes wider by about 6 cm, but the height will be, on the contrary, somewhat lower. The thing is that the jumper, which is located above the door, is not always possible to remove - and in terms of complexity, such a “sheepskin” is not worth the candle.
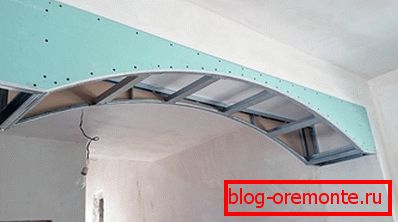
- Therefore, the installation of the arch in the doorway, in this case, is limited to the installation of parts of the vaulted part of the arch, cut out of plasterboard (see The drywall arch with your own hands is a step by step instruction) and mounted on bars mounted under the lintel, or ceiling profiles. The design of the frame depends on the thickness of the wall and the shape of the arch itself.
- If it is a thin partition, a block of similar thickness can be used as a base for the installation of drywall. But it is better when two profile guides or a pair of bars are installed in parallel along the perimeter. As for the curved part of the arch, the easiest way to do this.
- Details of the vault immediately cut is not worth it. First, on one side of the frame is mounted a rectangular strip of plasterboard, the width of which slightly overlaps the height of the curvature of the arch. The marking is made directly on it and the arch semicircle is drawn, and then the jigsaw removes the unnecessary part segment.
- An arched flexible profile is screwed along the curvilinear cut line - and now one side of the arch is ready. Then, the opposite side is executed in the same way: a rectangular strip is also similarly mounted; the points are transferred onto it with the help of a metal angle piece, and connecting them will result in a curved line that is absolutely identical to the first one.
- After the second element of the arch is ready, jumpers must be installed between the two sides, which will provide the necessary rigidity to the structure. Now you can close the frame below. In order to avoid problems with the bending of cladding material, for the installation of arches, it is better to use “designer” drywall, which is reinforced in the thickness with fiberglass mesh, and it bends well dry.
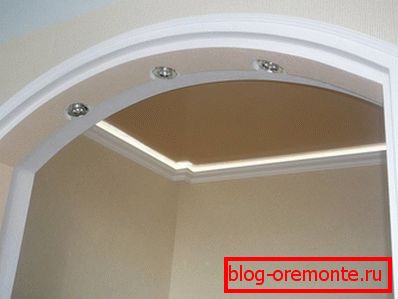
Note! When working with ordinary gypsum plasterboards, before bending it, the sheet will have to be pre-moistened and possibly perforated - this already depends on the bend radius. For the manufacture of a deep arch, you may need a pattern similar to that used for laying brick arch.
- If there is a desire to make the backlight of the arch, then you need to stretch for this wire before the bottom of the frame is hemmed. In this case, holes are made in advance in the curvilinear element of the vault for the lamps. To do this, use either a hacksaw on drywall, or a nozzle on the drill "crown".
- Ennoble the arch can be in other ways. For example, with a sufficient width of the passage, on the sides you can make small pedestals, and install on them columns of foam or plaster. But in general, you need to think in advance how and how the opening will be faced. We will talk about this in the next chapter, and now let's say a few more words about partitions with openings.

- Situations are very different, and sometimes the owner wants to make an opening where he was not there before, or vice versa, put a partition with an opening that would not so much divide, as harmoniously unite the space of adjacent rooms. When the partition needs to be installed, it is performed according to the same principle, which was mentioned above - only here the walls are installed first and then the arch.
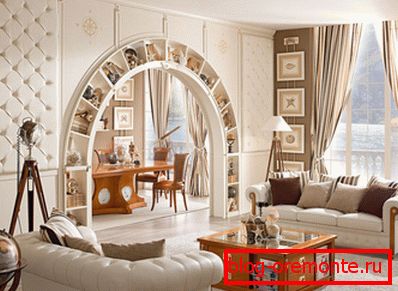
- Such a partition can not just serve as a decorative element of the interior. If you have a rack or deep niches in it, then it will replace part of the furniture for you, and will allow you to store on your shelves not only different small things, but heavier items such as a TV, music center or multi-volume books.
If you need to cut an opening in an existing wall or partition, then the easiest way to do this is to contact a company that provides diamond cutting services for concrete and brick walls. Professionals, armed with special equipment, will do this work in a matter of hours, cleanly and neatly - moreover, the outline of the opening will immediately cut out the shape that the customer wishes.
You will only need to buy a frame for it from the manufacturer, and insert the arch into the doorway.
Wooden arches
So, at your disposal there is a ready doorway without a door that needs to be refined. There are many ways to do this, and it is impossible to describe them all within one article.
We will talk about the most popular frame of the aperture - wooden arches, which are purchased in the kit. We will describe further what parts are included in such kits, and how to insert the arches into the doorways.
- Prescribing the word "wooden", we do not mean that the elements of the arch must be made of solid wood. It may well be a cheaper painted MDF; plywood, veneered with natural veneer; or laminated chipboard. You choose the option according to your budget, since the price of the product directly depends on the material and its facial finish.
Completeness
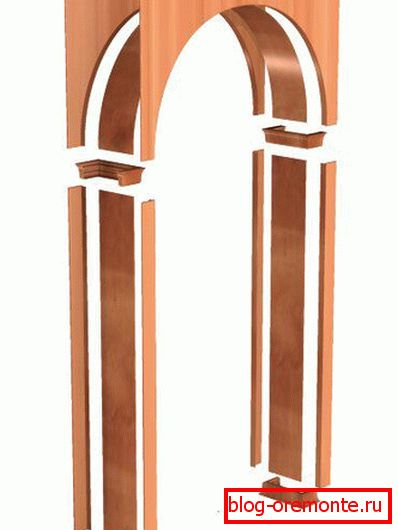
The quality of wood does not affect the installation technology at all, so this instruction can be guided regardless of the choice made. And so, you bought a complete frame: all the details are packed in one briquette, which you will open before you assemble the arch in the doorway. By the way, most of the kits are universal - and this means, then from their parts you can assemble various options for interior arches.

But first you need to open the package and check its completeness. Immediately under the lid, you will see something like the specification shown in the picture above.
Of course, not all sets are the same, but they, in varying variations, contain such details:
- Platforms 4 pieces - are installed in pairs on each side of the opening.
- Vaults and Bouncers
- Банкетки
- Upper and side squares
- Face and docking plates
- Intermediate plates
- Dowels - with their help, parts are interconnected
- Self-adhesive plugs covering attachment points
Assembly
Before you install the arch in the doorway, you need to make some preparatory steps. To begin with, you should accurately measure the height, width and depth of the opening. In the manufacturer's instructions, the maximum tolerances of the kit are always indicated, with which it is necessary to compare the obtained measurements.
So:
- Tolerances are usually given with a margin - for example: height 2.4 m, width of the opening from 0.79 to 1.5 m, and wall thickness 0.185 m. To reduce the purchased arch in height, it is enough to cut off the excess length from the platband, and join the places of the cuts with the stools. Then, two holes are drilled in the butt of the platband, into which the connecting dowels will be inserted.
- If the arch will be mounted not by glue, but mechanically, then in the frames, as well as the arches, there are also drilled holes for fasteners. Most arches have at least three options for the assembly of the width - this is what is needed for vaulting. They are intermediate parts and with the help of the same dowels they connect the left and right parts of the arch into one line.
- After one side of the opening is framed, it is the turn of the intermediate plates that overlap the end part of the opening. First, they, in the same way as the trim, shorten the height of the opening. Then, the plates will need to cut off the extra width, leaving 10 mm of margin on the slots, and put the end strips on their bottom edges.
- Mounting slots are located on the back of the platbands. To insert intermediate plates in them, the platbands must be installed so that the edges of the grooves are not hidden behind the corner edge of the opening. After both plates of the inner filling are mounted, they are fitted with connecting strips, which will allow to connect the sidewalls with the vaulted part.
The second side of the arch is assembled in the same way as the first: first fasten one trim, then the left and right sides of the arch, and then the second trim. It remains only to close the caps of the place of attachment - and your arch is ready.