Whitewashing the ceiling itself
If you decide to just whitewash the ceiling, and not paint, glue the tiles, wallpaper, or mount the stretch canvas, then follow simple instructions and you will be able to update the repair yourself without too much expense.
Whitewashing the ceiling with your own hands is a simple matter, but requiring some skills. In addition, it is the most common method of finishing, which has been used for decades. This method still remains popular, despite the rapidly developing market of building and finishing materials. And it does not lose relevance for several reasons:
- This is the cheapest way to freshen up the ceiling.
- No other material provides such environmental friendliness and safety.
- The process does not require special knowledge and skills.
- The result is a neat clean surface.
Before you whitewash the ceiling with whitewash, you need to remove the old finish layer from it and prepare the solution for work. It is also important to prepare the room for the upcoming alteration and gather in a heap, and if necessary, purchase the missing inventory.
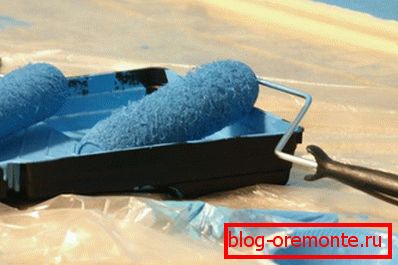
For work, you will need a wide soft-bristled brush, a roller with a tray, a bucket for chalky solution or a Soviet-style vacuum cleaner with a spray nozzle and a half-liter can. Do not forget to prepare the ladder so that later you don’t have to construct traumatic structures from stools and chairs. It would not be superfluous to be reminded that you should take care of the choice of special protective clothing: gloves, hats or scarf, jackets.
All items and things from the room need to endure, and if this is not possible, then wrap them with oilcloth or film, newspapers. After washing the old whitewash layer or dismantling another ceiling covering, proceed to the primer surface. As soon as the surface brightens and spots disappear on it, you can start whitewashing.
Material selection

Today, all three methods are successfully used, because each of these materials has good qualities.
a piece of chalk

Mel is known for providing deep white color of the ceiling, it is perfect for finishing both small and spacious rooms, because it visually makes the room taller and lighter. Chalk is a natural material. It is completely harmless and does not provoke allergies.
Lime
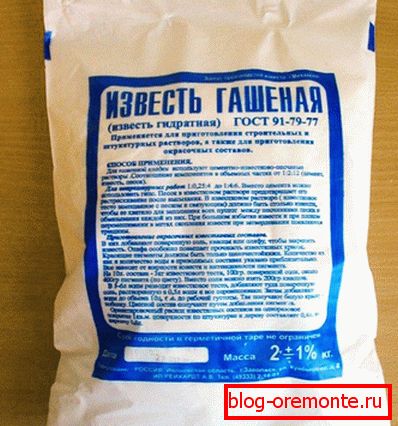
Lime дает антибактериальный эффект и способна просачиваться в небольшие расщелины, скрепляя их и делая незаметными. Однако такой материал применяют преимущественно для побелки нежилых помещений, поскольку гашеная известь является аллергеном. Для достижения наилучшего эффекта в нее добавляют синьку, которая придает потолочной поверхности приятный голубоватый оттенок.
Note! If the ceiling was whitewashed with lime, then it is not recommended to cover it with chalk. Otherwise, you will get an abundance of dark circles on its surface.
Water emulsion paint
Paints based on water emulsions are also great for whitewashing the ceiling. In addition, this method is considered the most advanced today, because the paint lasts longer compared to chalk or lime.
Note! To determine the whitewashed ceiling, you need to hold the surface with your hand, since the chalk gets dirty, then traces will remain on your hand. And you can also rub the whitewash with a wet finger, and if a trace of water appears on it, and the finger remains clean, then there is lime in front of you.
How to prepare a solution

It is obvious that the quality of the solution depends on the proportions in it of the selected components. To prepare a chalk solution (for 12–15 m?), It will be necessary to pour five liters of warm water into the container, add about 30 grams of glue there and gradually, in several stages, pour 3–3.5 kg of chalk. Note how to properly prepare the chalk: it must first be sifted through a sieve to avoid droppings, which later will be ugly allocated on the ceiling.
In the finished solution often add blue, but a little - 15-20 grams. It will prevent the appearance of undesirable yellowness on the whitewashed ceiling and will give it a rich white color. But be careful, do not overdo it with blue, otherwise you will get a blue room.
Note! It is desirable to pass the resulting solution through cheesecloth to prevent the ingress of badly stirred lumps.
Check the desired consistency of the mixture will help an ordinary knife. If the whitewash drains completely from the blade of the knife - the solution is not suitable, it is too liquid. It is easy to fix - add chalk or let stand for a day. Chalk will sink to the bottom, and on the surface will be excess water, which will need to be carefully scooped out.
For mortar, you must first soak 100 grams of salt. Then heat one liter of water and dilute 2-3 kg of lime in it. Add salt, aluminum alum and dye to the liquid as desired. Mix well and dilute with warm water, but not immediately, but gradually, bringing the total volume of the solution to 10 liters.
Whitewash technology

The prepared solution from chalk or lime can be applied manually as well as with a spray bottle. It will be easier to work if you conditionally divide the entire ceiling into sectors.
In the first case, you need to take a brush, dip it in a whitewash and cover the entire surface with uniform strokes. It is better to start from the corner and move in the direction from the window to the exit. It is necessary to move the brush in one direction, excluding circular and arbitrary strokes. The second layer must begin in the opposite direction - from the door to the window. Apply smears perpendicular to the application of the first layer. It is important to do so that there are no traces of the brush, then the surface will look perfect. For whitewashing experts advise choosing a wide brush (200 mm), pre-steamed in warm water. Instead of a brush, a roller is perfect, preferably wide on a long handle.
Using a vacuum cleaner

Whitewashing the ceiling can be done with a vacuum cleaner. This will reduce not only the whitening time, but also reduce the complexity of the process. For work, it is advisable to use an old Soviet-assembled vacuum cleaner, as it is equipped with a special spray nozzle.
Note! To achieve an excellent result will help not only the vacuum cleaner, but also other devices designed for these purposes.
The nozzle is a lid that fits on the jar. For better attachment, it is worth wetting the cover with water. Usually they take a half-liter jar so that it is not hard to keep on weight, they pour the solution in there and turn on the vacuum cleaner.
When working with a vacuum cleaner, keep the sprayer at a distance of 50 cm from the surface of the ceiling. If you bring a closer, there is a risk of droplets from the excess solution, if the sprayer is located far away - the mixture will dissipate. As soon as the first layer dries, you can start applying the next one and so on, until you pass the entire ceiling 3-4 times. The result is a dense film that will hide small defects.
With this whitewash method, it is important to protect the face and respiratory tract from particles of lime or chalk. Therefore, use a respirator or gauze bandage, goggles and gloves.
Whitewashing the ceiling, though quite a laborious process, but everyone can master it. Additional information can be obtained by watching the video, which clearly shows what to do and how.
Video
This training video shows painting (whitewash) of the ceiling and baseboards: