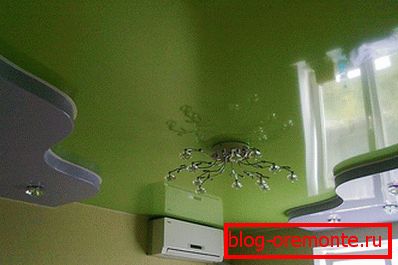
Two-level suspended ceiling itself
Repair in the apartment is a large amount of work. Even if it is made in just one room, this means that it is necessary to change the wallpaper on the walls, it is possible to replace the floor screed and lay a new linoleum or floorboard on it, as well as update the ceiling covering.
By the way, where is the best place to start doing repairs? Of course, from the ceiling. Why is it so easy to understand. Simply, it is located above all. If you first lay the linoleum, and then make the ceiling, then putty particles and drywall dust will fall on the clean floor. The question is: what is the best ceiling to do in the room?
The answer can be given, knowing the height of the room. Provided that it is higher than 2.5 m, you can make a two-level stretch ceiling with your own hands. If the room is low, then a single-level - this is the only option for a small room.
Types of two-level ceilings and their advantages

What is interesting, for the first time stretch ceilings began to be used in France. That is why single-level and two-level structures of this type were called by name French countries. Using this method of erecting ceilings, you can easily create a unique design in the room, given that such decoration of the top of the room has many advantages. These include the fact that with such a ceiling it is easy to close any irregularities, hide ventilation and remove electrical networks from the eyes.
Before talking about how to make a two-level stretch ceiling, it would be wise to know how they differ. If we talk about the material used to finish the ceiling, we can note several types - those where it is customary to use PVC and fabric. PVC canvass is made from polyvinyl chloride film. Its surface has a glossy shade. By itself, the film has great strength and easily withstands a load of 80–100 kg / cm ?. In addition, this coating is known for the fact that it can be of almost any color and shade, which allows you to create a unique room design.
Another advantage is the waterproofness of polyvinyl chloride. If negligent neighbors are flooded from above, nothing terrible will happen to the ceiling, except that it will slacken sufficiently. Even the furniture and decoration will not suffer! In this case, water is removed from the ceiling, and this is done easily, and it again becomes what it was at the beginning.
Note! How exactly to remove water from the stretch ceiling? It is necessary to turn off the electricity, make sure that the neighbors cut off the water. Then the chandelier or the luminaire in the stretch ceiling is dismantled, a hose is pushed through the hole and water is drained into the containers prepared in advance. If the hose is long enough, you can stretch it directly to the bathroom or toilet.
Cloth for stretch ceiling can be made of fabric. Before installation, it is impregnated with various polyurethane compounds. Unfortunately, the fabric is not very versatile and not so popular. Most often, it is mounted in gazebos or rooms where heating is weak or completely disconnected. In addition, the surface of such a ceiling is not glossy, and there is no wide choice of colors, as is the case with the use of PVC.
Preparation for installation

Nowadays the stretch ceiling of two tiers, covered by PVC film, is quite popular. If you use just such a composition, you can divide the room into zones without installing plasterboard or aerated concrete partitions. Moreover, such ceilings make it possible to embed chandeliers in them, to place several spotlights or spots.
During the installation of two-level stretch ceilings, practically no dust is generated, and the installation itself takes little time — only about 3-4 hours. Elapsed time depends on the size of the room, the dimensions of the ceiling and the number of levels in it.
Note! Potted flowers will have to be brought to another room, since during installation the temperature in the room can rise to 60–70 ° C. It is enough to simply remove the furniture, but you can not touch it, if it doesn’t bother you.
Actually, how to make a two-level stretch ceiling in an apartment? In general, it is not so difficult. If you want to see your home beautiful, with the original ceiling, you can do everything yourself by purchasing the necessary tools and materials.
The necessary materials include:
- selected fabric (PVC or fabric);
- guide profile, also known as a harpoon or baguette;
- sheet plywood from which the frame is made;
- wooden bar 60? 60 mm;
- fasteners for installation of metal lamps in the shape of the letter “P”;
- special thermocouples in which lamps will be installed;
- adhesive composition and a box of plastic dowels 60 mm.
From the tools you must have:
- water or laser level - the latter is more accurate;
- propane heat gun;
- hammer;
- drill and screwdriver (better battery);
- hacksaw or grinder, as well as a saw on wood;
- spatula, which is needed when installing the blade;
- blade clamp (for the same purpose);
- whipping cord, tape measure and pencil.
How to mount a stretch ceiling of two levels

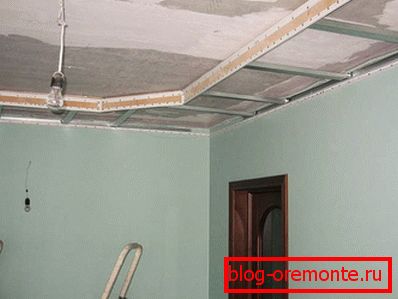
Before installing the frame lay the wiring necessary to connect the lamps and chandeliers placed on the ceiling. However, before you start mounting, you must stretch it in the corrugation and after that fix it with metal clamps.
Note! Clamps can be made independently. For one such product, you need to cut a strip of 1.5 cm wide and 7–8 cm long from a sheet of tin. A hole for a dowel is drilled in the center of the strip; Then you can clamp the corrugation. Or you can use a dowel with a screw, on which copper wire O1.5 mm is screwed. She can also fix the corrugation.
Further, with the help of a laser level (in its absence, a water level will also fit), the first level of the ceiling is marked. You can mark where it will be located at a distance of 3-5 cm from the old ceiling. The very same line is carried out with the help of beats.
The next level is lowered by a distance equal to the height of the spotlights, that is, 10–12 cm. Next, you need to make a markup of this level; The process is performed as described above. If in this tier it is planned to make any elements of a round shape, then their outlines must be put on the ceiling with a pencil so that the frame can be easily assembled.
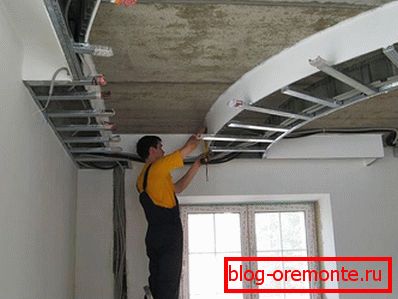
To fix the plywood construction to the old ceiling, you need a few meters of timber from the tree. It should be cut into pods, each about 12 cm in length. Then, using dowels, these pieces need to be fixed to the ceiling along the drawn lines, which marked the rounding. From one bar to another it is necessary to make intervals of approximately 15 cm.
A strip of plywood is attached to the installed bars on the screws. Its width is 10–12 cm. It is required that it in no way go beyond the drawn line, but repeat its contours.
How to fix the baguette profile to the wall and on the plywood frame? One of the requirements is that they must be on the same plane along the horizon. Lower the baguette, which is usually mounted on the walls, you need to lower 11-14 cm from the ceiling. When the frame structure is assembled, you can begin to mount spotlights.
Installation of spotlights and canvases

Lamps of this type are mounted in a frame. U-shaped fasteners and dowels are used for their fastening. Then the lighting in the form of a wire in a corrugation is supplied to their contacts. Best for this is suitable copper cable O1, 5 mm ?. The required power of luminaires should not exceed 50 watts.
The canvas itself begins to be mounted on the tier made first. The fabric unfolds and clamps fastened in several corners. With the help of a gas heat gun, the room needs to be heated to 59–61 ° C. When such a temperature is reached, the canvas softens and easily stretches onto the frame. The edges of the film, using a harpoon mechanism, are driven into the groove of the baguette.
Note! First of all, the installation starts from the corners, and only then fix the middle. The room must be warmed up until the installation of the stretch ceiling is completed.
After the first tier is mounted, you can start working with the second one. To harmoniously complete the process, a special decorative profile is used, which bends easily and can hide all gaps or irregularities on the wall.
When the canvas is stretched over both tiers, it is possible to finish the work by installing fixtures. In the stretch ceiling, thermal rings are glued to the places where the lamps are located, after which holes for the light bulbs are neatly cut out in them.
Video
This video demonstrates the installation of a multi-level stretch ceiling with LED lighting hidden under the ceiling: