Two-level ceiling itself
Today, ceilings of suspended and suspended type are very popular. Their choice is not only a fad. The appearance of such ceilings makes the living space much more modern and attractive. Many confine themselves to a one-tier ceiling, but those who dare to build a two-tier structure have much more opportunities to realize their designer fantasy. Of course, the ceiling on two levels is more difficult to build, so many are interested in how to make a two-level ceiling so that it becomes a highlight of the interior and attracted attention.
Preparatory work
For repairs of this magnitude, full access to the ceiling surface is needed. In order to prevent anything from moving, it is necessary to free the room as much as possible from all pieces of furniture, in extreme cases, move it to a place that the master does not need to be during installation.
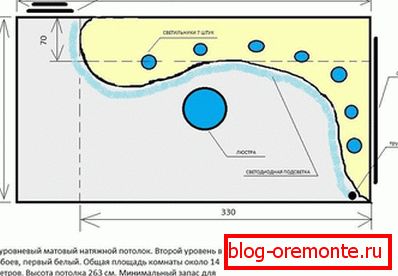
Then you need to examine the ceiling. It is desirable that its surface was in a satisfactory condition. This will save you from additional work when installing a frame structure that needs to ensure reliable fastening. Be sure to create a draft two-level ceiling with drawings, which will be applied to the required dimensions. Performing this phase of the work will make it possible to calculate the amount of materials needed. At the preparatory stage, it is equally important to pre-think the layout of the wiring and installation of lighting devices.
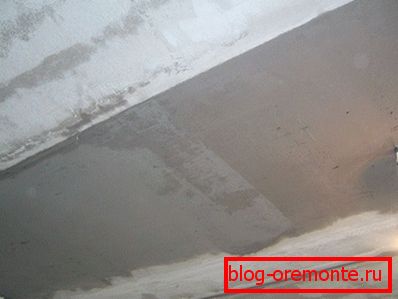
Before undertaking the arrangement of a two-level ceiling, you need to carefully inspect the surface of the existing ceiling. If the old whitewash or paint peels off, you need to clean up to the layer of plaster or floor slab with a spatula. If the plaster without areas with delaminations and cracks, you can finish the finishing plaster. If the ceiling is sometimes covered with cracks or the plaster lags behind the ceiling surface, the unusable area is cleaned to the very base. Then the surface is thoroughly treated with a primer and then a mixture of plaster. If the ceiling is streaked with cobwebs, and more than a third of the total area of the ceiling surface is damaged, it is advisable to completely plaster it. Plastering fully and the ceiling, which is characterized by significant irregularities and differences. If the irregularities are less than one centimeter deep, you can simply apply the paint mesh and several times putty putty until a flat surface is formed. Before embarking on the subsequent work, you need to wait some time to completely dry the fresh putty and plaster.
Work on the calculation of the two-level ceiling
Work at the design stage is considered difficult, and it will determine how the two-level ceiling will look in the future. During design work, it is necessary to draw the outlines of the projected ceiling, determine the locations of the protruding structural fragments and hidden niches, as well as outline the points of installation of the lighting devices. If you do not have enough skills and qualifications to perform design work on this profile, you can bind to this particular room one of the standard options.
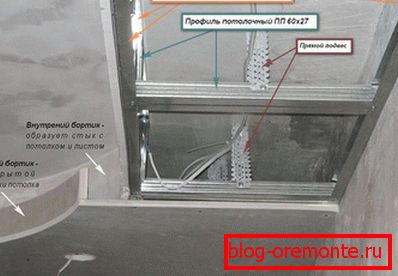
When the project with the design decision is made, you can take up the development of the design scheme for the future ceiling and the calculation of materials needed for construction. This is done in several stages.
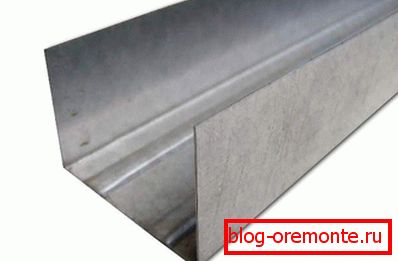
Based on the dimensions of the room, is determined by the perimeter. For example, we take a room with a length and width of 6 m and 4 m, respectively. From here, the perimeter is P = 6 · 2 + 4 · 2 = 20 linear meters. This number will determine the length of the UD directional profile (PN). For a ceiling with two levels, the direction profile must be multiplied by 2, since it will be necessary to make another constructive guide for the second level.
Note! If during the construction the opposite walls turned out to be of different sizes, the length of the larger one is taken into account. That it will appear in the calculations.
Now it is necessary to determine the number of CD-profile for the frame (PP). The profile for the frame will be fixed with a distance of 0.6 m between them, and the length of its slats should correspond to the width of the room. The length of the room is 6.0 m divided by 0.6 and we get exactly 10 profile rails for the frame of 4.0 m each.
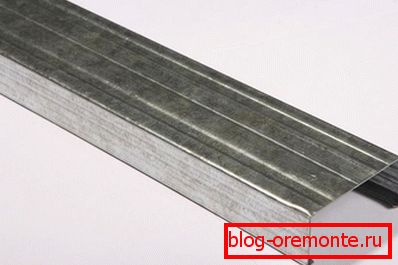
Note! The distance between the slats of the frame profile of 0.6 m was not chosen by chance. Since gypsum sheets produce standard sizes with a width of 0.6 and 1.2 m, when installing them, sheets should be laid so that their edges coincide with the location of the profile rails. Standard and the length of drywall sheets. In this case, fit the size of 2.5 m.
Knowing how many profile rails are needed for the frame, you can easily determine the number of direct suspensions that will act as fasteners for the slats. The distance between the suspensions is 0.6 m, but the first fasteners are fixed from the walls along the guide at a distance of 0.3 m. As a result (4.0: 0.6) · 10 × 66 suspensions for fixing the frame profile.
To strengthen the ceiling structure on 2 levels, you must additionally place jumpers between the main profiles of the frame and clamps for them, which are called crabs. First you need to determine the number of crabs, the distance between which will be 0.6 m. According to the same principle of calculation of crabs 66 units are obtained. As a result, there are 7 rows of jumpers, which in length will reach 6.0 m.
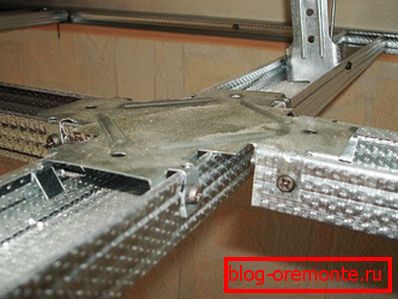
Note! Crabs and lintels should be at a distance from the walls, based on the size of the structure on the second level. For example, with the existing width at the second level of 0.6 m and future illumination of the hidden type, the jumper at the beginning and at the end will be installed at a distance of 0.5 m from the wall surface.
Having considered the necessary size and number of fasteners of the first level, it comes to the second. At this level, the calculations are easier. For the jumpers of the lower level, you will need 24 CD profile elements of 0.4 m each and an additional 4 of 1.0 m for connecting in the corners. In addition, to fix the jumpers will need 28 suspensions.
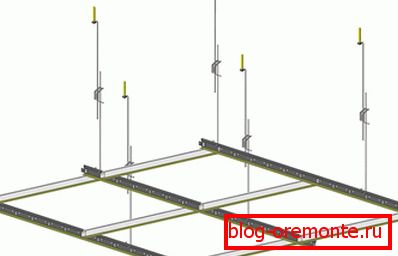
Note! Direct suspensions are used only if the ceiling height of the second level does not exceed 0.12 m.
If there is a need to strengthen the frame structure and create additional fasteners for gypsum plasterboards, located vertically, you need to purchase racks from the CD profile. The racks must be the same number as the counted second-level jumpers, namely 28 units.
At the last stage, you need to decide on the number of drywall sheets. The calculation is simple due to the standard size. For installation in rooms of residential houses, it is best to use sheets with dimensions of 2.5? 0.6 m or 2.5? 1.2 m. To calculate the required number of sheets, measure the area of the upper ceiling level along the profile edges and divide by the area of the sheet itself . As a result, it will be known how many sheets will be needed for the first or top level. The calculation of the lower or second level is carried out identically, with the only difference being that the area of the vertical walls and edges, which stand for the structure, is added. Having counted the number of drywall sheets, you need to determine their thickness. Based on the strength and weight, the best choice would be plasterboard sheets with a thickness of 9.5 mm.
Note! In many cases, a two-level ceiling is created only along the contour of the room, and the middle is left single-level. On these types of ceilings you can save money. In addition, it is possible to build a suspended ceiling or otherwise show imagination.
Wiring device

First you need to determine the points of installation of lighting devices. After that, the power consumed by all electrical devices and the number of wires in meters is calculated. Having on hand all the data, you need to buy a wire of the required thickness. For wires still need to purchase a cable channel, wiring box and corrugation. The latter can be directly stretched across the entire frame structure. Other elements need to be properly and securely fastened to the walls, ceiling and between themselves. These operations are performed using different dowels, anchor bolts and screws:
- for fixing to the surfaces of the ceiling and walls you need dowels and screws 6? 60 mm or 6? 40 mm, fastening pitch 0.3 m;
- for fastening profiles with suspensions and crabs between themselves, use self-tapping screws LN9, LB9 or LN11, LB11;
- for fixing sheets, self-tapping screws MN30 and MN25 are used with a distance between the mount of 0.25 mm.
Note! The crab is fastened with four, and the suspension with two self-tapping screws. When performing work it is better to use helpers.
Installation of a two-level suspended ceiling
Consider how to install a two-level ceiling with their own hands in the most popular version. For this you need to do certain operations.

- After the ceiling surface is in full order, we mark the ceiling height on 2 levels on the wall with the help of a tape measure. The thickness of the plasterboard is not taken into account. On the surface of the wall are several marks that are connected by a thread. The masking thread is stretched and released, resulting in a smooth line that represents the level of the mounted ceiling, from which you need to push off in further work.
- Marking is applied to the surface of the ceiling for the CD frame profile. Using the applied markup, the suspension is attached, to which the profile is fixed. The same procedure is repeated - again a clear line is drawn with a masking thread. After that, with a distance of 0.6 m, marks for the remaining profile rails are applied.
- Then, in the profile of the UD guide, holes are drilled for fixation with a distance of 0.3 m from each other. The profile is attached to the wall, and its bottom must coincide with the line made. After that, it is necessary to bump lightly into the notches on the surface under the dowels and drill the holes in the perforator. The dowels are driven into the holes, the profile is strung on them and screwed to the wall with screws.
Note! The number of self-tapping screws and self-tapping screws that need to be screwed is large, so for convenience and speed it is better to use a screwdriver.
-
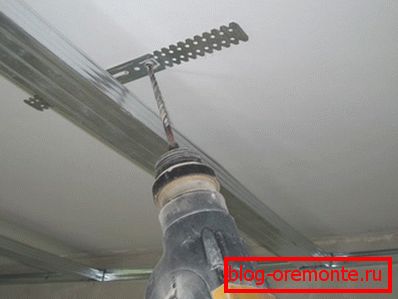 There comes a turn of the suspension, which is attached to the ceiling and at certain intervals by a perforator holes are drilled. For structural strength, two holes are made. Dowels are driven into the holes, after which the suspensions are fixed to the ceiling.
Note! Holes must be made along a line that should be strictly perpendicular to the suspension and cross it only in the center.
- Now the CD cage profile is fixed to the upper level of the ceiling. We take the suspension, bend it P-like in such a way that its width allows the profile to slide freely. With the help of the holes that are on the suspensions, the height of the first level of the ceiling is set. Suitable holes are preselected, and through them with screws, the profile is fixed at a certain height. So that the suspension is well sealed with a profile, one screw is used on each side.
-
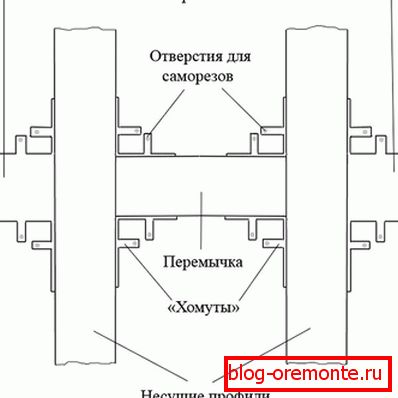 The next stage of work will be the installation of crabs. With the help of a tape measure, serifs are made on the surface of the ceiling at the installation site of crabs, with which the transverse profile rails will be fastened. To put the crabs in their workplace, they are placed on the profile (the antennae should be pointing down), snap into the middle of the structure and fasten with four screws to the profile.
- At the first level it remains to fix the frame jumpers. To do this, special scissors or grinder cut jumpers in the right quantity and the required size of the profile CD. To install the jumper in its place, we put it under the bottom of the crab, press it, snap it in and fasten it together with two screws.
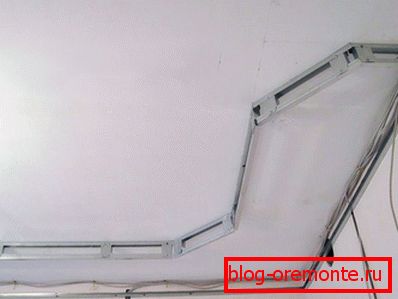
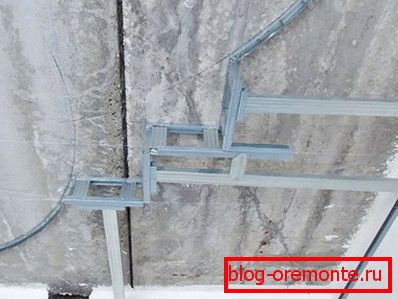
The skeleton of the first level is ready. It is the turn of the installation of the lower level design. The works are carried out according to the already known scenario, only minor amendments are made:
-
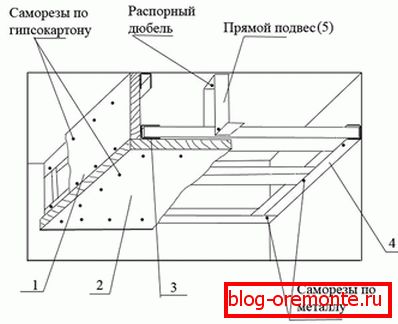 First, the CD profile is passed into the center of the UD guides and fixed to the gimbal. After this, the fastening with two screws to the guide-type profile is performed;
 - for reinforcement of the construction, all rails of the lower-level CD profile are fixed to each other along the contour with the UD profile and fastened with one screw;
- To fix the plasterboard plates, which are mounted in a vertical position, the profiles of both levels are fastened with a jumper from the CD profile. They are mounted above all horizontal rails of the lower-level CD profile;
- after the frame is completely ready, you can deal with the device wiring. It is carried out with the help of corrugations, which together with the wire stretches directly from the point of arrangement of the lighting device to the network connection. You can apply the second option - use a cable channel that is fixed to the wall surface. When arranging electrical wiring, most importantly, do not forget to leave 0.15 m of wire free, which should extend beyond the edges of the ceiling structure to connect the lighting device;
- then fixed plasterboard sheets. Work begins at the top level. For greater stability, sheets are attached to the profile, first in different places, fixed to the ceiling with hangers. Self-tapping screws are used for fixation, which are screwed with a distance of 0.25 m between them;
- after the work with the upper level is completed, work with the lower one begins. At this stage, in order for the sheets to be exactly flush with the profiles, they must be carefully cut. This is done simply - with the help of a ruler, cardboard is unilaterally cut through, a break is made and a recess is made on the other side. If necessary, pass along the edges of the plane. At the end of the sheet is attached to the profile;
- it remains only to sew the internal structures with vertical guides of drywall between the two levels. They are screwed to the profile vertical racks. If the lower level has a specific configuration, the cut gypsum board is soaked in water. After it becomes pliable for bending, the plate is given the desired shape, applied to the profile and fixed.
At the final stage of the arrangement of a two-level ceiling, holes are made at certain points for the output of the ends of the wires. The protruding edge of the sheet is glued over with a plasterboard border that will hide the backlight. The joints of the ceiling are primed and spatula. After drying the surface of the ceiling comes the turn of the finishing and connecting lighting devices. An example of making a two-level ceiling can be seen in the video:
Installation of a two-level stretch ceiling
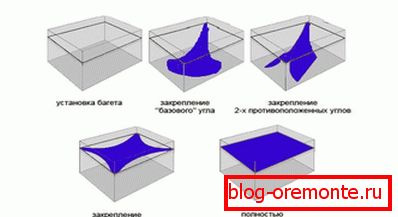
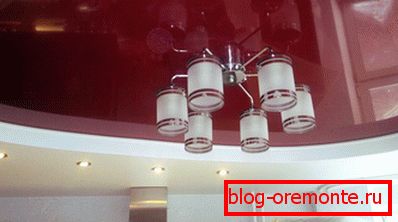
Installing a stretch ceiling on two levels is a little easier compared to a suspended one. To a large extent, this refers to the type of supporting structure. In addition, much less material is used for the equipment of a suspended two-level ceiling. Other nuances of performing work are similar to those described above. Again, you need to start working with creating a new project, in which the design of the ceiling will be completely different, and recalculation of materials. The main difference between a stretched two-level ceiling and a suspended ceiling is that in the first embodiment, the lower belt is located only along the contour of the room. The central part of the structure is left for the tension fabric. To build such a ceiling, it is necessary to do the following work:
- Along the perimeter of the room you need to build a single-level construction of plasterboard sheets. Installation is carried out in the same way as when installing the above ceiling.
- The profile is fixed to the constructed structure at the required height, to which the tensioning sheet will be attached.
- With the help of the heat radiator, both the canvas and the room are heated. After that, the material is subject to tension.
- First, two corners of the web are fixed, diagonally opposite to each other, then a turn of two other corners comes up. Contour tension occurs alternately from different sides.
- At the final stage, lighting devices are connected.
Mount a multi-level ceiling is much more difficult than a mono. The work is laborious, requires concentration of attention and knowledge. When tensioning the second-level leaf, it is necessary to work with assistants, all actions should be coordinated.
A photo
