The ceiling of the plastic panels yourself
The modern construction market is able to offer a large number of materials that can be used to finish the surface of the ceiling. With their help, you can level a lot of flaws, which may be irregularities or located on the form of electrical wires. One of these materials are plastic panels. However, it is not a secret to anyone that the price of finishing work per square meter of the surface is often comparable to the price of the material for the same area. In this regard, it is worthwhile to install a ceiling made of plastic panels with your own hands, since this is a rational solution.
General material description

The plastic panel is a finishing material mounted on the frame. Ceiling panels are distinguished from wall panels by smaller thickness and weight, however they also have greater brittleness, which should be taken into account during installation work. With regard to performance, it is worth to highlight the resistance of the material to moisture, durability, ease of installation and a variety of colors.
Stages of work
In most cases, a productive approach involves the division of work into separate stages and their consistent implementation. No exception is the installation of plastic panels.
Training

All work is better to start with careful preparation. In this case we are talking about removing the old coating. If the ceiling is whitewashed and has already managed to swell up in some places, then, of course, it is better to remove the whitewash from the ceiling. at all.
Note! It is permissible to clean the whitewash only in those places where it crumbles and primed the ceiling. If the ceiling is covered with wallpaper, and they hold on to death, then you can leave them as is, remove all protruding elements like lamps, chandeliers and move on to the next stage of work.
Required tools and materials:
- level,
- pencil,
- whipping cord,
- wooden slats 5? 5 cm or metal profile UD and CD.
Marking

The next stage of work is drawing the necessary markup. To do this, using a laser or water level, you need to mark the plane of the future ceiling.
- First, on each of the walls should be marked by two points on each side. Mark better closer to the corners. It is worth mentioning that you need to mark the walls at some distance from the ceiling plane. In most cases, 5–7 cm is enough.
- Then, using a tamper cord, you need to connect these points together, which will give a visual image of the future plane of the ceiling.
- After that, you need to mark the rest of the ceiling area. The point is that with the help of the same cutter cord, at a distance of about 70 cm from each other, it is necessary to beat off a number of longitudinal lines necessary for the installation of the batten.
Mounting the grid

After applying the markup in accordance with it, sheathing is mounted. For it can be used as a simple wooden slats section of 5? 5 cm, and profile slats of metal, depending on preference.
Note! For installation of the batten, marking holes should be made along the marking lines into which the dowels are driven in.

The distance between them should be equal and be about 50 cm. It is convenient to control the horizontal positioning of the battens with a simple construction level.
Note! At the locations of luminaires, the batten should be further strengthened.
Panel installation
All of the above actions can be considered preparatory, and therefore, after their completion, you can proceed to the installation of the panels themselves. This process can in turn be divided into several separate stages.

- First set the starting level, which will serve to secure the baseboards. It is installed around the perimeter of the room. Installation consists in the fact that the bar is simply screwed with screws. The distance between them is chosen arbitrarily, but more often 20-25 cm is enough.
-
 The ceiling plinth is attached to one of the walls on the bar. It is simply inserted into the guides of the starting plate. Under the baseboard is inserted the first panel. To fasten the panel, the same screws are used, with which it is screwed to the battens of the batten.
 - In the same way other panels are mounted. That is, each next element is inserted into the grooves of the previous one and is attracted to the frame by self-tapping screws.
- Separately, it is worth noting that the installation of an extreme panel may be of some difficulty. Most often, it is necessary to cut it in width, but this is quite simple to do with the help of a regular clerical knife.
- When the entire area of the ceiling is covered with panels, the remaining parts of the plinth are installed along the perimeter. Plinth just inserted into the guides.
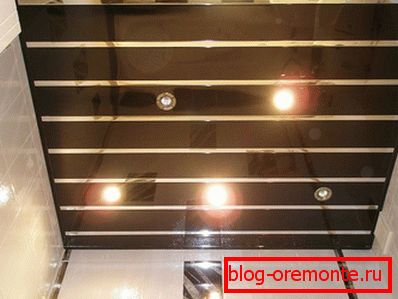
It can be added that when the process of installation of panels will reach the installation sites of lamps or chandeliers, the panels must be prepared, that is, equipped with special technological holes for wiring and fasteners.

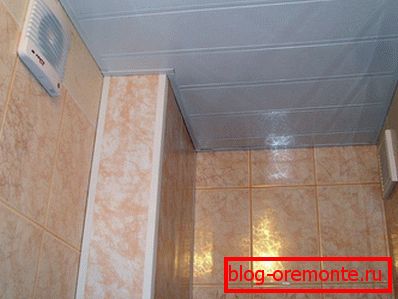
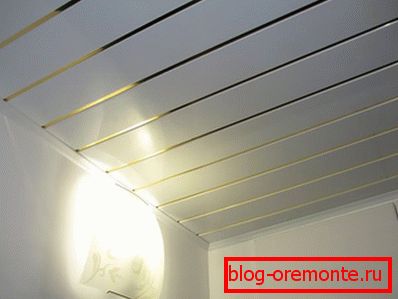
After installation of plastic panels on the ceiling, a visually attractive flat surface is obtained that will accentuate and complement any interior.
Video
See how to mount the panels on the ceiling in the bathroom:
A photo


You might be interested in the following articles:
- Glue ceiling installation
- Plasterboard ceiling
- Cassette ceiling installation
- How to glue wallpaper on the ceiling
- Stretch ceiling installation