Repair the stretch ceiling itself
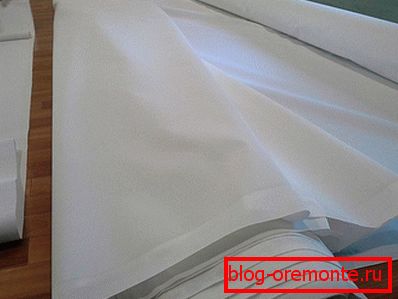
Stretch ceilings are not only harmoniously combined with almost any interior, it is really durable and reliable type of ceiling decoration. On top of the canvas can be applied glossy, matte or mirror coating.
Fans of the original design will appreciate the possibility of applying photos and ornaments. Structurally stretch ceilings are a film of polyvinyl chloride, made by seam or seamless technology and mounted on a plastic or metal profile. However, due to the occurrence of various non-standard situations such ceilings can be damaged. Moreover, the degree of damage can be very different: from small cuts, to cases of flooding by neighbors living on the floor above, and other unforeseen events.
Therefore, it is necessary to properly assess the condition of the ceilings and draw conclusions about the maintainability of the web or the need for replacement. In this article we will explain how to repair the stretch ceiling with your own hands, and also show detailed video instructions.
How to prevent a cut

- The long life of stretch ceilings is guaranteed only if the purchase and installation of quality materials with high strength and durability. It is better to choose seamless fabrics on a fabric basis, since they are more durable due to the homogeneity of the material.
- Attract to the installation work you need an experienced team, which specializes in installing a specific type of ceiling and can not only provide high-quality installation, but also give a guarantee.
Proper operating mode stretch ceiling should exclude overheating and overcooling its surface. When the room is heated above 70 ° C, the edges of the ceiling melt at the fixings, which may cause the web to break or sag. They are almost impossible to eliminate. If the premises are not heated in winter, then at low temperatures the material may become brittle and also burst.
When the room is flooded with cold water, a ceiling may sag. If water continues to flow, the web may burst due to increasing load. If you notice what is happening in time, then the film can be saved by piercing and subsequent drying. Flooding with hot water will necessitate a complete replacement of the suspended ceilings.
How to remove

Since in most cases the repair of stretch ceilings cannot be dispensed with without dismantling it, you should understand what fastening is used in a specific situation. To date, there are two main types of fastening: harpoon and bezgarpunnoe - mounting points can be located on the surface of the ceiling or walls.
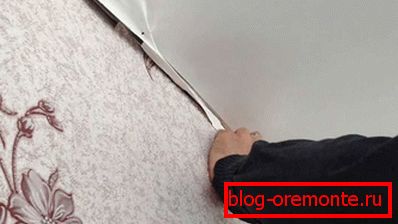
The no-joint connection is dismantled by removing the decorative finish and freeing the blade from the mount. To do this, you need to relax the tension of the film, which will allow you to freely pull the cam out of the clamp. The fastening is rigid and therefore partially deformed in the places of the clamps. When reinstalling the film will have to use a plinth to align it.
Harpoon mount is a design with a lock that is fastened around the perimeter of the room, and the canvas is stretched by inserting into the locks of the sealed edges of the film. As a result, when dismounting, it is not the sheet itself that is pulled out of the fastener, but a strong clamp.
Types of repair

Stretch ceilings in case of damage to the PVC fabric are generally not subject to repair - replacement is required. In some cases, the situation can be temporarily saved.
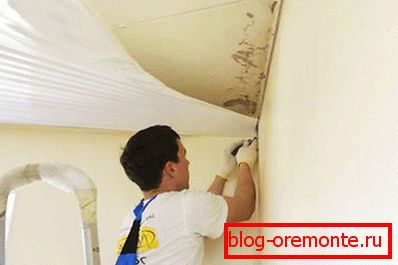
Stretching the ceiling due to flooding with cold water. In this case, if the weight did not break, you can try to drain the water through the holes for the lighting lamps. Before this, turn off the electricity, if this has not been done before, and then remove the chandelier or lamps and console parts. Several containers are taken, they are inserted under the fixing points of the lamps and gently roll the water closer to the holes with their hands and drain them. It is advisable to carry out these actions together: one holds the bucket closer to the ceiling, and the second helps to pour water closer to the hole in the ceiling. With large quantities of water, the procedure should be done carefully and slowly. After draining the water all the lights are removed in order to dry out the ceiling from the inside. The canvas when removing the water load will acquire the same shape. If the film is on a fabric basis, the ceiling will not be able to take the previous form and it will have to either be over-tightened or replaced. In rare cases it happens that there are no holes for chandeliers on the ceiling, and then it will be necessary to disconnect the web from one side to drain the water.
Note! Before dismantling, turn off the electricity, completely turning off all phases and zero. If this is not done, there may be a short circuit or a traumatic situation.
If too much water has accumulated, then a baguette can be pulled from the walls. In this case, you will need to re-fasten it.
Sagging of the web, which can be caused by long service life more than 10 years or uneven stretch during installation. To eliminate slack you need to re-drag the ceiling. If sagging occurred due to a rise in temperature, the canvas could lose its properties. If the web has a seam structure and it has torn along the seams, then the ceiling will have to be replaced with a new one. This happens due to the fact that the material is of poor quality or there is a factory defect.
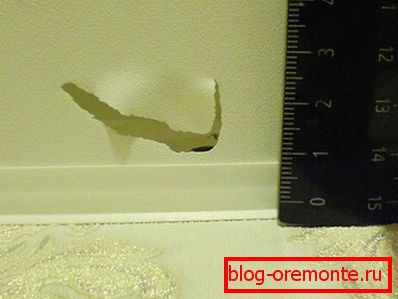
Tear due to cut is eliminated only if it has dimensions not exceeding 200 mm. In other cases, the film is replaced. Cuts are repaired depending on their location. These are mainly those that are at a distance of up to 200 mm to the wall mount with harpoon lock. PVC cloth will have to glue the mixture to tighten the edges or tape. If the seam is very noticeable, then it can be painted over. The main thing - to prevent further increase in the incision. If the damage is 100 mm from the wall, a piece of cable should be glued to the edge of the cut in the direction parallel to the baguette. After the glue has set, the canvas is heated by a hairdryer and pulled to the groove with a cable and fixed in it. The resulting new folds are eliminated in the same way along the entire length.
Note! With wide cuts, you should immediately fix the tape, and then assess the degree of damage.
Then you have to remove the canvas and glue the patch of glass on the inside. Installers usually leave a small supply of film, which is ideally suited for embedding. In the absence of a stock, you will need to use a transparent film or sealant. Apply the glue with a thin even layer, then apply a patch and gently press it down so that there is no air space left. Excess adhesive must be removed immediately with a dry cloth. As a result, there will be no signs of repair from the outside. If the cut does not allow stretching, you will have to sew the damage site with a nylon thread. Another option to hide the cut can be the installation of the lamp.
Note! It is possible not to carry out the dismantling of the canvas, but to apply the original design solution — to make a decorative volumetric appliqué in the damaged place that fits into the room design.
Defects resulting from improper installation, In most cases, are eliminated by the installer under warranty. These include: breaking along the seam, pulling out a baguette. Usually it turns out the reasons that led to the occurrence of such damage. If the canvas is torn off due to poor attachment, or improper cutting of the material, the repair will be carried out free of charge, and in all other cases at the expense of the owner.

In most cases, repairing the ceiling without removing the canvas is almost impossible. Therefore, the repair of the stretch ceiling becomes difficult and requires the intervention of specialists. To avoid such situations, it is necessary to ensure appropriate conditions in the room, carry out timely maintenance of the ceiling, carefully carry large items, avoiding damage to the ceiling.
Video
This video shows the repair of a small damage to the canvas located near the wall:
This video shows the repair of the stretch ceiling after flooding: