Plasterboard ceiling itself
Plasterboard sheets have been in service with builders for many years. This material can serve as a partition and a covering and even is applied to alignment of walls. Rare repairs do without its use. In this article, we will explain how to make a suspended ceiling from drywall with your own hands (without the help of experts), as well as show a clear video instruction.
Advantages of drywall

First of all, we will consider some advantages of using drywall to make a suspended ceiling:
- With it, you can easily and quickly get rid of any irregularities.
- In the casing, you can hide pipes or wires, as well as carry out any kind of lighting to the desired point in the room.
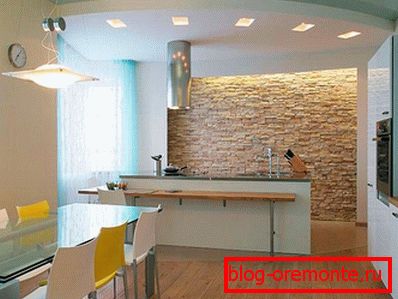
- Carefully made work with plasterboard will transform the usual room into an exquisite masterpiece of decor.
- This building material allows to warm the room and with its help you can create a soundproof barrier.
Plasterboard бывает обычный и влагоустойчивый. Как сделать правильный выбор? Если требуется сконструировать потолок на кухне или в ванной комнате, желательно использовать гипсокартон, устойчивый к влаге. Такой картон покрашен в зеленый цвет, в то время как обычный – серого цвета.
Note! This moisture-resistant cardboard differs not only in color, but also in the presence of additional additives.
Tools and consumables

Before you get to work, you should prepare the necessary tool. It includes:
- scissors for metal;
- paint cord;
- level;
- the rule;
- 3 spatulas: wide, narrow and angular;
- drill with a drill;
- screwdriver;
- A set of standard tools: tape measure, knife, screwdriver, hammer.

Also consumables will be required:
- sealing self-adhesive tape;
- reinforcing tape;
- press washers;
- red-hot screws;
- acrylic primer;
- putty;
- profile guide and ceiling;
- direct suspensions;
- crabs (profile connectors);
- dowel (size and length depends on the wall material);
- in some cases an anchor may be required.
If required, stock up with extension cords. Also, if necessary, you can prepare sound and / or thermal insulation.
Note! If you do not have a laser level, you can buy it or rent it. By making the markup using this device you will significantly save time and effort.
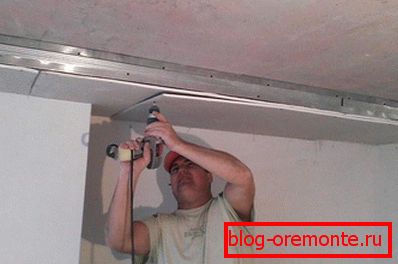
Profile mounting

Now proceed to the manufacture of the frame. First, with the help of roulette, you need to find the lowest angle. Measure out 5 cm from the ceiling and set the mark. If it is planned to install lamps, then - 8 cm. Then, using a level, we put labels on all corners. From one point to another, we tighten the masking cord and abruptly let go. Paint on the cord will leave marks in some places of the wall, which will help to connect them and make a straight line.
Now you need to lean the guide profiles with the lower edge to the line. Through the holes on the profiles do not mark the wall and drill. After that, glue the tape on the profile and fasten it with dowels. You need to make at least 3 fastenings on one wall, and then fix it more thoroughly.
Make lines on the ceiling in 40 cm steps. You will need to fix the main profiles on them. The width of the drywall is 120 cm, so there will be three fasteners in width: extreme and central. The drywall sheet, usually, is 250 cm long. The fastening can be made in 50 cm steps. But at the edges from the wall, a distance of 25 cm is optimal. Therefore, the second fastening will be 75 cm, the third - 125, etc.
Now you need to attach the suspensions and make marks through them for drilling under the anchor. On the suspensions we also glue the tape. Fixed suspensions, bend along the edges until it stops. They will be located profile, fastened with screws.
Note! Drilling holes in the ceiling is a very dusty job. Use goggles, a respirator and protective clothing.

Ceiling profile has a length of 3 and 4 meters, also found two meters. If a non-standard length is required, it can be cut with metal scissors. And if you need to increase, you will need to purchase special fittings. Mounting profiles begins with a corner. It is attached to the suspension with four screws with a press washer.
After that, we fasten the ceiling profiles to the suspensions, and, if their curved edges were lower, we wrap them up. The second profile is fixed in the same way. The following two are mounted near the opposite wall. After that, you can go to the center.
In places where drywall is attached to the ceiling, we need to fix the jumpers using crabs. In the right place secure the crab with four screws. From the ceiling profile, you need to cut the jumpers and attach four screws to the crab, bending the antennae.
Drywall fastening
Fastening screws begins from the corner, with a deviation of 10-15 cm. The further distance between the screws can be 20 cm. Hats should be slightly recessed. The gap between the sheets should be 2 mm.
Note! Depending on the type of drywall you have acquired, it may be necessary to cut the chamfer with a construction knife at an angle before starting to mount it.
The last stage - primer and putty seams. The cardboard from plaster does not come off. Using a large and angled spatula, hide all the seams against the walls, all the joints and visible parts of the screws. After drying, the seams need to stick self-adhesive tape, and once again putty.
It is not necessary to be a professional to build a gypsum ceiling with your own hands. It is under the force and beginners. Suffice it to have patience, the necessary tools and delve into the sequence of work.
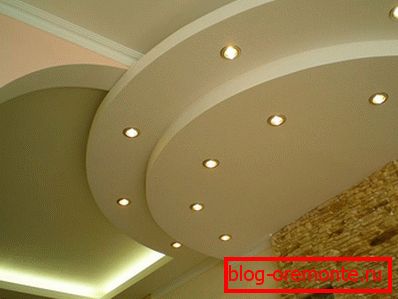
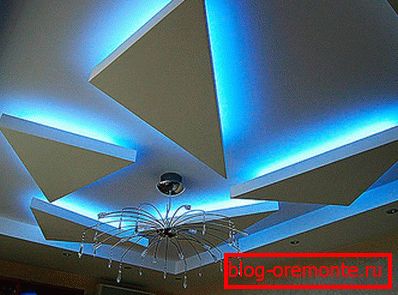
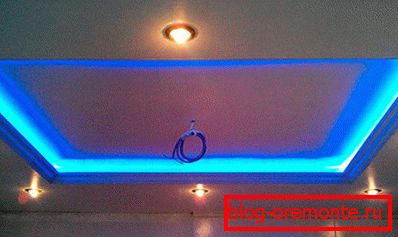
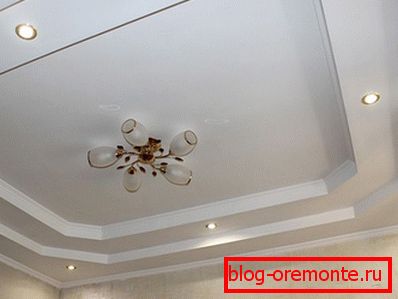
Pay attention to the video at the end of the article. It will help to better understand the process of creating a suspended ceiling, and in the photo you will see ready-made suspended ceilings made of plasterboard.
We also recommend that you read the articles:
- How to level the ceiling with plasterboard.
- A box of plasterboard on the ceiling.
A photo

Video
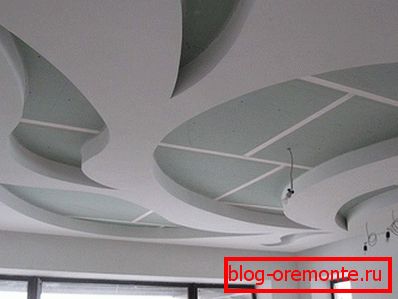
In this video you will see how the installation of a multi-level plasterboard ceiling: