Multi-level ceiling itself
The original and aesthetically attractive method of finishing the ceiling is the installation of a multi-level ceiling. Due to the multi-level design of the ceiling, it is possible to achieve an unusual appearance of the room, to hide any parts of engineering communications, for example, carrier beams or ventilation ducts. In this article we will look at how to make a multi-level ceiling with your own hands, give photos and video instructions.
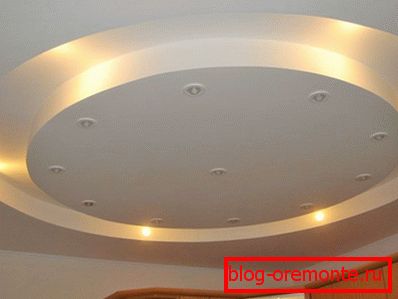
It is worth saying that multi-level ceilings can be done in several ways:
- Installation of a multi-level ceiling for suspended technology.
- Installation of a tension multi-level ceiling.
- The combined use of both methods.
Technically, the options for performing the task will be significantly different, and therefore it is necessary to make a decision whether to turn to specialists for help or to make a multi-level ceiling with your own hands. Therefore, it is quite useful to get acquainted with the description of the installation process and some nuances of the work.
Suspension
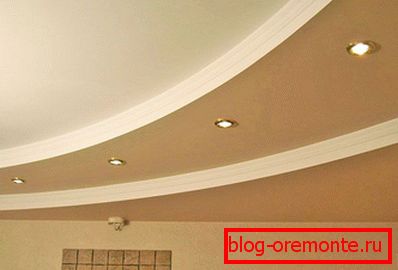
The simplest from a technical point of view, the option of manufacturing a multi-level ceiling is its installation using suspended technology. The material used in the manufacture of drywall. It is simple in processing and installation, which is quite a weighty argument in its favor, this is especially important if it is decided that the work will be done independently.
It should be noted that the installation of a plasterboard suspended ceiling should be carried out in stages.
Training
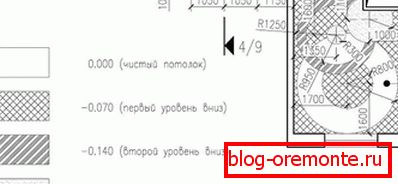
At this stage it is necessary to purchase the materials required for the work, prepare the necessary tools. And also you should not forget that the ceiling, which has several levels, is a rather complex structure, therefore, at the initial stage its detailed drawing should be made. It is necessary to reflect all the conceived design features - the location of the levels, their shape, to design the lighting system.
When purchasing material worth some stock. In addition, the same material from different batches may differ markedly, both externally and according to individual characteristics, in connection with which the purchase is best done in the same hardware store.
Mounting the grid

When all the preparations are completed, you can proceed to the installation of the base for fixing drywall - battens of metal profile rails.
- First you need to mark the base, marking the first level of the ceiling. This can be done by drawing a horizontal line around the perimeter of the room. It should be marked on the walls with the help of a water or laser level and a beater cord. Thus it is necessary to take into account the thickness of the rails themselves, which will be used, as well as the elements and the location of the wiring.
- On the marked lines you need to attach the starting guide, fastening them with screws. It is worth making a reservation that it is necessary to pre-drill holes in the concrete walls and drive dowels into them. The distance between the screws can be left about 80 - 90 cm.
- When the starting elements are fixed, you need to mark a number of longitudinal lines along which U-shaped fastener elements (suspensions) should be installed, at a distance of about 50 - 60 cm from each other.
- After installing the fasteners in them with screws, slats are installed. The ends of them are inserted into the starting rails, and then attract to the fasteners with self-tapping screws, which are popularly called bugs, for small sizes.
Installation of the first ceiling level
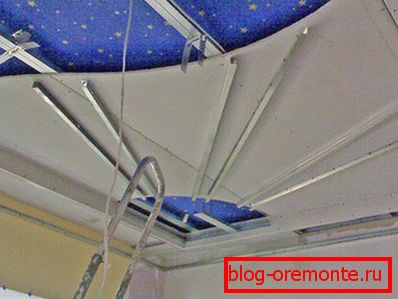
- Once the batten is installed, you can begin to mount drywall. It is simply screwed to the bearing rails of the batten with screws. Thus, the first level of the ceiling is mounted.
- Then you can proceed to the installation of the second level. The frame is also made from the profile. The crate of the second level is screwed with screws to the crate of the first level.
Installation of the second ceiling level

- After mounting the second level of the batten, it is also sheathed with drywall. It should be said that in the case when the slats of the batten need to be bent, and most often it happens, then this can be done by cutting the slats with the help of scissors for metal.
- Drywall for the second level of the ceiling, often having an intricate shape, you need to cut. It is convenient to do this with an electric jigsaw, dust, however, there will be a lot.
- After the main plane of the second level of the ceiling is sheathed, you need to close its side surface with gypsum plasterboard, where you can see the battens. To do this, cut the drywall into strips of suitable width, then bend them. This can be done using several stacked plates as a support. Before bending the strip, drywall should be slightly moistened with water.
- After giving the drywall strip the desired shape, it is necessary to fasten it with screws to the frame.

Subsequent ceiling levels are mounted in the same way, if needed. It should be noted that the system of spotlights or optical fiber is well combined with multi-level ceilings. Thanks to properly selected and mounted lighting, you can visually increase the volume of the room, as well as bring originality to any interior.
Stretch multilevel ceiling

But you can still make a multi-level ceiling. The next option - tension design. In principle, the process of its creation is similar to the one described above, but more complicated. If you briefly describe the stages of work, they consist in the installation of special fasteners, called baguettes. After that, they are filled with the material of the ceiling. The canvas is preheated to a plastic state.
First, mark the level of the future ceiling, in this case, the first. This is done with a laser level, as the highest accuracy is required. After that, with the help of a chopping cord around the perimeter of the room, the line bounces off. A line of holes for the installation of a baguette is drilled along this line with the help of a drill, which is fixed using dowels and self-tapping screws.

After that, the metal frame is mounted skeleton of the second level of the ceiling, which is also equipped with such guides. At the same time, they are installed on both sides of the profile so that both levels of the ceiling can be fixed.
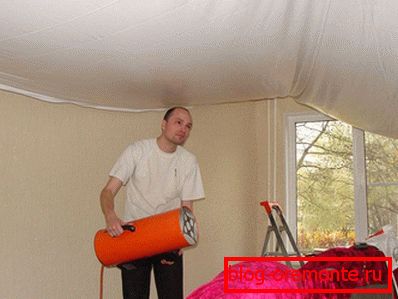
When everything is ready, you can begin to stretch the canvas. In its structure, the material used as a stretch ceiling resembles thick polyethylene. When heated, the material becomes plastic and can be stretched. After cooling, the material loses its plasticity, and the stretch ceiling acquires the final shape. Works should be carried out at least together.
First, one of the corners of the material is filled into baguettes, the rest are stretched (without heating) around the perimeter of the room and fixed with special clips. Then, using a heat gun, a certain area of the material is heated, and it is charged into the baguette completely.
Note! Usually, the material is first filled at the corners of the room, and then around its entire perimeter.
After the first level of the ceiling is ready, the second is likewise stretched.
It should be said that a beginner without special knowledge and sufficient experience in the work will make the stretch ceiling difficult. It should also be noted that the installation technology of such a ceiling implies the participation of at least two people and the use of special tools, such as a heat gun. In addition, the installation of the material requires some experience, in the absence of which you can easily spoil the material, which would entail additional considerable expenses. So in the case of installation of multi-level stretch ceiling is better to contact the experts.

In conclusion, we can say that multi-level ceilings can decorate any room. However, it should be borne in mind that their installation requires some experience. If there is a desire to install a multi-level ceiling, then you should pay attention to the ceiling of plasterboard. The installation process is much easier.
Video
For more information on the topic can be found in the video.