Installation of stretch ceiling
Stretch ceilings - this is today not only a sign of prosperity, but also a way to decorate your apartment. It is available to most residents of large and small cities.
How to install a stretch ceiling with your own hands in a room with medium size? And what is necessary to have from materials and tools? Below the most detailed description will be given of how exactly the installation of suspended ceilings takes place. The most important thing is to understand that the process is not unrealistically difficult.
Preparation for installation

Before starting work it is necessary to conduct a series of preparatory work, which can be divided into stages. The first step is to take measurements from the ceiling. It's simple - we need a tape measure, pen or pencil and a piece of paper. Then, according to the obtained dimensions, we buy in the construction market or in the store a fastening profile, a film for a stretch ceiling, racks for lamps and the lamps themselves, as well as fasteners.
Note! When a canvas purchased for installation has been brought to the room where repairs will be made, it must be carefully removed from the packaging and put in a warm place. It is better if nothing is lying on the canvas.
If you keep a stretch canvas for a long time or transport it incorrectly, creases may appear on it. In fact, there is nothing terrible about it. True, there is one drawback - these creases can only be eliminated after six months. By the way, we must not forget that if the ceiling area, on which it is necessary to mount the stretch ceiling, is quite large, then there is a chance of sagging the canvas.
Stages of work

As the measurements of the ceiling are made, the installation will continue further. So, we make measurements as carefully as possible. First, on a blank sheet, you need to draw a room (schematically) in length and width. If the room is not square, but has any walls or roundings, they should also be noted.
Note! The scheme is marked as a top view - it is more convenient to note the dimensions.
The perimeter ceiling is measured. After that, you need to measure out all the available diagonals in the room, that is, from each corner of the ceiling, measure the distance to all corners in the room. The data obtained are also marked on the drawing. When all dimensions are removed and indicated on the sheet, you can purchase materials for mounting the stretch ceiling.
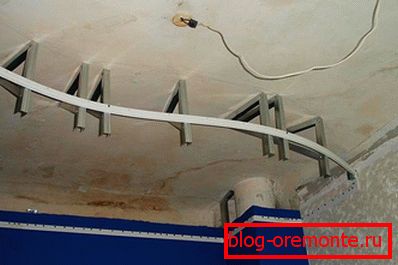
It is interesting to know that the installation technology provides in the construction of the ceiling a skeleton of a profile, the standard length of which is 2 m. It is intended to fix the canvas in it. This profile is installed around the perimeter of the ceiling. Installed profiles should be shorter than the length along which they are mounted, 1 cm on each side. That is, if we have a room with the dimensions of 2.7? 3 m, then the distance of the profiles will look like 2.68? 2.98 m.
Note! In some old-style houses, the ceilings may not be very high. To make a frame means to lose the extra centimeters without it. In order not to lower the ceiling, the profile can be mounted directly on the old base without hangers.
During the fastening profiles can be difficult because of how they are joined at the corners between themselves. Here, the docking is done in the same way as the baseboards are connected to each other, that is, with trimming the angle to 45 °. After that, you can begin to mount the profile to the wall. Strengthening it, you need to monitor whether it is located exactly or not. This can be checked using the level.
Best of all, if the dowels that secure the profile, will be located at a distance:
- 8 cm (for brick walls, with a concrete base or plasterboard coating);
- 12 cm (if the wall is tiled or sheathed with metal).
How to install racks for lamps

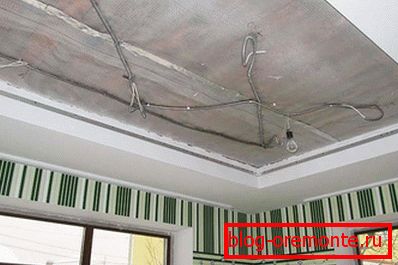
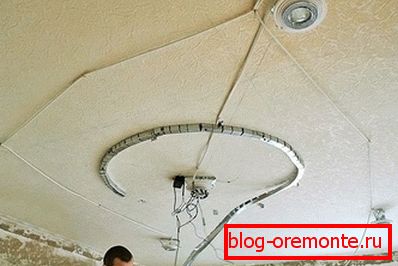
When the installation of profiles intended for web tension is complete, you can install racks on which the fixtures will be mounted, having previously decided where they will be located. After they are fixed in place, wiring should be brought under the lamps.
Note! It is best not to connect luminaires located in different sides of the room through a single switch. So it turns out to save on lighting, when there is no need to illuminate the entire room.
When this stage of work is completed, it is necessary to project the location of the lamps from the ceiling to the floor. This can be done with a construction plumb or a vertical level. This is necessary so that when the ceiling is closed by the canvas, one can easily find the locations of the lamps.
Note! If linoleum or laminate is laid on the floor and it is impossible to put projection marks on it, you can place the points where you need to mark points, stick a paper tape and put these points on it. After mounting fixtures tape easily breaks and ejected. Do not rush to remove the tape until the lamp above it is fully installed!
Stretching canvas

Before you stretch the canvas, it is worth remembering that the process is associated with some features that must be considered:
- Handling a knife and other cutting objects, it is necessary to be careful not to damage the film.
- By itself, the canvas in no way changes its properties at temperatures up to 100 ° C and copes with any mechanical effects.
- Avoid contamination of the canvas, falling on the floor or mounting it with dirty hands.
- After installation it is impossible to twist lamps with a power more than 60 W.
- It is better not to bring heating devices close to the film.
- The canvas should be turned slowly, making it evenly, while it should be gradually heated.
- After the canvas is deployed, it must be hung on the clips installed at all corners.
- It is necessary to mount the canvas from the angle indicated in the diagram.
Correct installation of the web (film) is possible only if all the above recommendations are taken into account. You will also need some tools for installation, namely:
- spatula (for sealing the harpoon in profile);
- heat gun or hair dryer - to warm the sheet;
- fasteners for mounting profile.
First of all, you need to heat the film before you stretch it. Why do you need to do this? The canvas under the influence of increased temperature, which can be obtained with a heat gun, can increase in size, that is, stretch. Thus, the area of the film becomes larger by approximately 10%, which makes it easy to mount. After the time, the dimensions of the canvas become the same and it is stretched, so that an excellent and almost perfect surface is obtained.
A small film can be heated with a household hairdryer, which is used to dry hair. If you do not want the film to melt, an industrial dryer is not recommended, because the temperature it creates is too high and can ruin the coating for the stretch ceiling.
The warmed canvas is fastened at the corners with the help of a special profile, in which the harpoon is fixed, welded by a special installation under voltage to the edge of this canvas. If it is too long, you can fix it in the middle on each side. After that, the harpoon is gently inserted into the profile with a spatula. If after installation, creases formed on the canvas, it is worth reheating the canvas a little.
After stretching, the film should be heated for about a quarter of an hour, and then left to cool. It does not interfere with a little airing the room (preferably in a natural way, that is, through windows and doors). After installation, you should check all fastenings so that the harpoon does not jump out of the profile groove anywhere.
Installation of fixtures

Now those marks from fixtures that were projected on the floor will come in handy. Now they are projected back to the ceiling, but already onto the stretched canvas - using a laser level or plumb (in the latter case, the accuracy is lower). The resulting marks will help to find the center of the lamp box on the canvas.
Then the rings for fixtures are pasted on the canvas. This is done so that the mark was at the center of this ring.
Note! It is worth knowing that when mounting the ring, its entire surface should be glued to the film. You do not need to immediately cut the film - you need to give time to glue between the ring and the film to dry.
Cut the film with a knife that is well sharpened and has a thin canvas. We get a hole through which you can adjust the height of the lamps under the level of the stretch ceiling. When these adjustments are made, you can install LED or ordinary light bulbs - depending on which lights are selected during installation. After that, the installation of the stretch ceiling can be considered complete and, if necessary, perform subsequent repair work.
Video
This video is about installing and installing suspended ceilings: