Installation of cassette air conditioner
The cold not only helps to preserve the freshness of the products, but also creates comfort in the room in hot weather. Previously, in order to cool themselves used the plows. Today we can use more modern systems. For office and retail premises installation of a cassette air conditioner will be relevant.
The principle of operation and features

Cassette air conditioner is a classic representative of a split system. This means that it, like the usual version, consists of two blocks. The condenser and the compressor are located in the outer part, and the evaporator and the drainage system in the inner part. When the heating mode is activated, the functionality of the blocks is reversed. But he has his undeniable advantages:
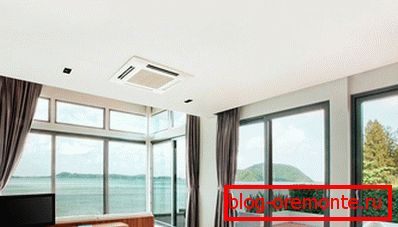
- Location. The internal module of this type of air conditioners is located in the false ceiling. This makes it possible to hide the bulky design and perfectly fit it into the interior.
- Uniform sizes. Dimensions are designed in such a way that in most cases the Armstrong ceiling should not be completed.
- Hidden freon system. All tubes, including drainage, are hidden under a false ceiling. They do not need to make shtroby, and then close them with plaster and putty.
- Minimum noise emission. It uses a fan of a special form, not creating turbulence, which are the cause of noise, and more efficiently producing air intake.
- Maximum coverage area. It is more reasonable to produce cooling, starting from the ceiling. It is there that warm air accumulates. If you reduce its temperature, it will go down and cool everything that is in the room.
- Comfortable airflow. Thanks to the swiveling planks, you can adjust the distribution of air flow so that it does not directly fall on the people who are present in the room.
- The possibility of drying the air makes it possible to apply it in wet and warehouse premises.
- In some models available fresh air intake from the street.
- Flexible customization. Remote control.
General installation guidelines
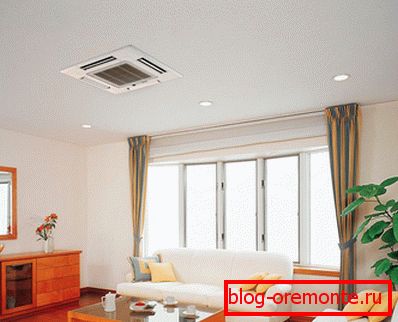
In order for the device to serve the maximum period, it is necessary to choose the right place for both the indoor and outdoor units.
- Internal and external modules are not recommended to be located in those places where there is a probability of ingress of engine oil on them.
- Undesirable installation in rooms or areas where there is a high content of sulfur compounds and various salts. This may be the territory of thermal springs or the sea coast.
- The neighborhood with the equipment that is the source of high-frequency interference is poorly tolerated. They are an obstacle to inductive currents that are present in the engines of the unit.
- Installation in premises where vapors of various acids and other chemical compounds are present are not allowed. This, for example, may be laboratories.
- The room should not accumulate flammable gases.
- Wiring must withstand the load exerted.
- Ceiling height should be from 2.5 m.
- The ceiling must be strong and have small deviations in the horizontal plane.
- After full installation, there should be no obstructions on the way.
- There must be a ground loop.
- The modules are mounted on a metal base, so it must also be grounded.
- Do not remove the design from the original packaging until it is delivered in place.
- Provide ample space for easy unpacking and assembly.
Note! Which unit will be installed first, the master himself decides, there are no strict sequence or rules.
Installing the indoor unit

For the internal module it is better to choose a place in the middle of the room, this will give the opportunity to use the unit with maximum efficiency.
-
 Make a cardboard swatch that will be the same size as the block size (usually it comes in the kit, it can be part of the packaging from the manufacturer).
 - Attach it to the planned installation site and determine how many tiles will need to be removed. In order to make it easier, the markup can be made on the floor under the planned installation site, and then with a conventional or laser plummet to transfer points to the ceiling.
- If necessary, trim the aluminum profile of the ceiling, after strengthening it.
- Carefully inspect the surface of the ceiling. If necessary, glue a small piece of foam to reduce vibrations.
- Mark the middle of the selected area, it should coincide with the middle of the unit.
- Align the middle of the stencil (you can use a tape measure instead of a template) with the marked point and apply the marking for 4 holes.
-
 Use a suitable diameter drill to drill holes. Insert the studs in them.
 - Screw a nut on each stud, then put the washer on and then tighten another nut.
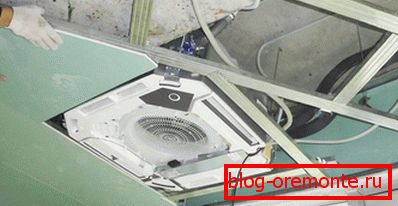
- Lift the indoor unit and insert the studs into the slots intended for them. Put on the nuts so that the body does not break.
- Raise the module to such a level that it goes flush with the plane of the suspended ceiling. The size to which it will be recessed should correspond to the depth of the front panel.
- Use a level to check the plane is correct. It is very important to ensure that the drainage fluid does not flow onto people's heads.
- Tighten the nuts firmly.
- Measure the distance from the internal to the external unit along the path of the location of the future freon highway.
- Cut the pipes to the required size. You can cut only with a special disk pipe cutter. Do not use grinders or hacksaws. It is important that metal chips do not remain inside, which can later lead to system failure. Cut the cut points with a special tool that smoothes the chamfer, or go around with a small file. Be sure to pull out all the chips.
- Cover the pipe opening with tape or tape.
- Lay the pipe in insulation.
- Under the ceiling, fasten the studs with hooks into which the line will be laid, and place the pipes in them. Secure them in place with screeds or clamps.
- If the pipe needs to be bent at an angle, use a pipe bender for this. Pre-cut and slide the insulation. Then you need to glue the cut and fix with adhesive tape. With manual bending, you can wring it and not notice it.
-
 If it is necessary to expand the pipe, use a special rammer, which expands the internal diameter of the pipe to the external one. Do not try to fit the size at one time otherwise the nozzle will burst. Do this in several passes, slightly increasing the size of the collet. Next, weld with wire and torch.
 - Move the tubes almost close to the nozzles of the indoor unit. Unscrew the locking nut and slide it onto the nipple. Using a file, process the end face and chip the chips. Take a flare gun under the cone of the appropriate size and increase the diameter of the tube. Put it on the nozzle and press it well. Secure it with the nut. To do this, use two keys. One rests, so as not to turn the nozzle, and the second tightens the nut.
- Put the insulation on the place of articulation and fix it with plastic ties.
- Set the decorative bar in place. To do this, remove the air intake grille, pulling the two clamps. Put it aside. Remove the four plugs that are at the corners; they should hang on the holders. Find an engine that changes the position of the blinds. Its position must coincide with the point of connection of the pipeline. Fix the pad to the brackets on the block. Move the block so that it is in the middle of the hole. Use the level to set the lining. Fasten the air intake grille and plugs at the sides.
- If after fixing the front panel there is a gap up to the ceiling, then it is necessary to lift the whole structure by tightening the nuts on the studs.
Installing an outdoor unit
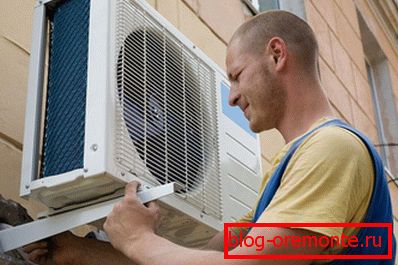
Before installing the outdoor unit, carefully review the maximum differential allowed. For some air conditioners it should not exceed 20 meters.
- The outdoor unit should be well fixed so as not to vibrate when the engine and compressor are running.
-
 It is desirable to leave a space up to 30 cm to the side edges, if the design does not imply a block scheme. Nothing should limit the blowing of the air by the fan, otherwise the efficiency decreases.
 - Do not move the outdoor unit while holding the decorative grille; you will damage it.
- The center of gravity may not coincide with the geometric center, so calculate the force correctly.
- When transporting, do not lay the module on its side or bend it over an angle of more than 45 ?.
- If it is planned to be installed on the ground, then it is necessary to prepare the foundation, the size of which will be several centimeters longer and wider than the block dimensions.
- With frequent strong winds in the area it is better not to carry out perpendicular mounting to the wall. If you do not meet this condition, then due to the strong sail the unit may simply break.
- First, holes for paws are made. Stands are fixed with anchor bolts. After that, they are installed on the compressor unit and bolted.
- Using a perforator, make a hole in the wall. Its diameter must be such that the pipeline and electrical wiring fit into it freely. Draw the communication to the unit.
- Flare and clean the tubes, just like when installing the indoor unit.
- The valve of the outdoor unit must be closed. Unscrew the nut and make a connection without delay to prevent dust and dirt from getting inside. Tighten with two keys.
Pipeline
In order that freon could freely circulate, and the compressor was not subjected to a large load, it is important to observe a few simple conditions.
- Observe the maximum allowable length of the freon line.
- Throughout the site should not be more than 15 bends.
- Do not make the bend angle greater than 90 ?.
- The bending radius should not be less than 100 mm.
- For some models, there is such a condition that if the length of the pipeline does not exceed 8 m, the refrigerant that is in the outdoor unit and will not need to be additionally filled will suffice.
- After installation of the sockets, it is necessary to make a vacuum processing circuit. For this, a pump is connected to the valve on the external circuit. It must be turned on for 15–20 minutes. He will remove all the air and remnants of moisture.
- During pumping, you can check the integrity of the system, walking along the entire length of the pipe.
- When the vacuum has been created, you can open the shut-off valve so that freon will fill the system. After that, you can once again check the integrity of the system with the help of a soap solution applied with a brush to the joints.
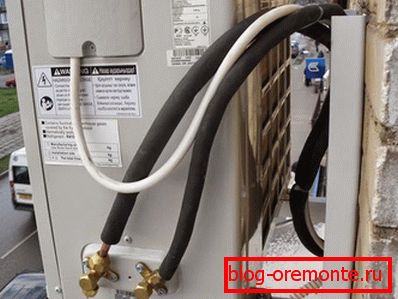
Drainage installation

A plastic tube of suitable diameter can be used for drainage.
-
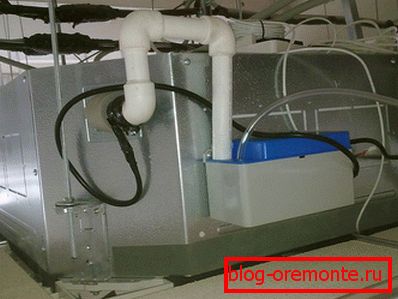
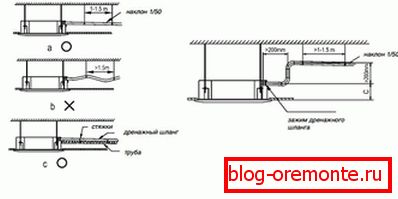 Using a hose clamp, fasten the tube to the drain pump, which is located on the indoor unit.
 - Stretch it to the place of discharge. Try not to pull it, so as not to dislodge the head of the indoor unit.
- If possible, observe a slope of 2 cm by 1 m. This is necessary so that after turning off the air conditioner, the liquid can flow by gravity.
- The end of the drain hose must not be submerged in water.
- In order to check the drainage system, it is necessary to fill the water through a special hole on the external unit and turn the device into cooling mode. One person can follow how the pump works, and the second one can see if the water flows.
Electrical connection
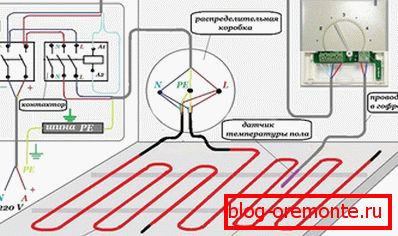
- For the air conditioner must be provided with a separate machine, from which nothing else will be powered. Well, if there is an opportunity to install a stabilizer in case of its absence in the general wiring.
- The ground loop must integrate the indoor and outdoor unit.
- If the cable needs to be extended, use a wire of the same type and cross section.
- Connection is made to the external unit. On the inside of the cover there is a pattern that will prevent you from making a mistake.
After the connection is completed, you must perform a test run. After turning on the entire system, carefully listen to how the engines in the units function. If extraneous rattling or other noises are noticeable, it is necessary to interrupt work before identifying the cause.
Periodically it will be necessary to perform simple maintenance. It will be to clean the internal mechanisms of dust, as well as to control the volume of freon.
Video
You can see how the installer cassette conditioner is installed below:
And thus make maintenance of the cassette conditioner: