Installation of a ceiling frame for drywall
Recently, gypsum ceilings are quite popular. Thanks to their design, you can create a surface of different shapes and configurations. But first you need to carry out the installation of a ceiling frame for drywall. How to do it correctly, we consider in this article.
Installation of a single-level ceiling framework of profiles

To build a single-level frame, you will need profiles for the 60/27 mm ceiling, 27/28 mm guide elements, direct suspensions for attachment to the ceiling and “crabs” that connect the fragments at the same level. In addition, you will need screws in large quantities. Before you install the frame for plasterboard sheets, you must first calculate the number of profiles required to create the structure.

- To calculate the total length of the guide elements, you need to determine the perimeter of the room, measuring all (!) Sides, since even parallel walls can differ in length by several centimeters. Since the slats are 3 m long, their number is calculated by dividing a certain number by 3. Do not forget to take one slat in reserve.
- First you need to decide on the ceiling profiles and calculate their number. For the calculation of the important width and length of the room. If the width of the room is 3 m, and the distance between the profiles is 0.6 m, then the method of dividing the first value by the second results in 5 spans. From here - the number of longitudinal profiles will be one less - 4 pcs. The transverse profile on the suspended ceiling is calculated according to the same principle, which takes into account a similar step between the elements - 0.6 m. With a room length of 6 m - 6 is divided by 0.6. It turns out 10 spans and 9 transverse profiles with a length of 6 m. As already mentioned, you should always purchase profiles slightly larger than calculated. This is due to the possible loss of presentation of some items during transportation, as well as the formation of unnecessary segments during installation.
- Due to the fact that direct suspensions attach longitudinal profiles to the ceiling with a distance of 0.6 m between them, the number of purchased products is calculated by dividing the length of the elements by a certain step. Since the crabs are joined by longitudinal and transverse profiles, the number of fittings is very simple to calculate. Also, the work may require special connectors that will fasten the ends of two short elements. They must be prepared before installation.
After the preparatory work, the installation of profiles under the plasterboard ceiling begins.
Note! An important step in the installation of a framework for a suspended ceiling is the marking of the base surface. The quality of the plasterboard ceiling will depend on the correctness of the marking.
The guides are fixed along the lines to the walls. These profiles are mounted at a distance of approximately 10 cm from the surface of the main ceiling with dowels, under which holes should be pre-drilled at a distance of about 80 cm from each other.
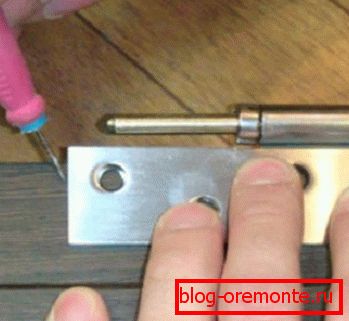
- Then attach suspensions to the ceiling, on which longitudinal profiles are installed. The connection with the ceiling elements is carried out using self-tapping screws. In this case, it is necessary to take into account that the profiles
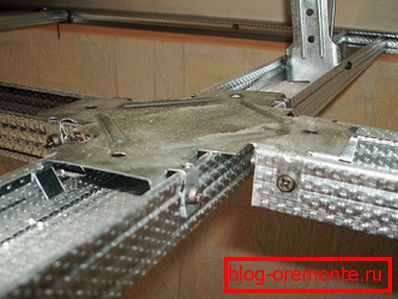
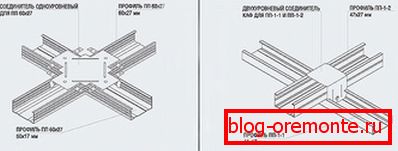 were necessarily located in the horizontal direction. When checking the horizontal position you need to resort to the help level. The protruding ends on the elements are folded towards the ceiling, and in places where the longitudinal and transverse elements are joined, crabs are mounted. They are placed on top, and after installation, these parts with their working surface should be directed to the ceiling. The transverse elements are inserted into the fixing part, and the "crabs" from different sides, they are fastened with screws.
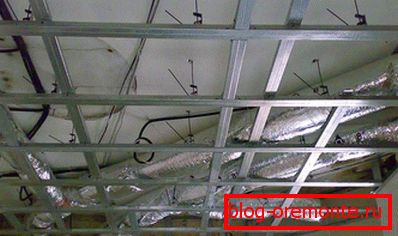
 - After the frame is assembled, its structure is checked for fastening strength and, if the joints are flimsy, the crabs are harder to reach with screws. Then comes the turn of the installation of electrical wiring, which is hidden in a corrugated sleeve - to pass unprotected wires through the profiles is inadmissible.
The installation of the ceiling frame in chronological order is presented in the following video:
Installation of two-level ceiling framework profiles

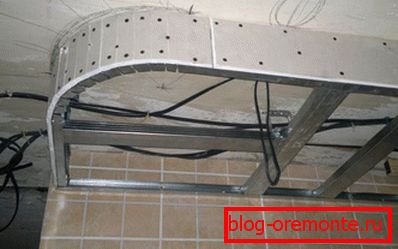
Installation of the frame for a two-stage gypsum ceiling starts from the bottom level. For this work, you will need guide profiles of 27/28 mm and rack elements of 60/27 mm in size. From the guide elements is constructed the contour of the lower stage. It is necessary to fix the profile for drywall on the basis of markings applied to the surface of the main ceiling.
- If the design of the lower tier is a curved shape, then the elements of the guide profile are trimmed with a grinder or hacksaw, after which they are bent and adjusted according to the pattern printed on the ceiling.
- Between the two guide profiles, which are parallel, in the vertical direction set the rack. Their length should be equal to the distance from the surface of the concrete slab to the level of the lower tier. Then the constructed frame structure is attached to the ceiling.
- Rack elements are attached to the floor surface at a distance of 60 cm from each other. After this, jumpers are fixed in the transverse direction with the same pitch between the posts. Elements using direct suspensions are attached to the ceiling surface in 40 cm steps. Profiles are interconnected by self-tapping screws, and attached to the concrete ceiling ceiling using dowels and screws. If the ceiling is wooden, then the fasteners are made using all the same screws. After the frame is installed on two levels, the correctness of the installation of its elements is checked by level.
Wooden frame
If wooden material is used for work, and it was decided to make a crate from it for a gypsum ceiling, it should be taken into account that the moisture content of the material should not exceed 12%. Work with wooden elements is somewhat more difficult than with metal ones. The frame of the profile on the ceiling of wooden bars can be mounted as a single or double. In the first case, strips with a cross section of 5/4 cm are used, in the second case - 5/3 cm bars.

When suspensions are used when installing the frame, the latter are first attached to the main ceiling. If they are not used for fastening, they are replaced by special holders for the slats. The bars of the main frame are fixed to the holders or hangers with screws. The alignment of the lathing design occurs by adjusting the suspension brackets.
Note! After installing the metal or wood frame sheets of drywall are attached to it with self-tapping screws in 15 cm increments.
Finally, the plasterboard false ceiling is finished.
Video
Here is a simple device will allow to install the ceiling of plasterboard alone: