Illuminated ceiling itself
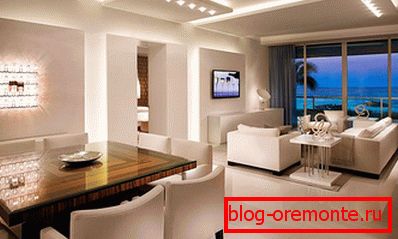
Today, ceilings with built-in lighting are gaining great popularity in interior design. Proper lighting, in which the ceiling lighting is involved, can fill the room with a pleasant light and give it a special atmosphere. Demonstrating diligence and some design abilities, you can create a ceiling with your own hands on different levels, beautifully decorate the ceiling plinth and cornice with LED tape. The main thing is not to overdo it, because all light sources should be harmoniously combined with each other and interior details, complement and not interrupt each other.
Before the ceiling lights decorate the interior, it is necessary to decide which type of ceiling will be mounted: multi-level or single-level. The first type has a more complex design, but for the installation of such a design requires a sufficient height of the room.
Note! Each level reduces the height of the room by 5–15 cm, so if this small room has a small height, then it would be better to use a single-level ceiling with lighting.
Ways to light a room

In turn, there are two types of ceiling lighting: hidden and open.
The first type is a system of lamps in a half-open niche - one of the edges of a multi-level ceiling. It is popular more than others, since the outgoing light with this type of construction is refracted and scattered from the ceiling. The light sources themselves in this case are not so noticeable to the eyes. With an open type of illumination, lamps or ribbons are mounted in special openings or simply mounted to the ceiling.
Which light source to choose

The construction industry can offer a lot of options than to light up the room - it all depends on what the owner of the dwelling expects and what money he has.
The use of LED strips and lamps to illuminate the ceiling is the most popular solution. This system gives a good uniform light, has a very long service life and low price. The LED tape is easy to install, as one of its sides is provided with a sticky layer. The color of the glow can be both monochrome and multi-color. On the color LED strips on the same basis are placed red, blue, green diodes. Some of them have a protective silicone layer that makes this backlight moisture resistant. The LEDs are powered by a voltage of 12 V, although 24 V can also be found. The LED lighting of the ceiling can be remotely controlled and programmed for a specific mode of operation.
Note! Neon lights - one of the most durable and able to create a fabulous atmosphere. But installing it yourself is not recommended. Work on its installation is better to produce a specialist.
For lovers of bright and unusual in the interior, the ceiling lighting duralight - a real find. Bright, multi-color and very flexible material can be used not only on the ceiling, but also in other elements of the decor.
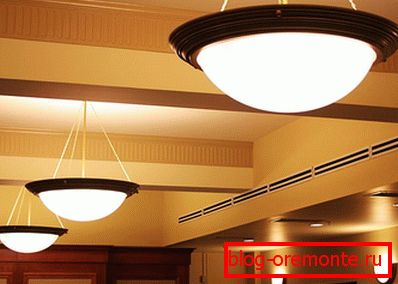
Conventional chandeliers and lamps are a classic way of lighting residential and office space. Chandeliers, sconces and other lamps are popular among various segments of the population. If you apply the imagination and fantasy, then from these familiar elements you can mount quite an attractive and modern ceiling lighting.
Preparing for the lighting device

So, how to make a ceiling with lights? First of all, it is necessary to check and update all the electrical wiring in the room, including the electrical network, conducted to the panel in the apartment. This is necessary so that in the event of any problems arising due to old age and wiring wear, it would not be necessary to subsequently dismantle the ceiling itself and the backlight installed on it.
Note! It is necessary to make a ceiling scheme, decide from which materials it will be made, and how many levels it will have. Ceilings in which there are several such levels can be made of drywall, and in the middle install a stretch ceiling, or use plastic elements.
When all elements and light sources are indicated in the drawing, the materials and the area of their application during installation are selected, and all questions regarding the design of the ceiling are clarified, you can proceed to the layout. First, elements from the drawing are transferred to the ceiling. This means that the scheme with a piece of paper should be drawn on the surface of the ceiling, and in the case of a multilevel version, the corresponding marks are applied to the side surfaces of the ceiling with two levels.
Such a complex ceiling, having a closed lighting, can be built from plasterboard. If the apartment or house has low ceilings, it would be best to use open lighting. Its installation will cost less material costs and will not take so much time.
Installation of the ceiling and niches for lighting

If it was decided to build a plasterboard niche for the installation of hidden lighting, then first you need to make a frame of the metal profile. To do this, you will need a tail cord and level. First of all, you need to retreat from the top of the ceiling about 10 cm from two sides on each wall. Then, using the marked marks, a horizontal line can be applied to the wall surface with a thread.
Note! The line, which will mark for the installation of the ceiling frame of metal profiles, should be held strictly horizontally. If in some place it will not be held exactly, the end of this line will not close with its beginning, because of which the ceiling can not be made exactly.
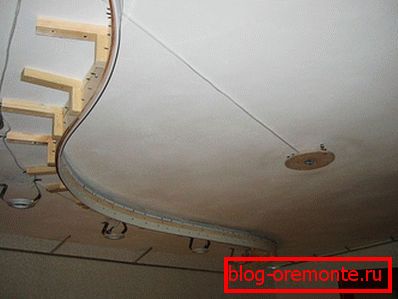
Through this line, a starter profile is attached to the wall with dowels. The main one is inserted inside this profile, which is then fixed to the ceiling with brackets 40–50 cm long. It is possible to add rigidity to the frame by using additional bridges from the profile, so that the “grid” is obtained. On the resulting frame, which usually covers the central part of the ceiling, drywall is fastened with metal screws. The existing recesses from the fasteners are smeared with starting putty, and a special reinforcing mesh is glued to the connecting seams, which is also puttied.
Now you can start making niches in which the ceiling lights will be laid. For the second level, similarly, as in the first case, you need to mark the line of installation. It can be made at a distance of 4–7 cm, after which the aforementioned profile mounting takes place. The main profile is cut into blanks corresponding to the height of the level. The obtained segments are attached to the starting rail to get suspensions. From below, another starting profile is mounted horizontally on them, along which the rest of the structure is dialed. It remains to bring the necessary wiring and sheathe the second level with gypsum plasterboard - this is the edge of the ceiling.
Installation of ceiling lights

Note! To avoid electrical shock, do not operate under voltage. For convenience, you can install an external light source.
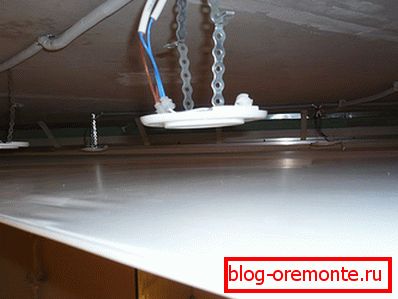
The illumination scheme should be made in advance. Wiring on metal elements should be carried out only if all cables are hidden in the corrugation. Selecting the power supply for the backlight, you need to consider that it should have a power reserve of about 30%. The necessary scheme of LED strips can be found on the Internet or ask advice from friends who have already engaged in ceiling lighting. When all work on the lighting device is completed, it is necessary to check the operability of the electric circuit in the internal lighting system, and only then sheathe the ceiling with drywall and finish.
In order to make a ceiling with lighting, you will need certain knowledge and skills, but after doing this difficult work, you can enjoy a beautiful ceiling.
Video
This video shows the process of making a plasterboard ceiling with lighting:
In this video, you can see a beautiful backlight made with the help of LED tape: