How to seal the seams on the ceiling
The presence of high-quality prepared ceilings in the apartment has always indicated that the owner of the living room is attentive to its interior and constantly seeks to improve it.
Special requirements are placed on the ceilings, the surface of which form reinforced concrete slabs, stacked with small gaps (the so-called “rusty”). In such a situation, repair work must include procedures to eliminate these natural, but not entirely desirable, irregularities on the ceiling surface. Moreover, the sealing of seams on the ceiling is the most important component of the whole complex of repair and repair work carried out in the apartment.
Preparation of working tools and materials

For the organization of high-quality finish seams, carried out during maintenance, you will definitely need the following tool:
- ordinary hammer and chisel;
- perforator or electric drill;
- spatula with narrow working part;
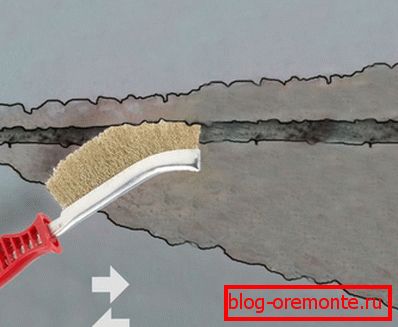
- metal brush.
In addition, to seal the gaps between the floor slabs, you will need to prepare the following consumables:
- primer of the required quality;
- the finishing mixture itself;
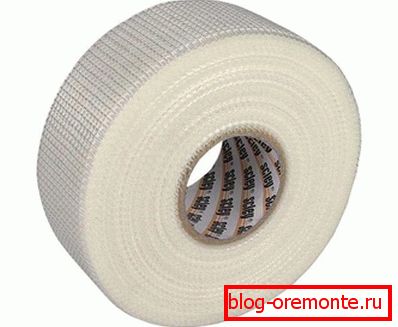
- serpyanku tape;
- fine-grained pelt.

Before you seal the seams on the ceiling, be sure to protect your eyes and hands during work, i.e. Prepare special safety glasses and gloves.

Note that the repair done by yourself will always be worth the effort spent on it, and the ceiling brought to an ideal condition will serve you for many years. To obtain the desired result, you first need to familiarize yourself with the general plan of work on the installation of ceiling joints.
General order of work
To level the ceiling surfaces, traditionally, special mixes are used that are exclusively intended for the treatment of rusting. Despite the variety of compositions offered by the modern market, the work on the sealing of seams is always carried out according to a standard scheme, including the following operations:
- First of all, it is necessary to remove from the joints with a chisel all that remains of the old coating (loose pieces of concrete screed and plaster), as well as remnants of the old filler. You can use a spatula with a small working plane for the final clearance of the seams.
- Then, the seams should be treated with a deep penetrating primer, prepared in accordance with the instructions on the package. For processing, use a narrow brush, well penetrating the entire depth of the treated seam.
- After that you can proceed to the preparation of the mortar you have chosen as a filler. To do this you need a small plastic container with water and a construction mixer.
- Having prepared the composition of the desired consistency, you can proceed to filling the gaps with this solution. Pay attention to the fact that for deep rusting this operation should be carried out in several passes, when it is passed to each subsequent layer only after the previous one has dried. In the case of very wide and deep seams, they are first filled with a small bottle and only after that they are filled with a solution.
- After the final drying of the filler, the rusts are additionally processed with the help of PVA glue, and then glued with one layer of serpyanka. The width of the tape is chosen with a margin that ensures the overlap of the widest point by at least 2 cm.
- Over the serpyanka a putty is applied with a thin layer, which after drying is carefully polished with emery paper.
Preparatory work

The seams between the floor slabs are most often found in the houses of old buildings and very often spoil the general appearance of the ceiling surface. In the event that you plan to give your home an attractive and modern look, you should immediately worry about patching these natural ceiling irregularities. Moreover, during the operation of a house, its walls usually shrink, which leads, as a rule, to misalignment of the ceiling tiles and to a noticeable expansion of the existing rust.
Next, we will try to tell you in more detail how to seal the joints on the ceiling, detailing the general scheme described above. The order of the operations performed during this process can be represented as follows:
- First of all, it is necessary to prepare the joints on the ceiling surface for processing. To do this, remove from them the remnants of the old filler, as well as clean the nearby surface areas from the old plaster or whitewash.
- The process of preparing the seams also includes procedures that involve their jointing (expansion to a state of complete readiness for finishing). Note that the seams of small depth are only slightly “widened” with a spatula.
- In form, ready-to-seal joints should resemble a truncated cone, which provides optimal conditions for holding the filler in them.
- Finally, the seams must be thoroughly cleaned with a metal brush. The stripping operation should be carried out until small chips from the embroidered gaps stop falling.
Next, we will introduce you to some features of the repair procedures associated with the installation of ceiling joints.
Features of the procedures for terminating rust
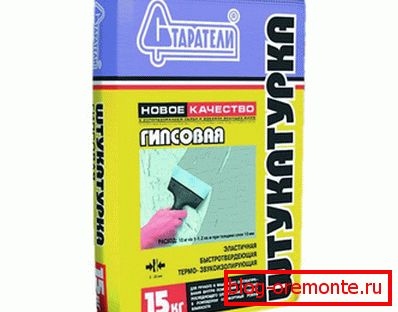
The basis of the most common mixtures used to prepare the composition for the installation of seams on the ceiling is gypsum plaster. By the way, we note that the price of these compositions seems to be quite “lifting”: it ranges from 150 to 250 rubles (depending on the packaging).

In addition to gypsum-based compositions, cement plaster with special polymer fillers is sometimes used for embedding rust. However, for interior work, the most suitable composition is still gypsum plaster, characterized by a high degree of plasticity and a short hardening time (“setting”).
Preparation of the dry mix you choose is to dilute it in warm water in full accordance with the instructions attached to the store packaging. When this mixture is diluted to the desired consistency, reminiscent of sour cream of medium thickness. The finished composition must be thoroughly mixed to a state that excludes the presence of hard lumps in it.

Before starting work, the seams should be carefully primed to their full depth. To do this, it is best to use a small brush, carefully observing that during processing there are no noticeable gaps.
Note! It is necessary to proceed to the seal of joints immediately after priming (without waiting for the primer layer to dry). This technique allows for excellent adhesion between the applied finishing layer and the concrete surface.
The filling of the seams with the finishing material is made by small strokes applied with a slight pressure on the tool, which ensures the quality filling of the cavity between the plates. In this case, the excess solution is cut with a spatula by pulling its blade along the rust (with transverse cutting of the excess on the surface of the seams, small irregularities may form).
And now let's take a look at the recommendations of masters who are well acquainted with all the subtleties of the procedures we are considering:
- If necessary, additional reinforcement of the treatment area should not wait for the complete drying of the solution. Used for these purposes tape serpyanka overlaid on the reinforced section so that the seam was located exactly in its middle.
- The walls of the seam are treated with a layer of mortar, the thickness of which should not exceed one or two millimeters, which will allow you to get a fairly even coating.
- In the event that the seam is very wide and deep - for its filling it is allowed to use construction tow, previously soaked in a gypsum solution.
- The serpyanka laid over the seam is then smeared with a thin layer of the previously used solution.
Sealing of seams with foam

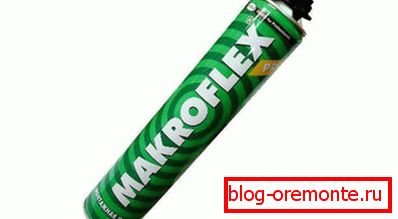
By sealing seams on the ceiling using mounting foam resorted in exceptional cases, when the actual width and depth of the seams exceeds the average. Only with the help of foam you will be able to close the rust to all their depth and ensure the required quality of work. The sequence of operations performed during this process is as follows:
- At the preparatory phase, the area around the rust is cleaned from the old coating and whitewash.
- Then it will be necessary to expand them with a chisel, knife or spatula with a thin blade.
- After the removal of small debris from the seam, it is necessary to proceed to its cleaning with a metal brush.
- At the end of the stripping, the surface is treated with a special primer compound, for the application of which a conventional paint brush can be used.
- After it is completely dry, you can begin to seal the ceiling rust with foam. When carrying out these operations it is recommended to use a special construction gun, which provides high-quality filling.
- After a certain time, the remains of the dried foam are cut off with a sharp construction knife.
- At the final stage of work, the final finish of the seam is made using the previously prepared finishing mixture.
- After its complete drying, it will be possible to proceed to the final leveling of the surface using a special putty for this purpose.