How to seal a crack in the ceiling
Many people know the problem with cracks and crevices in the ceiling. They significantly spoil the interior space and the mood of the residents. In the article we will tell how to seal the crack in the ceiling on their own.
Cracks in the reinforced concrete ceiling
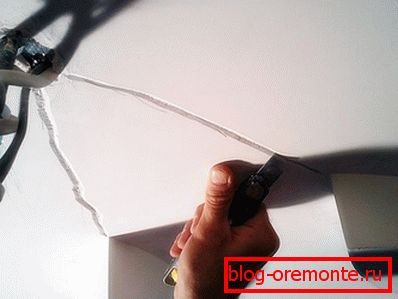
Before the main work it is necessary to prepare the ceiling. To do this, you need to remove fragments that do not hold well on the ceiling in the area of the problem area. If this is not done, but immediately take up the putty work, the cracks will appear again, and will have to wait for long. It is necessary to expand the processing area thoroughly and not to be afraid that excess pieces of facing material will fly off the surface. It is better to immediately get rid of the flimsy elements, rather than engage in repair work more often than is really necessary.
Note! Since during this type of repair there is always a lot of dust, before work the room should be freed as much as possible from various household items, and the furniture should be covered with plastic wrap.
- When closing a small crack, the repair object and the surrounding area must be carefully primed, preferably in two runs. The primer should be chosen such that it penetrates deep into the ceiling surface.
- After that, according to technical instructions, you need to knead the putty and seal up the grooves. It is necessary to work carefully and without haste, so that the mixture applied with a spatula lays down evenly.
- The composition should dry 24 hours. Then on the dried place you have to go with sandpaper to level the surface. The first part of the work is done - you can start finishing.
If there are cracks of impressive size on the ceiling, the repair will be more thorough. In this case, you will need to seal the gap using the serpyanka. The work will be performed in the following sequence:
- the crack, as in the former case, is thoroughly sealed with a putty;
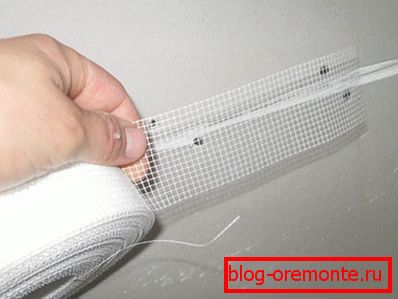
- serpyanka is applied to the repaired area;
- after one day, during which the applied mixture dries, the putty is applied to the problem area again.
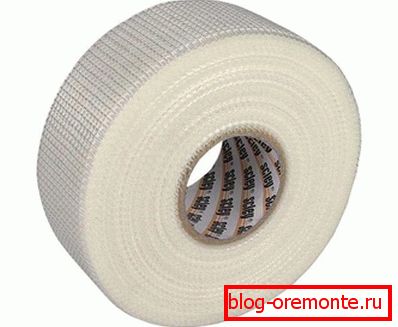
Note! In some cases this is not enough. Sometimes the use of a variety of putties and compositions can be replaced or supplemented with construction foam and sealant, resistant to moisture.
Experienced experts and resourceful masters solve the problem with cracks and other methods. For example, linings made from flax and cotton and paper based fabrics are used. It should be borne in mind that the fabric strip should not only overlap the section to be repaired, but also protrude by about 3 cm. Due to additional centimeters, the structural strength will increase.
Note! Fabric before imposing on the surface of the ceiling must undergo a certain treatment. Due to this, in the future it will not shrink.
The band must first be washed, and then carefully and carefully walk on it with an iron. After that, the piece of material must be completely saturated with glue.

PVA glue or wood glue is suitable for this. Moistened with glue flap squeeze and apply to the treated crack. The strip is neatly leveled with a spatula and after some time required for complete drying, the problem area is puttied.
Cracks in the plasterboard ceiling
There is an opinion that if the ceiling is built from a construction on the basis of plasterboard sheets, the problem with cracks will be automatically solved. But it's not always the case. Regardless of the shape and configuration of the gypsum ceiling, it can also cause cracks. On such a ceiling, defects appear no less frequently than on reinforced concrete floors and the reasons for their formation may be different:
- over time, the frame structure has weakened. The reason for this problem may be the initial unsatisfactory fastening of the metal profile. If the frame was made of wooden elements, there is a possibility of material drying out;
- high humidity in the form of condensate between the main ceiling and drywall;
- when installed on the joints of the sheets the serpyanka was not mounted;
- there is no chamfer on the edges of the drywall sheets;
- putty ceiling made not by the rules.

If a defect occurs, accompanied by a lag of paint or plaster, repair of the crack is performed in the following order:
- Using a spatula, the problem area is cleared.
- The processed surface is cleaned with a fine-grained skin. Dust is removed with a brush.
- The cleaned place should be primed and wait until it dries.
- The putty is prepared and the indentation is sealed.
- The surface to be treated is carefully cleaned.
- Plot primed.
- Then it is painted in several layers.
- In order for the color of the ceiling to even out, in a specific place you need to walk with a water emulsion.
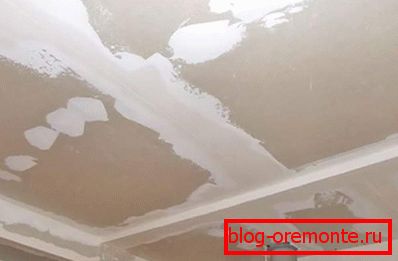
If a crack is present at the junction of the drywall sheets, the following steps are taken:
- the crack is freed from excess plaster;
- cleaning the area with sandpaper;
- the chamfer is removed with a sharp knife on the edges of the sheets;
- dust is removed from the surface with a brush, after which a primer is applied in two runs;
- putty is applied to the place where the sheets are joined;
- then it is the turn of serpyanka, which is glued to the joint;
- the surface is primed again;
- spatula with a wide spatula putty problem place, after which the necessary time is given for the mixture to dry;
- so that there are no voids on the surface, you need to walk again with a putty;
- again comes the turn of the primer;
- a thorough painting of the ceiling surface is carried out, the tone is evened out.
The gap between the ceiling and the wall

The gap between two mating surfaces can be patched with many methods. They are quite simple in execution.
- The most popular method: the crack between the ceiling and the wall is laid with mineral wool or filled with construction foam. Polyurethane foam manifests itself in this case in the best way. Since electrical wiring often runs through such problem areas, the material must be non-combustible. Foam tends to expand and fit snugly to adjacent surfaces, thanks to which the gaps are securely sealed. In addition, elasticity is characteristic of foam. If the house shrinks, the foam will shrink. The gap filled with assembly foam needs to be plastered.
- It is also possible to eliminate cracks with plaster or putty on a synthetic basis. The advantages of these materials are moisture resistance, environmental friendliness and safety. To blend better with the surface, the gap must first be moistened with water. After sealing the cracks with plaster or putty, the repaired area is well dried.
- Now in the building retail outlets, the already prepared putty is offered, which is meant just for such cases. It is applied to the problem area with a thin layer with a spatula.
There are many more ways to seal cracks, for example, using a reinforcing mesh or fabric. The main thing is to work with responsibility and the gap will disappear for a long time.