How to prepare the ceiling under the suspended ceiling
It rarely happens that good things come out the first time. Any work or occupation requires painstaking training and skills. In order for the apartment not only to have a pleasant appearance, but also not to lose it over an extended period of time, it is necessary to know how to prepare the ceiling for a suspended ceiling.
Benefits

This type of coverage appeared relatively recently, but during this period it was already able to convince consumers that there are a huge number of advantages. Among them:
- Long service life.
- Preservation of appearance without additional care.
- Protection of premises for leaks from above.
- Relative ease of installation.
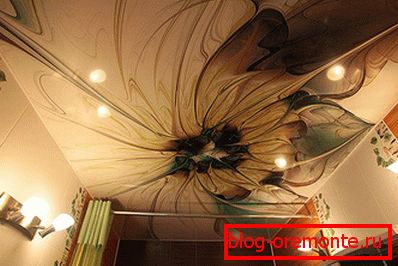
- The abundance of colors and the possibility of applying a print on the choice of the customer.
- Ideally smooth surface.
- Ability to select any configuration and tiered.
- Possibility of self-assembly.
Preliminary preparation

Preliminary preparation will allow to estimate in the best way the condition of both the ceiling and the room as a whole. It will provide an opportunity to decide on what tool will be needed and whether to buy more materials.
- Estimate the overall humidity of the room. For this you can use portable sensors. If the moisture content is excessive, you may have to improve the ventilation or increase the waterproofing.
- Check what material the walls and ceiling are made of. They should not be loose, so that the profile for the future stretch ceiling can be well fixed and have sufficient elasticity.
- At what stage are the construction or repair work.
- Is there a need for additional electrical wiring.
- Will need additional insulation.
Ceiling preparation

The suspended ceiling is designed to hide most of the flaws that were made during the construction work. But some shortcomings will have to be fixed before installation.

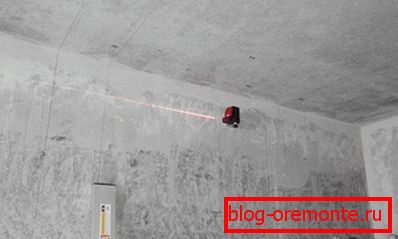
- The first thing that needs to be done is to check the level of the ceiling drop. This is done in the same way that is applied to the floor. With the help of the plotter planes need to beat off the perimeter throughout the room. Next, measure the distance from the applied horizon to the ceiling with a tape measure. So you find the highest and lowest points. Having calculated the difference, you will find out the maximum difference. If it is up to 5 cm, then this will not be a particular problem. In the case when this value exceeds 10 cm, creativity is important. If you install a stretch ceiling at the lowest point, then a significant part of the room is lost (this is irrelevant for rooms with ceilings that are 3 meters or more in height). Alternatively, to compensate for the large discrepancy, you can design the ceiling in two tiers. To do this, you must select a zero point from which the maximum curvature begins and from it in two directions stretch two webs.
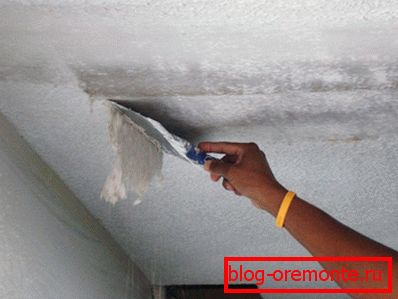
- Assess the surface of the ceiling. If it is painted, whitened, then it will be necessary to get rid of such a coating. If there are flows of plaster or cement mortar, it must be knocked down. In order to remove the whitewash can be applied in two ways: to cover the entire surface with soap and salt or adhesive solution. After a certain time, the coating swells up and can be freely removed with a metal batten or trowel. The paint will have to tinker a little longer. Solvents can be used, but this should be done in a well-ventilated area, as well as using personal protective equipment. Another way is to beat her with a hammer. You can use the construction dryer and scraper.
- The ceiling can be covered with wallpaper. Their structure is slightly different from those used on the walls, because they should be better fixed. In order to remove them without much difficulty, it is better to soak them with copious amounts of water.
- If the surface is covered with polyurethane flooring, it can be simply removed with a construction knife and trowel. With ceramic tiles, things can be much more complicated. Here you will need a punch with a chisel and enough time to beat it. After that, the remnants of glue will need to knock down with a hammer.
-
 Between the slabs are cracks, which are filled with cement mortar. These rusta must be knocked out. Due to temperature changes, the plates are subject to a slight displacement, this will necessarily lead to the fact that this solution will fall out sooner or later. Then you have to disassemble the canvas or otherwise remove it. In the case when the openings are deep enough, they must be zenenit. From the outer part it is necessary to pierce and reinforce the reinforcing mesh 30 cm wide.
 - If, after dismantling all types of finishes, potholes or any other gaps are detected, they must be sealed with a putty and reinforced with a reinforced mesh, as is the case with rustes.
-
 In order to eliminate mold, it is necessary to use special antiseptic substances. But before applying them, it is important to wash and scrape off all the external manifestations of mold and mildew.
 - After the room has been washed and cleaned, it must be allowed to dry well.
- Next, cover the entire area of penetrating primer. It is better to do this in several layers, giving time for each layer to dry well. All joints are brushed, flat surface - roller. The second layer is applied perpendicularly. This must be done so that over time the concrete dust does not begin to crumble.
- The ceiling will in any case be slightly lower than the main one. This means that a niche is formed. It can be reasonably used by placing an additional layer of heat and sound insulation in it. This will make it possible to save money during the heating season, as well as provide peace and quiet. For these purposes, usually used mineral wool or foam sheets. For the first you need to install special mounts. Expanded polystyrene can simply be put on the glue.
- Now it's time to do the markup. We have already plotted the baseline and identified the ceiling drop, which may be present. Focusing on our line, it is necessary to put additional marks to fix the profile that will be on the walls and on the ceiling itself, if the structure is on several levels.

Note! At this stage, you can once again check whether all the joints and possible slots with holes are sealed carefully. If we miss at least one of them, it can lead to unexpected consequences. Indoors there is a continuous circulation of air masses. If flow leaks through the holes, it will certainly cause a difference in pressure. This will lead to the fact that the future flooring will either be pressed against the concrete surface, or, conversely, blown. In some cases, in order to avoid this, it is necessary to install small ventilation grilles in the corners through which the difference in pressure is equalized.
Electrical part

None of the ceiling can not do without the installation of lighting. In the tension version, the LED strip and spotlights look great. In the middle of the room there may be a hanging chandelier.
- According to the prepared project, transfer the arrangement of all elements to the ceiling.
- It is desirable to install a separate automatic switch in the panel for this type of lighting.
- Use double-braided wire that is easy to fit and bend (this can be PVA, ball screw or monolithic VVG). Put it in a sleeve, it is better that it was metal. Plastic corrugation should be non-flammable.
- Spotlights can not with the help of their antennae to hold in the soft surface of the stretch ceiling, so they need to install special holders. They are a ring that is fixed to the concrete floor with a perforated metal profile. Stands are displayed so as to be flush with the ceiling. In this case, they will not create unnecessary protrusion.
-
 Lamps connect in parallel, rather than in series. In the sequential version, it will be necessary to correctly calculate the number of elements in the circuit; this method is more suitable for 12 and 24 V bulbs.
 - When mounting the breakers always break the phase conductor.
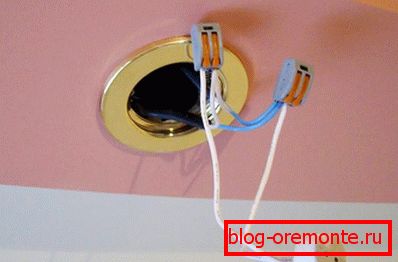
- All twist should be well insulated. For this it is better to use terminal blocks. In them the wire can be clamped with a bolt or by means of a spring design. There are also caps that are screwed onto the junction of the two ends. If necessary, install an additional junction box.
- A small transformer is mounted for the LED strip, which converts 220 V to 12 V. It can be hidden under the ceiling, but it is better to take it to an accessible place so that if necessary it is easy to replace or repair it.

Note! It is better to use LED or fluorescent lamps in luminaires (it is also possible to use ordinary small power). They have a not so high heating temperature. If these requirements are not met, the coverage at the locations of the lighting points will warp and may turn yellow from high levels of radiation.
If you meticulously approach the implementation of all the works listed above, then you will be very surprised how easy it will be to install the stretch ceiling later. It doesn't matter where you plan to do it: in a new building or in an old house - the requirements will be the same.
Video
In more detail the features of the preparation of the ceiling are discussed in the video: