How to make a corner ceiling plinth
The final stage of repair is the decoration and the addition of the final touches. A special place is occupied by the installation of ceiling plinth. If everything is clear with the floor plinth, what is the function of the ceiling?
The ceiling plinth (it is also called the frieze, fillet, baguette), primarily serves to mask the seam. He also hides the jagged edges of the wallpaper and prevents the putty from shedding, which likes to peel off at the corners and edges of the surfaces. Original and beautiful baseboards can also be an element of the decor of the room, make it more comfortable and smooth the transition of the wall to the ceiling. Without this element, the repair of the premises looks unfinished.
Most often used for the ceiling skirting foam, wood or polyurethane. They are easy to use, inexpensive and lightweight. Installing the plinth is simple, the main problem arises when removing corners. Let's talk about how to make a corner of the ceiling plinth with your own hands exactly, firmly and without cracks.
Corner Finishing Techniques
Decorate the corners of the ceiling plinth can be 3 ways:
- Hide corners for special decorative items.
- Run the corner joint of the skirting board with the help of the body.
- Run the corner joint without the cans.
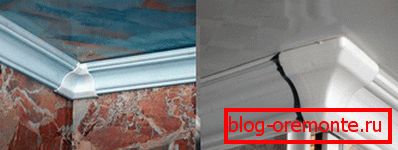
The first method is the easiest, the baseboard edges are cut exactly and a special corner element is attached to them. But in most cases, this method is not suitable, as people prefer to see a solid baseboard without excessive pomp. There are angular elements that are combined in texture and pattern with a plinth, but they are not always available.
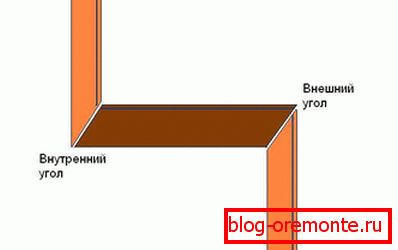
The second and third methods consist in exact performance of cuts and gluing of a plinth. The peculiarity of these methods is that it is quite difficult to do work without gaps and gaps, and you need to have some dexterity. If the plinth has a picture or a pattern, then it will be necessary to observe it, and this is unnecessary trouble and material consumption.
Preparation and necessary tools
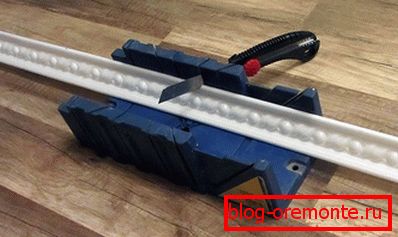
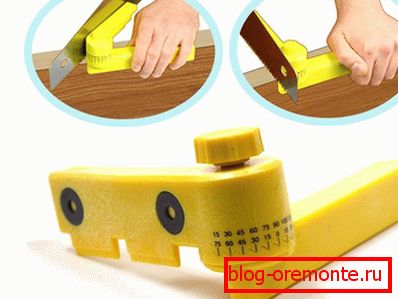
Difficult to find a room with flat corners. Therefore, before starting work, you will need to measure the angles and prepare the necessary tools:
- construction knife or hacksaw,
- roulette wheel
- hacksaw,
- pencil,
- protractor
- ruler,
- stuslo.
Materials:
- plinth
- glue or liquid nails,
- sealant.
Before proceeding with the installation of the plinth, it is necessary to inspect the surface. It should be clean and level. Remnants of finishing materials, unevenness and dust must be removed. Otherwise, the plinth will lie crookedly and may soon come off.
Most often, the baseboard is joined in the inner corners, but if there are projections and complex elements in the room, then it will be necessary to finish the exterior and non-standard corners with the baseboard.
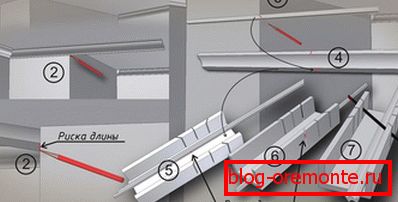
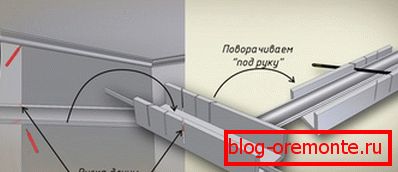
Cutting corners with the use of stousla
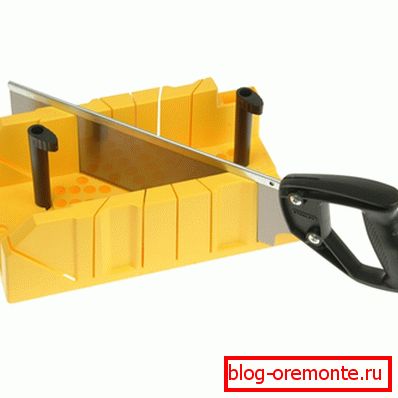
Stuslo is a tool that allows you to cut the rail at the right angle. Externally, it looks like a tray and has a groove for placing the strip. Along the edges of the miter box there are slots at different angles that fix the hacksaw. Often beginner finishers are interested in how to cut the corner of the ceiling plinth with the help of the cloth?
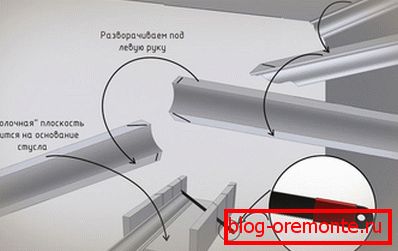
So, the stages of work:
- Measure out the length of the plinth.
- We insert the plinth into the tray.
- We take the plinth in the left hand, and the hacksaw (or construction knife) in the right.
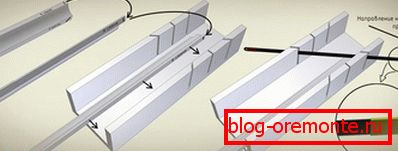
- Insert the hacksaw into the groove with the desired angle of inclination and sawing the workpiece. We try not to press so that chips on the plinth will not form chips or scratches.
- Now you need to prepare the second part of the corner. We install the second plinth in the tray.
- We insert into the corresponding groove a hacksaw and saw off.
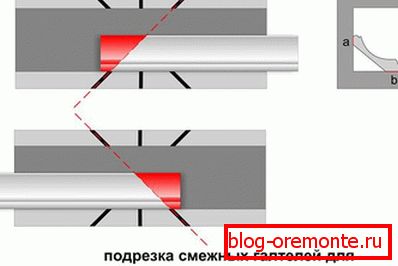
- After the manipulations, we dock the planks on the floor and check their coincidence.
If the joint turned out to be smooth, then the plinth can be fixed in place.
Note! It is not recommended to fix the baseboard before the next element is prepared and fitting of the joints is performed.
Cutting the inner corners without stousla
Stuslo greatly facilitates the process of cutting and joining parts of the plinth. If there was no hand at hand or there is no possibility to purchase it, you can make it yourself or cut the plinth without it.
Cutting the corner without the stousla is done using ceiling marking. The difficulty of this method is to keep the baseboard under the ceiling hard enough.
Trimming steps:
- Two skirting trim exactly at right angles.
- We apply the plinth to the wall and outline its contour with a pencil (it is enough from an angle of 10-15 cm).
- We apply the second plinth to the wall and also outline its contour.
- It turned out the connection point of elements.
- Alternately, mark the point on both baseboards and draw a cut line to the corner.
- Crop slats on the drawn lines.
- On the floor, we check the accuracy of the joint.
- Glue the plinth to the ceiling.
Если используется деревянный plinth то возможна подгонка срезов напильником.
Note! Plus, the way of the ceiling marking is that it is possible to achieve a perfectly accurate joint, which cannot guarantee the previous method with the tusl. Also, the ceiling marking allows to achieve a flat joint even in uneven and difficult corners.
Execution of external corners
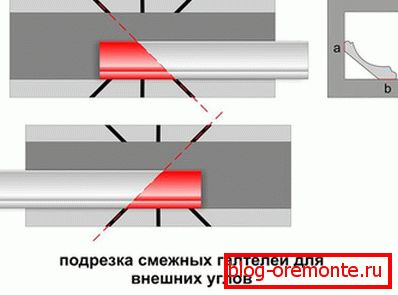
External corners in the room are quite rare, but unlike internal, they are more visible and require the most accurate joining of the slats. Small gaps and cracks in the outer corners cannot be hidden, and they will significantly reduce the quality of repairs. If the inner corners are 90 degrees, then the outer corners are 270. Consequently, the strips for the outer corners are cut in the opposite direction.
Stages of work:
- At the first stage, the marking of the inner corner is done in order to eliminate the situation with insufficient length of the prepared strip.
- We attach the bar to the ceiling and note the dimensions.
- We put the plinth into the box, hold it with the left hand.
- Insert the hacksaw and saw off the bar at an angle of 45 degrees, the hacksaw handle is directed to the left hand.
- We already hold the return plinth with our right hand.
- Saw off the same way, only this time the hacksaw handle should be directed to the right hand.
- Perform fitting fittings, internal and external at the same time.
- Fasten the plinth.
Note! As already noted, cutting with the stousla is not suitable for angles not equal to 90 degrees. Also note that the back ends of the baseboards do not fit.
Execution of external corners методом разметки происходит аналогично внутренним. Только точка пересечения планок на потолке в этот раз будет местом соединения угловых деталей. А точкой распила станет точка, прилегающая к стене, желательно добавить пару миллиметров на запас. Если не получился идеальный стык, то ситуацию исправляют герметиками, замазкой или краской.
Rounded corners
Rounded corners относятся к сложным элементам. Установка плинтуса в такие углы достаточно кропотливая и требует умения и некоторых навыков.
Rounded corners can be done in two ways:
- Carry out rounding out of the cut parts of the baseboard.
- Use flexible skirting.
Note! Plinth round corner consists of several parts. The more components, the more beautiful and more natural the angle will look.
Stages of work:
- The plinth is cut into pieces of 5-7 cm.
- Depending on the type of angle, it may take several parts. At least 4.
- Each part is cut at an angle. Straight ends should remain only at the extreme elements in order to dock them with the plinth.
- We join the elements with straight parts.
- Next we customize the rest of the rounding elements. If necessary, prune or replace if the slice does not fit.
- Glue all the details end-to-end. In order not to confuse the sequence of parts, you can number them.
The gaps are filled with putty, sealants or putty. Tint and mask. It all depends on the material of the plinth. Similarly, perform the installation of baseboards on columns or pillars inside the premises.
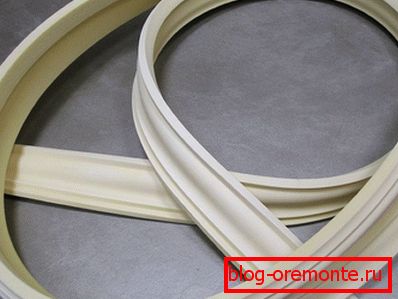
The use of flexible plinth allows you to minimize the number of corner pieces, and in some situations it will be enough to bend one slat. Most often the flexible plinth is made of polyurethane.
Pluses of a flexible plinth:
- ease of installation,
- ease of care,
- damage resistance
- large selection of colors and textures.
Such a plinth can be bent at any angle, and it is successfully used to design complex ceiling structures with oval and round elements.
There are several ways to execute the corner of the bonds of the ceiling plinth, the choice depends on the characteristics of the room and the master's abilities.
Video
Отрезать плинтус или багет под углом можно и без стусла, о чем рассказал автор видео. Попробовав правильно отрезать plinth автор пришел к выводу, который вы сможете услышать в конце ролика: