How to make a ceiling in the bath
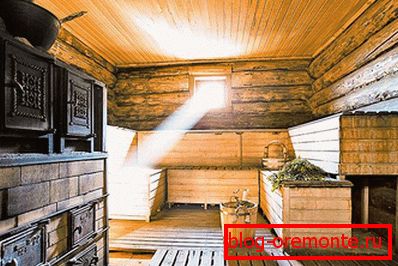
During the construction work there are no trifles. This statement applies to any construction and, in particular, the construction of the bath, one of the most important stages of which, perhaps, is the arrangement of the ceiling. In the article we will tell you how to make a ceiling in the bath with your own hands, as well as demonstrate a visual video instruction.

Note! Options for performing these works there are several. The main stages and technological aspects of each of them will differ to some extent, therefore, for the most accurate description, they require separate consideration.
General points of work

To begin with, you should consider some common points of work, regardless of the chosen technological solution.
- Ceiling height. This indicator is important in any case. The fact is that in the bath, for reasons of heat conservation and economy, it makes no sense to make unnecessarily high ceilings. The smaller the room, the less effort it will take to heat it. But, at the same time, it is necessary to take into account the fact that it will be necessary to wave a broom in the steam room, and too low a ceiling will not allow this. The optimal ceiling height, in most cases, will be 2.3–2.5 m.
- Strength. For whatever technology it was decided to build the ceiling in the bath, it is important to ensure its maximum strength. The point is that the load on the ceiling can and most likely will turn out to be quite significant, which means that it should have not only sufficient mechanical strength, but also successfully withstand temperature extremes. It often happens that from the attic the ceiling is exposed to negative temperatures, while inside the room under the ceiling the temperature is close to 100? C. One of the basic principles of the ceiling in the bath is the organization of the layered structure.
- Hydro- and heat insulation. Among other things, care must be taken to ensure that the carrier beams of the ceiling are not exposed to moisture, so you should think about high-quality hydro and thermal insulation.
Selection of materials

Another important point in the construction of the ceiling is the choice of materials used for this. It is on the choice of quality materials will depend on the result of work and the life of the finished ceiling.

- Heater. The most versatile material can be called mineral wool. Minvat is lightweight and has good thermal insulation performance, which is especially important for insulation of the ceiling. However, it should be borne in mind that this material may lose its function if it gets wet, so when using it, special attention should be paid to the issues of hydro and vapor insulation.
- Керемзит. It can also be used as a material for ceiling insulation. It has quite good characteristics. But, you need to know that in order to ensure that it performs its functions, the layer thickness must be at least 30 cm, therefore, despite the relatively low weight of the material, the overall load on the ceiling can be noticeable. Also should be provided and waterproofing expanded clay.
Note! As a vapor and waterproofing can be used in various modern roll materials. The usual polyethylene will do, but when using it, air will not enter the room, so you should take care of ventilation.
Wood is traditionally used for finishing the ceiling. For example, you can use a clapboard. This material is easy to use and has good performance. But it should be borne in mind that for indoor use of the bath, and especially the steam room, you should choose a lining of hardwood, as it does not contain tar, which can lead to burns.
Ceiling types

As mentioned above, there are several options for manufacturing the ceiling in a bath, each of which has certain technological features.
Sewing
As one of these options can be called a hemmed ceiling. The manufacturing process consists of the following:
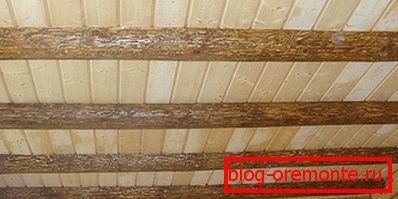
- First, the supporting beams of the ceiling are laid and fixed. For their manufacture fits a wooden bar section of 15? 15 cm. Beams are fixed at a distance of about a meter from each other and fixed with screws or nails.
- Beams are “sewn up” with a cut board from below, that is, the boards are laid close to each other and nailed or fastened with self-tapping screws.
- From the side of the attic fit vapor barrier layer. It is impossible to allow cracks between the strips of material, so the joints should be laid overlapped and taped.
- Mineral wool or expanded clay is poured into the space between the beams.
- Waterproofing is placed on top of the insulation. Just as in the case of vapor barrier, if several sheets of material are used, they should be laid with an overlap of at least 15 cm, and the joints should be glued with tape.
- And finally, this "pie" must be sewn up with boards.
The ceiling, built on this technology, will perfectly keep the heat indoors and at the same time will be quite durable.
Grazing
Another option for the manufacture of the ceiling in the bath will be a flat ceiling, the manufacturing process of which is extremely simple, and its implementation can be done, in most cases, with your own hands.
- First lay a layer of boards close to each other. Boards are fastened with nails or screws.
- A vapor barrier is laid on top.
- Over it the heater keeps within.
It should be separately noted that such a ceiling, though simple to manufacture, due to the absence of additional load-bearing elements in the construction, can only be used in small rooms with a span of no more than 2 m between the walls.
If water leaks through the roof, the insulation becomes wet and stops performing its functions. These nuances must be taken into account.
Panel
Along with the options mentioned above, the ceiling in the bath can be made of special panels. These panels resemble long troughs in which layers of vapor and waterproofing are laid, and materials designed to insulate the ceiling, and are sewn on top of the panel with trimmed boards. Such panels are quite versatile, but they have significant weight that must be considered.
Video
Warming of the ceiling with sawdust: