How to hang a chandelier on a stretch ceiling
Stretch ceilings are now quite popular. They look beautiful and good in operation. In this article we will explain how to hang a chandelier on a suspended ceiling, as well as present photos and video instructions.
Hook mount

The most sought-after and practical type of fixing a chandelier on the ceiling under a tensioning cloth is a hook mount.
Method 1
If the chandelier is suspended on an anchor hook, then a hole is made in the concrete ceiling with a perforator or electric drill, the diameter of which must coincide with the size of the anchor. An anchor is driven into the hole with the help of a weighty hammer, after which turns are made with a hook until the sleeve is worked out. The same result can be achieved by tightening the nut, which is included in the hook set. The diameter of the anchor is selected based on the type of chandelier. The most popular sizes are from 0.6 to 1.4 cm.

Method 2
The chandelier can be fixed on the ceiling by another method if it is not about an apartment, but about a private house. In this case, you can choose the place of fixing the light fixture yourself and make a hole there completely through the ceiling with access to the next floor or the attic. After that, two rectangular plates are cut out of the metal blank with a saw for metal, the thickness of which should not exceed 3 mm. Making core marks on the center of the plates, make holes, the diameter of which should be slightly larger than the diameter of the opposite end of the hook. Both plates are applied to the floor slab from different sides - respectively to the ceiling and floor. When overlapping all three holes must match. On the hook, the straight section of which should be with a solid thread, screw the nut. The hook is passed through the holes, and the nut must rest against the bar that is under the ceiling. Then, a second nut is put on the hook shank, which, when tightened, presses both plates to the overlap.
Method 3
Some concrete floor slabs have longitudinal pipe voids. This can be used with the following type of attachment. When applied, a rolled steel product called a circle is used. It represents a round rod from which it is possible to make a mortgage product. You can cut a segment of a certain length and size in diameter up to 1 cm from it. In order for the embedded part to freely enter the body of the slab, a hole is made in the ceiling, the diameter of which should not exceed 5 cm. . The hook can be made from the same rod, but with a diameter of up to 0.8 cm. With the help of special tools or a machine, the rolling circle on one side twists into a ring with a diameter of 1.6 cm, on the other side it bends into a hook. After that, the hook ring is inserted into the ceiling hole. In conclusion, the mortgage bar is pulled through the ring.
Method 4
There is another way by which the chandelier is mounted on the ceiling. For this work, you need a hook, on the rod of which the thread is cut to the end, thanks to which two nuts are screwed onto it. In addition, you will need one plate. Holes with a diameter of 0.8 cm are made on the metal plate. They must be drilled diagonally over the part. At the lower end of the thread of the rod of the hook you need to screw the design in this order - a nut, plate, nut. Then the shank extending beyond the nut is cut off with a hacksaw or grinder. In the main ceiling, a recess is made into which the nut is inserted, while the metal plate must adhere tightly to the ceiling. In order to fix the plate to the ceiling, notes are made. Then for fastening apply anchor studs, which have a diameter of 0.6 cm, and nuts. Such a constructive product can be used to fix the chandelier on the ceiling of wood. In this case, screws are used.
Fixation plate, "cross" and "I-beam"

For hanging light chandeliers used mounting plate. It is sold with a lighting fixture. All slats are similar and have the same design. In order to fix the chandelier to the bar, use screw clamps, which are located on the sides of the part. To fix the strap itself there are several holes. An intermediary for fixing the plate to the surface of the main ceiling is a timber beam. When fixing it to the ceiling, the bottom of the beam should be approximately 1 cm higher than the canvas of the stretch ceiling.

"Cross" is designed for more weighty and structurally diverse chandeliers. Before fixing it, a carrier platform is attached to the main ceiling. A plywood fragment with a thickness of 1 cm is suitable for its production. The platform should be slightly longer and wider than the chandelier itself. In the middle of the plywood base to cut a hole with a diameter of 5 cm, through which the wires will be output. First, four plates are fastened to the main ceiling with anchor dowels, to which the carrier platform is screwed.

The I-beam is used to install even heavier chandeliers. It is fixed as described above. The whole difference lies in the attachment to the carrier platform.
Note! A plasterboard surface cannot be used as the main ceiling. She will not stand the load.
Chandelier installation
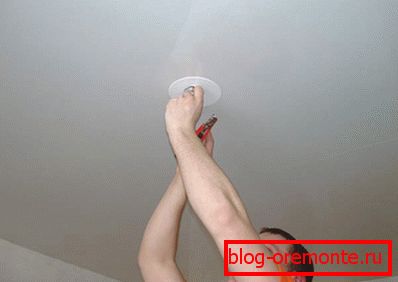
We hang the chandelier on the stretch ceiling after it is already installed and cooled after stretching. Since each light fixture must be mounted differently, only the main nuances of the lighting installation can be emphasized. When a hook is used to hang a chandelier, a plastic ring should be glued under it onto the canvas, then cut a hole along the inner contour with a knife and remove the wires to the outside.

When using a strap, the procedure is identical, only the ring should be of a larger diameter. This is necessary in order to fix the plate on the base. With the "cross" and "I-beam" plastic rings are glued in the center and at the points of fixation of the slats to the carrier platform. At the end of the installation, the chandelier wires are connected to the mains, the lighting fixture is fixed to the ceiling, plugs are screwed in and the luminaire is working.

Video
We offer you to see how the chandelier is mounted on the suspended ceiling.