How to glue the ceiling tiles
As you know, there are many ways to improve the ceiling. However, not all of them are characterized by low cost and ease of implementation. An excellent option that combines these two qualities is decorative tile. Thanks to it, you can cost-effectively decorate the ceiling yourself, and create your own unique room design. The main thing is to know how to glue the ceiling tile correctly and with the help of what methods you can achieve the best result.
Ceiling tiles can be of various dimensions, but a size of 50–50 cm is considered to be standard. A quality material is characterized by the absence of irregularities along the edges, as well as dents, chips and defects in the design. Depending on the composition and method of production ceiling tile is:
- Extruded polystyrene, obtained by stamping.
- Extruded polystyrene, manufactured by extrusion technology. A distinctive feature of such a tile is a smooth glossy surface, which often imitates natural material - wood, stone.
- The injection tile received as a result of heating of initial raw materials. This method allows you to get a relief pattern, and the product has clear boundaries.
No matter what type of tile you choose, you can definitely say that you won. And that's why.

Material advantages:
- durable,
- waterproof,
- inexpensive,
- it's easy to work with him
- can be painted,
- hides minor irregularities of the ceiling,
- is attached to any surface: concrete, wood, plaster, plaster,
- various colors, relief patterns.
If for any reason a separate segment of the ceiling tile has deteriorated, then it can be easily replaced with a new one, since the tiles are the same in size.
Before pokleit tiles on the ceiling, it is important to calculate the amount of required building material, to prepare the room and tools.
How many tiles do you need?

First, the tiles will need at least 15% more than required by calculations (in reserve). The calculation is simple: the area of the ceiling (length multiplied by the width) is divided by the area of one panel. It is known that a standard tile of 50? 50 cm means that its area is 0.25 m ?. For example, the area of the room is 25 m ?: 25: 0.25 = 100. That is, you will need 100 tiles, and taking into account the stock - 115 pieces.
What is required for work?
It requires a ladder, rags, a spatula to remove the old coating from the ceiling, gloves and glue. More and more repair technicians agree that liquid nails and Moment glue are best suited. Also in the priority tile adhesive "Titan" and "Eco-Naset". Do not save on glue. Poor quality material is a direct path to rework.
When working with ceiling tiles you will not need to make furniture, as the way of finishing is not dirty at all. It is enough to cover the items and the floor with an oilcloth, so as not to stain them with glue and dust.
Preparatory stage
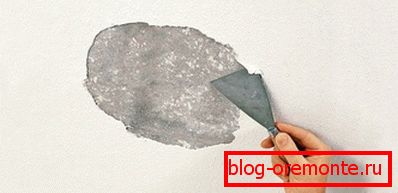
Ceiling tiles should be fixed on a flat, dry surface. Before that, the ceiling is cleaned from the old coating. Remove the paint, dismantle the old tiles, level the surface with a primer. If the ceiling is whitewashed, then it is not recommended to glue the ceiling tile to the whitewash, because with a high degree of probability it will disappear. If you, at your own risk and risk, decided to glue the tiles on whitewashing, use the following recommendations:
- Apply a coat of primer over the old whitewash and wait until it is completely dry. During this time, the primer will saturate the chalk layer and firmly grasp the surface of the ceiling.
- Take the spatula and otkovyryayte them clearly lagging parts of the chalk. Then generously grease the ceiling or the back of the tile with glue (you can do both) and press the canvas to the ceiling.
- You can wet whitewash with a wet sponge, thus partially washing it. Next, proceed to gluing tiles in one of the following ways.
Note! If you scrubbed whitewashing to a concrete base in some places or you puttied some areas (the color of the ceiling became uneven), when using a light tile these areas will shine through. In this case, it is recommended to perform a full putty ceiling.
From the center to the walls
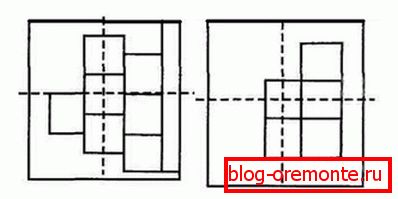
Note that gluing tiles to the ceiling in this way is not the easiest option. First you need to accurately determine the center of the room. If there is a chandelier, it can be used as a guide, since the light source is usually located in the middle. In the presence of a chandelier, but lack of experience, it is better to be safe and draw lines on the ceiling so as not to “squint” to the side. Next, four tiles are applied glue. Experts advise not to pour glue all the way, but to distribute the drops at the corners of the tile, in the center and along the edges (but not too close to them), since when pressed the glue will stick out beyond the borders and will have to be removed.

After waiting a little while the glue dries up, you need to alternately glue all four tiles around the chandelier. A word of advice: cut the corners of the tiles that surround the chandelier in advance. This will help the tile to lie at a right angle, and then the cut points will then be disguised under a glass of chandelier.
If there is no chandelier in the room, then two ropes will help determine the center, which should be pulled from the middle of one wall to the opposite one. The intersection of the ropes is the desired center.
As soon as you have stuck four basic tiles, you can continue to paste the ceiling towards the walls. The main thing is to closely monitor the ornament and not stray. But even if you make a mistake - it does not matter, the tile is easy to remove and re-fix the right side.
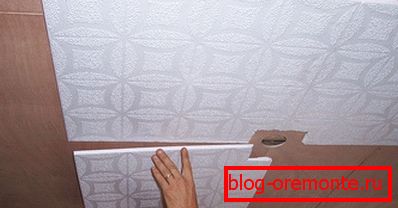
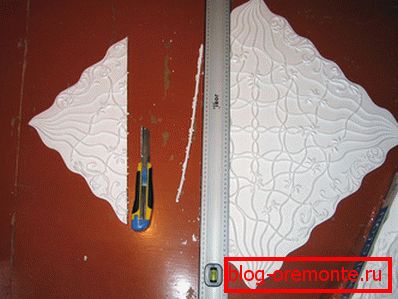
In most cases, the gap between the pasted area and the wall does not match the size of the whole tile. This distance needs to be measured and cut off part of the tile. It is advisable to glue so that the cutting line is against the wall. The remaining gap between the wall and the tile will subsequently disappear behind the ceiling eaves or stucco.
Wall to wall
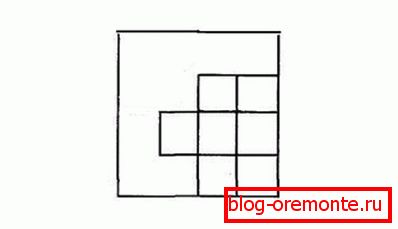
The easiest, but no less beautiful way. You can start from any corner of the room and lay out the canvas in rows one after another. With this method, tile will need to be cut around two walls opposite to where you started installation. By the way, you can facilitate the work of a special device. Since the hands get tired of the shed, and the tiles need to be pressed against the ceiling and fixed for some time, the use of a homemade press is a good solution. This device is made of a piece of plywood or chipboard, to which is attached a long stick, which allows you, while standing on the floor, to hold the tile on the ceiling.
Diagonally
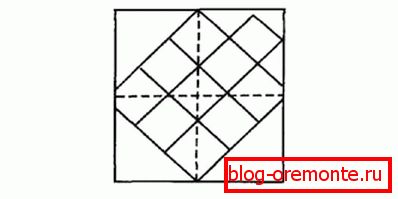
Now a little about how to properly glue the ceiling tiles diagonally. Obviously, this method is the most original. In addition, it helps to visually align the curved walls. Start with the ceiling layout. How to determine the center has already been negotiated. Through the center point draw two cross lines dividing the ceiling into four identical sectors.
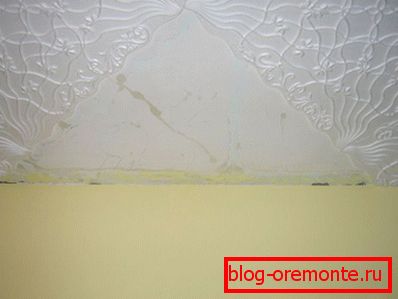
It is important to arrange the first tile so that its corners coincide with the axes drawn on the ceiling. It turns out that the tile is deployed with a diamond. New tiles are glued to it and they continue until they fill the entire surface of the ceiling. The walls will have to tinker by cutting out the pieces. One tile can be divided into 2-3 segments.
At the final stage they glue the baseboards, wipe off excess glue, remove construction debris. To prolong the life of the coating, it is recommended to fill the joints between the plates with a special sealant. That's all. It remains to close the room to eliminate drafts, wait for the glue to dry completely and begin to decorate the ceiling with paint. But it is optional.
Video
Pasting the ceiling with seamless tiles: