How to disassemble the rack ceiling
The rack ceiling is an inexpensive and reliable design which was widely adopted in recent years. Most often, the slatted ceiling is installed in the bathroom or on the balcony, but its installation can be carried out in any room at the request of the client. Often rack ceiling can be found in commercial and medical institutions.
Despite the fact that the construction itself can be perfectly preserved for several years, in some cases it is still required to lead its dismantling. The reason may be very different. Perhaps, one of the rails was deformed, and it is necessary to replace it. Or maybe, the landlord simply decided to change the entire interior, and the ceiling as well. The dismantling of this design is quite simple, and it is quite possible for him to carry out himself. In this article we will look at how to disassemble rack ceiling in the bathroom all the rules.
To work will require:
- screwdriver;
- screwdriver;
- chisel (can be replaced with a knife).
Dismantling is carried out in reverse order compared to its installation. That is, for the beginning it is necessary to remove the lamps, then the plinth, and only then proceed directly to the ceiling.
Note! All work must be carried out with gloves, as the sharp edges of the slatted ceiling can seriously cut the arm.
How to remove the lamp

The first thing you need to de-energize the room in which work will be carried out with electrical appliances.
- Luminaires with a cap under the incandescent bulbs are removed in the following sequence: First, the lamp itself is twisted off, and then the lamp is removed. Wires must be unscrewed from the cartridge and insulated.
- In the presence of halogen lamps, you must remove the ring. Now you need to unhook the bulb from the wires and pull out the entire lamp.
Complete disassembly of panels
First you need to dismantle the plinth. It is removed quite simply. You just need to hook the edges of the knife and tear off.
Note! The plinth can be kept intact in rare cases, and therefore you should prepare for the purchase of a new one.
Rack ceiling begin to disassemble from the most extreme panel. To do this, insert a screwdriver between the rail and the wall corner and gently pull one panel towards you. It is necessary to pull out the panel from the profile in which it is mounted. Also, if possible, clean the sides of the panel from the dried foam. This foam can damage the remaining panels as well as the interior details in the room when removing the slats. Thus it is necessary to free all panels from the profile and clean them from the remnants of the dried foam. It is necessary to clean the panels diagonally. Work should be carried out carefully, because these plastic panels can still serve, and they are easy to install in any other room.
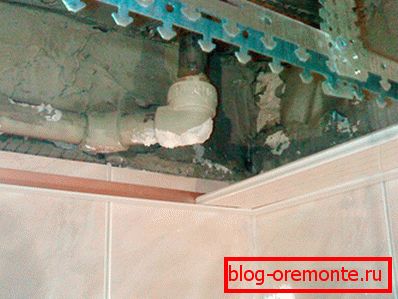
Now you can proceed to the dismantling of tires. It is necessary to loosen the spring clamp, and now the tires are easily detached from the vertical suspension.
The removal of hangers depends on what type of ceiling will be installed later. If the owner of the premises is planning something else, then the suspensions can simply be cut with a grinder, otherwise you will have to work a little. The head of the anchor bolt must be unscrewed and then completely pulled out of the ceiling. If the suspended structure is fixed with the mounting dowel, then it is necessary to unscrew this dowel with a screwdriver. In some cases, you can even use a chisel, which you need to cut the dowel. It is better to use this method in the most extreme cases, since in the future the projecting part of the cut dowel will be difficult to decorate. The wall corner is also disassembled in the same way. It is advisable to avoid cutting the anchor bolt with a chisel, so as not to complicate the process of subsequent installation.
Partial disassembly of panels

It may be necessary if it is only necessary to replace a part of damaged or deformed panels. In this case, the steps for dismantling tires, suspensions and wall corners can be skipped. At partial dismantling of the panels, as a rule, only a part of the ceiling changes, and the slats are carefully pulled out diagonally.

It is worth noting that the partial dismantling of the slatted ceiling panels is an excellent opportunity to check all the details of this suspended structure. Only in such an open way, you can ensure that everything is securely fastened. If the anchor bolt or mounting dowel is loosely attached to the wall or ceiling, then right now it is easy to fix. In some cases, you can completely replace the mount, or next to add another one. You can also check the condition of the wires. Such a check will subsequently help to get rid of many problems.
In order to have a more complete understanding of the process of dismantling the slatted ceiling, we suggest watching a video on this topic.
Video
This video shows how to disassemble the rack ceiling: