How to apply liquid wallpaper on the ceiling
Liquid wallpaper relatively recently appeared on the construction market. They do not resemble the material that everyone used to call wallpaper. Nevertheless, the new direction in the ceiling is gradually developing and gaining popularity. In the article we will show how to apply liquid wallpaper on the ceiling, as well as show photos and video instructions.
Surface preparation

A distinctive feature of liquid wallpaper is their high adhesion. They adhere well to surfaces, which can be based on a wide variety of materials. The great advantage of these wallpapers is that over time they do not stick off.
The ceiling on which liquid wallpapers are applied must meet certain requirements:
- the surface should be solid and durable - nothing should fall off of it;
- the base should not change color when in contact with moisture. This applies to metal elements that, when in contact with moisture, tend to be covered with corrosion;
- Ceiling materials should not be prone to moisture absorption.
That is why the ceiling should be carefully prepared for the application of liquid wallpaper.
Note! First, the ceiling must be cleaned from fragments of the old finishes, which are poorly kept on the surface. If before the ceiling was covered with paper wallpaper, they must be completely removed. Cracks of large size must be puttyed. They can be filled with liquid wallpaper, but because of this the cost of repairs will increase.
- The surface of the ceiling before finishing necessarily primed. For this procedure, a white or colorless deep penetration primer is taken. This event will not allow moisture to penetrate deep into the surface and will make the ceiling more robust.
- For this work it is better to use a concentrated primer, which will need to be diluted in a 1: 3 ratio. Do not use Ceresit CT17, which forms yellow spots on the finished surface.
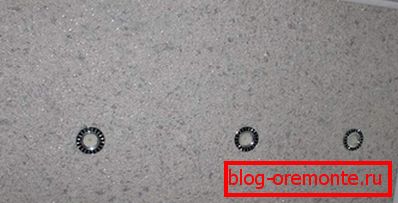
- If there are metallic inclusions on the surface of the ceiling, which are able to rust on wallpaper in certain places, they should be painted with water-based paint or PF-enamel.
- At the final stage of preparation, the surface is roughened. After starting putty or plaster, the liquid wallpaper itself is applied. To grind a surface before their application is not necessary. If the surface is smooth, on the contrary, the ceiling should be treated with a primer with inclusions of quartz dust.
- Quartz dust or fine sand can be added to the primer. This is necessary so that the material of the liquid wallpaper lays down evenly and without any gaps.
Kneading liquid wallpaper

Liquid wallpaper can be purchased ready-to-use, packaged in pails or in bags with a dry mixture. The most commonly used bulk material, which is diluted with water.

Note! First, the package with the material must be well shaken, which in the future will allow the mixture to mix well. In addition, this simple manipulation will allow in the future to get rid of many lumps.
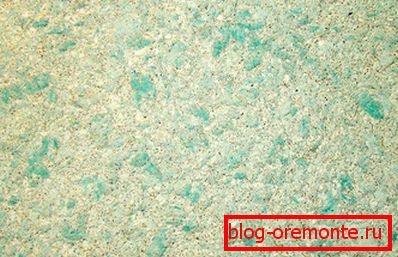
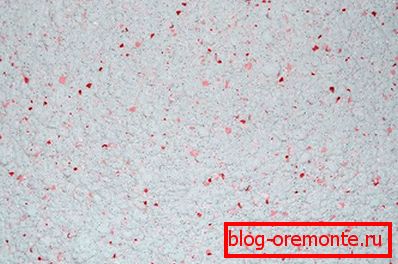
After that, you should choose a suitable dish, which will be mixing liquid wallpaper. The photo shows what liquid wallpaper looks like after stirring with water.
- The dishes should be chosen taking into account the capacity of one packet of liquid wallpaper. For one package there is enough pot of about 7 liters. In order for the container to be convenient to use, its depth should be up to 30 cm, and diameter - up to 60 cm.
- Water should be taken clean at room temperature. It is uncomfortable to work in cold water, because the batch should be done with bare hands. Hot water reduces wallpaper adhesion.
- You can dilute one packet of liquid wallpaper, or you can pour several packages into the container at once, and the size of the dish should be appropriate. If you mix the contents of several packages, it will be more difficult to make the mixture uniform in consistency. On the other hand, if the packaging is from different lots, in this way it will be possible to achieve a uniform shade.
- After studying the instructions on the package, a certain amount of water is poured into the container. There the dry mix gets enough sleep. Manually liquid wallpaper mix thoroughly, and the container is left for 12 hours. After this time, the liquid wallpaper is re-mixed.
Surface coating

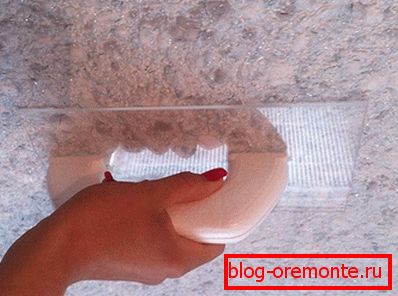
When applying liquid wallpaper on the ceiling, you can use a roller, but it is better to use a smooth trowel, the material for which can be stainless steel or plexiglass.
- A stepladder or chair should be placed so that it is as comfortable as possible to work - the work area should be right in front of your eyes. Spatula must work with a slight inclination to the surface, then the composition will lie evenly.
- The spatula can not be pressed - the wallpaper should look loose. This method of application will allow you to create a good surface structure, there will be no waste of material.
- After applying the wallpaper on a specific area, you need to visually assess the result. The coating must be smooth - without tuberosity, gaps and openings. Due to the peculiarities of the material, all defects are visible at any stage of work. They are easy to correct.
- In order to avoid joints and seams on the surface of the ceiling, the work needs to be performed not as separate fragments with stops, but as a whole.

Liquid wallpaper dry in natural conditions. Depending on the microclimate in the room, the coating can be operated in 1-2 days.
Video
The video demonstrates how liquid wallpaper is applied to the ceiling.
A photo