How to align the ceiling putty
When organizing a major overhaul in a private apartment, any master somehow has to deal with the alignment of its walls and ceiling with the help of special finishing tools. In this case, the alignment of the ceiling is a mandatory component of all procedures carried out in the process of apartment renovation. In our article we will try to tell you about how to level the ceiling putty with your own hands, as well as consider some of the features of the relevant working procedures.
Alignment methods
Before starting work, you should familiarize yourself with well-known methods of leveling the surface of the ceiling, which are currently widely used in construction. The choice of the option suitable for you depends on the condition of the surface before the repair, as well as on your ideas about the design of the already repaired room.
Taking these considerations into account, you can use one of the following alignment methods:
- Using leveling plaster.
- Plasterboard or suspended ceiling.
- Alignment of the surface of the ceiling with a putty.

Alignment with plaster is used in cases where the surface of the ceiling slab has significant flaws and irregularities that cannot be eliminated by conventional methods (i.e., using a classic putty).
If necessary, to hide the significant flaws that are present in the ceiling tiles, so-called false ceilings are used, which are formed from suspended coatings of a particular type.
Well, in a situation where it is supposed to paint the surface of the ceiling or trim it with wallpaper, you should do the plastering work.
Note! The use of this method of alignment is possible only if the ceiling has minor irregularities.
This last method will be considered, which is considered to be the simplest and not very costly among the specialists.
Special features
When leveling the ceiling with a putty with your own hands, you should remember that the finishing material should be applied to the surface with a layer no thicker than one millimeter. Otherwise, the finished leveling layer will eventually crack.

Before finishing works, it will be necessary to carefully prepare the ceiling surface for processing. During the preparatory work with the help of a wide trowel, the old plaster is first removed from the ceiling surface, after which not only whitewash, but also the chalk stains left after its removal are washed off the ceiling.
In addition, prior to leveling, it is desirable to treat the surface with a primer, which will ensure better adhesion of the finishing layer to the surface. The type of primer used in this process depends, as a rule, on the condition of the surface and the level of humidity in the room. For example, a primer with a waterproofing is usually used to finish a bathroom or kitchen.
Work tool

The following items should be included in the composition of the main and auxiliary working tools used during ceiling leveling works:
- full set of spatulas of various sizes and configurations;
- small grout (grinder);
- the so-called "Malka";
- building rule;
- "Water" level;
- special paint cord used to beat check marks;
- mixer and dishes for the preparation of leveling mixture.
Before leveling the ceiling putty, carried out on concrete floors, you will need a hard trowel, through which the surface is cleaned. Other types of spatulas (with a width of the working part from 100 to 500 mm) are used for laying out and leveling the putty mass.
The so-called "Malka" is a device designed for the temporary placement of small portions of putty mixture. In addition, this tool can be used for laying out and leveling the mixture at the stage of preliminary (draft) work.
The masking cord is used to beat off the control line, produced, as a rule, around the perimeter of the room, and to place beacons.
Ceiling surface preparation
High-quality preparation of the ceiling surface for puttying is possible only on condition that all the instructions regarding the treatment of it with a special primer are strictly followed. After applying a layer of primer, be sure to wait until it is completely dry.
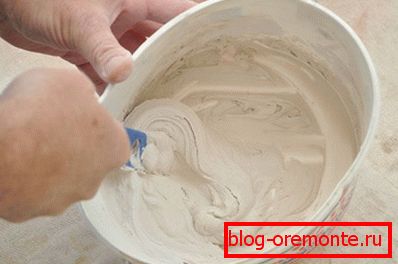
Before leveling the ceiling with putty, You should carefully examine all the nuances. The fact is that, in accordance with the order of application, all the putty compounds are divided into so-called starting and finishing. Starting mixtures are applied in order to level the significant irregularities of the ceiling (ranging from 1 to 3 cm), while the finishing compositions are used to eliminate very small deviations of the order of 1–2 mm.
In the course of finishing work, it is necessary to take into account the maximum thickness of the starting layer of putty, which is necessary for leveling significant irregularities.
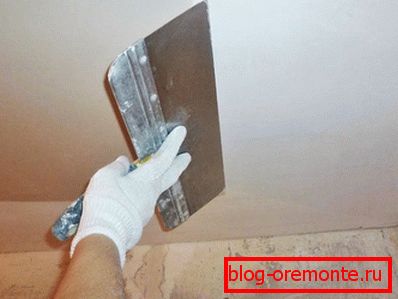
In the event that this indicator significantly exceeds the maximum allowable value - you can not do without plaster surface, produced immediately after the reinforcement of the ceiling. Most often, as a reinforcing material, in this case, a special construction (paint) mesh is used, which is attached to the surface to be trimmed with its adhesive inner side.
After fixing it, a previously prepared plaster mixture is applied as evenly as possible to the ceiling surface. Subsequent treatment with a putty is done only after the leveling plaster has completely dried.

After applying the starting layer of putty, you must once again make sure that there are no irregularities visible to the eye. And only after that it will be possible to proceed to the finishing of the ceiling surface, and after drying the applied layer - to its processing using a grinding tool.
Ceiling marking
If significant irregularities are found on the ceiling surface, you will have to pre-mark it in order to arrange the lighthouses along which the ceiling will be leveled.
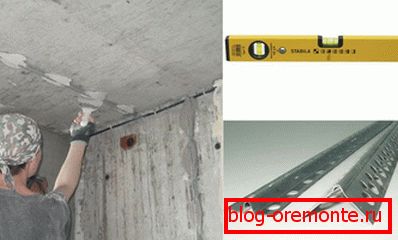
At this stage of the work you will need a water level, with which you can put all the beacons. Before starting marking work, you should familiarize yourself with a number of subtleties concerning the order of their conduct:
- for fixing the beacons, the starting putty mixture is used, but in this case it should be quite thick (only slightly diluted with water);
- in the process of placing beacons, a thin track of the fixing mixture is applied to the ceiling, into which the lighthouse profile itself is pressed with little effort. The working thickness of the beacons you can choose arbitrarily, because it does not in any way affect the final result, but only determines the rigidity of the structure;
- in the course of the formation of the next beacon should focus on the previously broken control line. For leveling the entire system of installed beacons, you can use a fairly long level;
- The final alignment of the ceiling surface is organized with the help of an instrument you already know - the building rule, the length of which must correspond to the maximum distance between the beacons. It is best if this distance is approximately 10 cm shorter than the length of the tool used in the alignment. In addition, as a guideline that defines the plane of the formation of lighthouses, a simple thread stretched across the center of the ceiling is often used;
- The drying time of the beacons can be used to eliminate gaps, small cracks and gaps in concrete floors that are present on the surface.
Watch the video on the alignment of the ceiling putty you can below.
Video
This video shows the process of aligning the ceiling on the beacons: