Drywall ceiling itself
Over time, people are faced with the fact that the apartment or private house is required to make repairs. It may be necessary in one room or in the whole house. In this case, usually the most difficult part of it is the ceiling trim.
There are several ways to repair the ceiling. However, they all differ in labor intensity, in the amount of money spent and construction materials used. In addition, some work, such as installing a ceiling of plasterboard, can be relatively easy to do yourself.
In this article we will explain how to make a ceiling of gypsum cardboard with your own hands, which will last more than a dozen years and will be able to hide all the flaws. We will understand where you can do it, and where not.
Training

It is worth noting that it is best to make the structure sheathed with plasterboard sheets, in those cases where it allows you to make the height of the ceiling. The ceiling of plasterboard implies that you have to do to align the metal frame, so if the height of the room is less than 2.2 m, you will have to think about another way of finishing, for example, plastering or installing the wall paneling on wooden slats.
In fact, to make a gypsum ceiling with your own hands, you do not need to be a very experienced specialist. The main thing is to understand the essence of the work and do everything in the right order, stock up on the necessary materials and tools. It is equally important to carry out the preparatory work.
Consider the option of repair in one of the rooms of a private house. Of course, there is no need to level the ceiling, which will be hidden under sheets of drywall. However, if there are huge cracks on it, it is necessary to check its condition. It will be a shame if a piece of old plaster collapses on an already assembled plasterboard ceiling or a rotten beam falls. Therefore, such elements must either be replaced (repaired) or dismantled.
It is also very important to check if the roof is leaking. If water flows through it, it can cause the deformation of drywall and lead to its premature destruction. Large cracks may indicate a wall subsidence, which will also lead to the appearance of similar deformations after repair. Therefore, before you make a serious repair of the ceiling, it is sometimes necessary to patch up the box at home.
If we talk about the apartment, then there to make a false ceiling is much easier, since the whole structure will be attached to concrete slabs. However, if the property is located on one of the upper floors, it is worth making sure that the roof of the high-rise building is securely covered with roofing material and will not leak. Otherwise, all work on the ceiling will be useless, short-lived.
Ceiling mount

Before you install the transverse and longitudinal profiles, you need to install fasteners for them from the ceiling, otherwise the entire structure will inevitably bend under the weight of drywall and fall apart. Need U-shaped fasteners.
Note! Usually these items are sold as plates, and in place they can be bent as needed.
To fix the plates accurately, it is necessary to make a marking on the ceiling where the profiles will be laid. Then, according to this marking, it is necessary to mark on the ceiling the points where the holes for installation will be drilled. The holes are drilled using a perforator with a standard or ordinary drill (it all depends on the surface where the fasteners will be installed), dowels and a hammer.
Note! In order for a regular dowel not to dangle in the ceiling, in case it falls into a void in a concrete slab, it is better to use special expanding dowels that hold very tightly.
When all the U-shaped fasteners are in place, going design. If the ceiling is planned to do a two-tier, then the next tier is attached to the previous one, just like the first level - to the ceiling. Between themselves, the profiles are connected by "fleas" - miniature metal screws that firmly tighten the frame parts.
Profile mounting

First we buy the necessary materials. You will need a metal profile CD-60 (supporting element for the ceiling) and a profile UD-27, acting as a guide strip for the CD-60. You will also need a box of black screws for metal O3.5 mm and a length of about 25 mm, as well as a package of tiny self-tapping screws for connecting profiles. Of course, you need a few sheets of drywall - how much you can calculate with the help of building calculators. Also needed is a drill with interchangeable nozzles, a bit for screws and a drill for dowels.
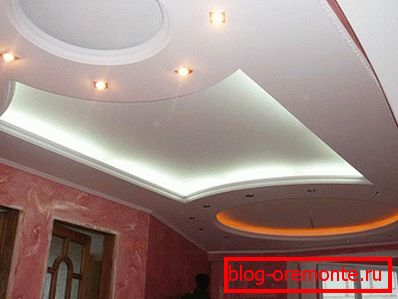
First of all, it is necessary to determine whether the ceiling will be single-tier or will have two levels. The first level should be located at a distance of 9-10 cm from the old ceiling. To begin its installation, it will be necessary to mark a line along the perimeter of the room with the help of a laser level, which will be the mark when attaching the main profile.
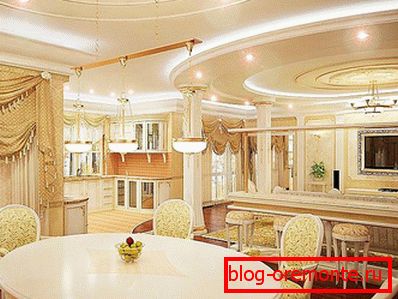
Note! The two-tier ceiling, undoubtedly, looks much more spectacular and more prestigious than the usual one level. However, before deciding what kind of ceiling to make, it would be worthwhile to measure the height of the room and estimate its financial possibilities so that the ceiling repair would not take months or even years.
Now the CD-60 profile is taken. It will be mounted on the ceiling with dowels. It should be placed in such a way that the bottom of the profile touches the wall, and the side that is below coincides with the marked line. It is enough to drill holes for dowels every 40–45 cm in length and along the edges of the profile. If it passes through a corner, you can neatly cut its side walls and bend it along the wall, securing it in one corner on both sides, or cut off an extra length with scissors, and attach a whole profile on the next wall.
When the entire perimeter of the room is sheathed with a profile, you can begin to mount the UD-27, to which the sheets of drywall will be attached.
Profile installation requires attention and accuracy. The distance between them is directly related to the width and length of the drywall sheets. Its dimensions in width are always 1.2 m and in length it can be from 2 to 3.6 m. Imagine that a sheet of gypsum plasterboard of 1.2 × 2.5 m has been purchased for installation - standard sizes used for ceiling finishing. Then the longitudinal profiles of UD will be fastened through 0.6 m, and transverse through 0.65 m. This distance is calculated from the center of one profile to the center of the next. That is, one sheet of drywall will fall on one half of the profile, and the second sheet will fall on the other.
Electrical installation

Inside the ceiling in advance, after installation of the frame and before fixing the sheets, it is necessary to conduct all the necessary electrical wiring. It is necessary if it is necessary to replace the old cables laid for the chandelier, or install additional lighting. It is important that all the wiring be laid in a corrugation, otherwise it will become a fire hazard for the ceiling and the whole house. It is also better to hold it until the power is connected, and only then connect the phase and neutral wires.
Do not do junction boxes in the gap above the ceiling! In the event that the ends of the strands oxidize or weaken, it will be impossible to get there. The same applies to cases if you suddenly need to change something or add to the box.
There is no need to save on the purchase of a cable for lighting, since excessive savings at one time can lead to unexpected “surprises” in the form of overheating wires or deformation of the insulation. It is best to use a cable of 1.5 mm ?, which is able to withstand a load of 4 kW. Of course, you can draw a smaller section, but you never need to denounce that the number of electricity consumers in the ceiling will not increase.
Corrugated to the ceiling with cable can be mounted in several ways. One of them is staples attached to dowels. Depending on the length of the staples, you can fix not one bump in it, but several. Another proven method. Take the dowel, from which the screw is pulled out. From the pieces of copper cable that was used for laying, wires are separated without insulation and are cut with cutters into pieces about 15 cm long. Then they are wound on the screw so that there are two equal ends. Next you need to hammer in the native ceiling dowel and hammer in it with a hammer or tighten the screw with the wiring. Then the corrugation is pulled to it and the wire is tightened. To prevent the bond from spinning, you can pull it up with pliers.
Installation of plasterboard sheets

Caution should be exercised when lifting sheets to the ceiling. In this work can not do without an assistant. First, two people lift the sheet, then one of them holds it from the bottom (you need something like a mop), and the second, using a screwdriver or a drill, fastens it with screws in profile. As mentioned above, the edge of the sheet should fall in the middle of the profile, except for places where the profile is adjacent to the wall.
If the screw is scrolling in a profile or has passed through a sheet through, you need to unscrew it and tighten it side by side. It is also worth remembering that their caps should not stick out of the sheets - this will interfere with the putty.
So that there are no cracks on the future ceiling, two things are worth considering. The first is that a special self-adhesive mesh is applied to the seams, which later is puttied. The second method is the installation of sheets with bandaging, that is, shifted by half (as when laying bricks). So less likely that a continuous crack will pass through the ceiling.
Ceiling finishing - plastering and painting

Before plastering drywall sheets need to be coated with a primer. For this, a liquid from Knauf or any other that is used in your area will do.
To finish the ceiling, you will need a starting putty, applied by a layer of about 2–3 mm, and finishing, the thickness of which should only completely level the ceiling. After the first layer has been applied, it should be treated with emery cloth, but not very coarse, so as not to scratch. When the entire ceiling is covered with a layer of starting putty, in a few steps, it is finished with a finish, after which the skin is again applied, but already quite small.
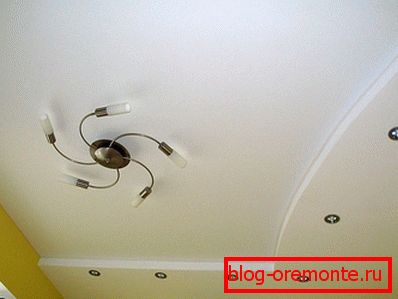
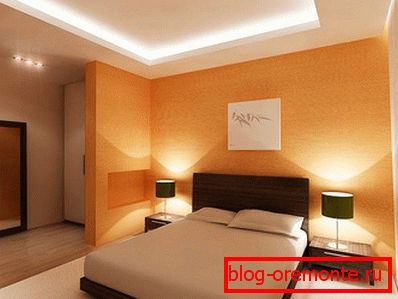
Then the ceiling, after it dries, must be primed again, after which it can be painted with water-based paint. Which color to choose? White colors look best, but you can choose a different color, for example, in orange or pink shades. After painting, chandeliers or spotlights are hung.
A photo


Video
To see in detail how the installation of the ceiling of plasterboard, see the following video:
This video shows how to make a multi-level plasterboard ceiling: