We build a country house from a bar - a phased technology
Who does not dream of building a small cozy house at his dacha in which you can relax comfortably and at the same time not save for him for several years? This is quite realistic, especially if you have at least once in your life faced with the construction or repair.
It does not matter if there were no such cases, our article will help anyone, even if you have never held a drill or a hammer in your hands.
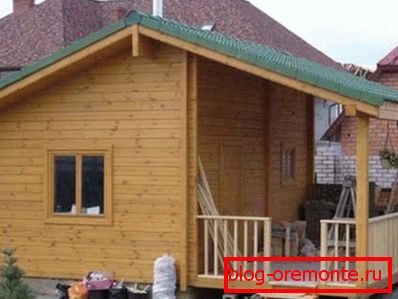
Preparatory work
First of all, you need to familiarize yourself with several rules, prepare a project of a country house from a bar and purchase construction materials. In order not to get ahead of ourselves, we divide this section into several parts.
Note! For example, will consider a single-storey house with dimensions of 4x5 meters, without an attic, but with access to the attic. Ready projects of country houses from a bar are presented in this and other articles of our site.
Construction requirements
- The most important thing is to determine the location of the future structure. It should be practical, in terms of accessibility, safe, in terms of protection against possible fires of neighboring structures, functional, in terms of providing all the necessary communications. Some useful tips:
- From the street should retreat at least 5 meters.
- The minimum distance from the fences of neighboring areas is 3 meters.
- The nearby wooden buildings should be located at least 15 meters away.
Note! Wires carrying better to throw in limbo so that they do not lie on the ground. This eliminates the possibility of accidental damage, as well as the interaction of electricity with water.
Preparation of documentation
- First of all, on paper should indicate the dimensions of the future structure. Since we have a house with one floor, it is enough to indicate the height of the supporting walls and the height of the roof, as well as the length and width, as a result we will have the total area of the house. Do not forget that our construction is 4 meters long and 5 meters wide, and its height is 3 meters, that is, 20 square meters or 60 cubic meters.
- After the location of the bearing walls on paper, you must specify the internal walls, dividing the room into 1-2 rooms. Since we have a small house, one spacious room with a small partition is enough for arranging the kitchen area.
- The project should indicate all construction materials that will be used in work processes.
Materials for construction
We have decided that the building will be built from a bar - an environmentally safe material that is better suited than anyone else for a country house. As for the roof, then fit metal, or the usual corrugated, so to speak, economical option for a small structure.
As for finishing materials, it is best to use varnish or paint, which also have a positive effect on the strength of the structure, protecting the timber from abundant moisture. On the other hand, in order for the paint to stay on the tree for a long time, it must be carefully prepared and treated with protective agents.
Note! The final price of construction largely depends on the type of timber chosen; this can be, like the profiled material, and country houses from laminated timber can easily be built. The latter option is more expensive, but less time-consuming, so you decide, focusing on their capabilities.
Required Tools
- Drill.
- Screwdriver.
- Hammer and kyivanka.
- Construction level and plumb.
- Roulette.
- Hacksaw and jigsaw.
- Furniture stapler.
- Paint roller and brush for paint and varnish.
Foundation stage
After all the above procedures are completed, the materials and tools are acquired, you can proceed to the construction of the foundation. Typically, small cottage log houses do not heavily load the soil, so if it does not consist of sand, then the most economical and practical option for the base is the columnar form.
It's easy to do it yourself from any scrap materials:
- Initially, the dimples are pulled out so that the bottom of the pits is located below the level of soil freezing.
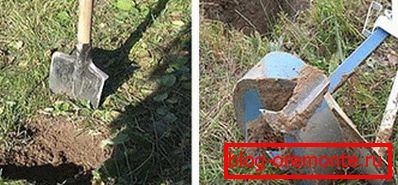
Note! For convenience, it is better to dig a hole with a diameter of half a meter so that the finished pole can be treated with a hydrophobic material, and then covered with soil.
- 10-15 cm of sand are poured on the bottom of the cavity and carefully rammed.
- From scrap materials (plywood and planks) it is necessary to make a formwork, about 20-30 cm high above the soil level. The cross section of the post is 15x15 cm.
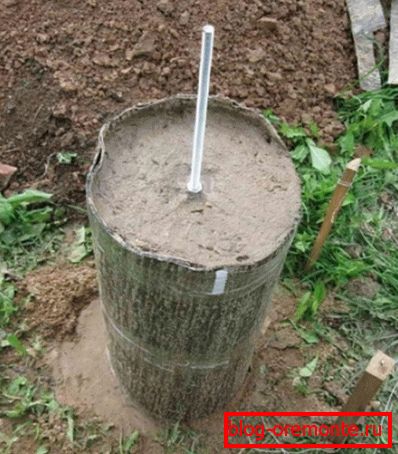
- Now in a metal container (or on plastic wrap) it is required to knead cement mortar, mix cement, crushed stone, sand and water to form a thick mixture.
- Pour the solution into the well.
- Insert 3-4 bars of reinforcement into cement.
- After the solution sets (5-7 days in warm weather), it is necessary to cover it with bitumen.
- Now the pit is filled with soil.
Note! The pillars should be located in steps of 1-1.5 meters, not more, but not less, although a large number of supports does not affect the technical part, but only affects your budget.
- After all the supports are ready, you need to check the horizontal plane of the base. If everything turned out without special drops (an error of 3-5 mm is permissible), then a piece of roofing material is laid on the pillars.
- Now it remains to lay out the foundation on the foundation of the house, fastening the products with the help of nails.

We build walls
Building country houses from profiled timber, to save, it is enough to use products with a cross section of 10 to 10 cm, this is enough to withstand all sorts of loads.
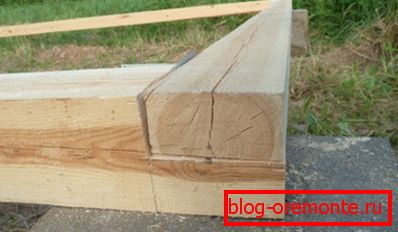
- First of all, you need to lay out one row on the base.
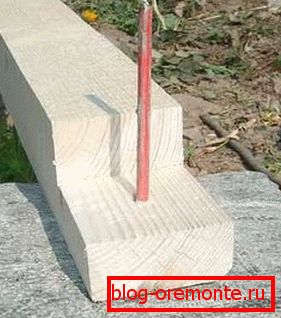
- The next step is the laying of the second row of timber with its fixation along the entire length of the pins through each meter.
Note! Fasteners should be inserted 1-2 cm into the material so that it does not come into contact with the bar of the next row.
- It is better to start building from one corner, erect two perpendicular walls, not forgetting possible internal partitions. If they are on your project, then additional grooves should be made in the timber and the internal walls should be laid simultaneously with the external ones.
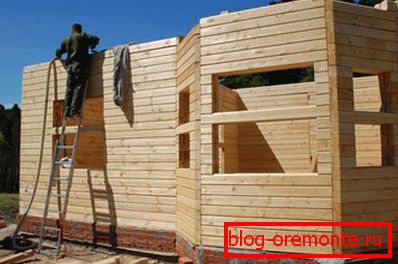
- The openings under the windows should be left empty until the house shrinks completely, with a few exceptions - one row of timber should connect all sides of the window opening. This is necessary in order to avoid irregularities. The same goes for the doorways.
Roof installation
When all the walls have been erected to the required height, you can proceed to the installation of the roof, one of the most crucial moments.
The end result is directly related to the durability and reliability of the design.
- Initially, horizontal lags are installed, which play the role of a ceiling.
- On them, in the center, are mounted vertical supports (for a dual-slope roof), the height of which should be equal to the planned height of the roof.
Note! In the case of other types of roofing, vertical supports are arranged depending on which design is planned. For example, for a shed roof, they are mounted strictly above the supporting wall.
- Now came the installation of rafters, they should be mounted on metal corners and screws. The distance between the posts is not more than 60 cm.

- Between the rafters should be fixed with several horizontal boards.
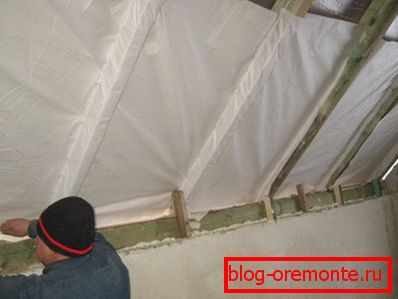
- Inside you need to flash all windproof film, for this use a furniture stapler.
- It remains to fix the building material that you chose for the roof. If this is the usual profiled sheeting, then it can be mounted without preliminary drilling using galvanized screws with a drill.
In that case, if you plan to use the country house all year round, you will need to fix the insulation for the beam between the rafters and another vapor barrier on the outside.
Finishing and wall insulation
Small country houses from a bar are usually erected without the use of thermal insulation materials, so to speak, the building is suitable for use only in the warm season.
On the other hand, no one bothers you to make it suitable for life in the colder months:
- The most affordable insulation is foam, it is inexpensive and affordable at work.
- Before fixing it on the wall, you should decide which side is best to do. If from the outside - then all the beauty of the natural material will disappear, if from the inside - the room will lose a few square meters of usable area.
- Also, before installing the insulation material, it is necessary to treat the wood with antiseptics, protecting it from insect parasites and mold.
- As we have already said, it is better to cover the timber with varnish in order to preserve the texture of the wood and make it more expressive. It is possible to paint, just decide in advance with the color in which your house will be painted, because the paint will fade and fade over time.

Conclusion
As you can see, to build a house with your own hands does not require special skills of a builder or expensive tools, it is enough to follow what this instruction says.
You also do not need construction equipment to lay timber, 1-2 assistants are enough, and you will cope with the construction of a small house in a few days. Just do not forget to wait for time for shrinkage before operating the house.
In the presented video in this article you will find additional information on this topic.