The roof of concrete: high-quality arrangement
For many years now, a concrete roof has been the most popular solution when it comes to flat construction. Basically, this technology is used for garages, but sometimes it is preferred in residential construction. Next, we describe how to do it.

Create a roof
Our instruction will consider the construction of a flat roof, but there is a possibility to make a gable. Consider all the processes in stages, to make it easier to understand them.
We prepare materials and tools
Before filling the roof of the garage with concrete, it is necessary to prepare a set of tools.
If you do not want to spend a lot of money and want to do everything yourself, you will need to take the following:
- Rule With it, level the solution on the surface.
- Tamper. It allows to remove bubbles, and also to condense a concrete mix.
Note! Get a tamper weighing at least two kilograms.
- Large brush.
- Steel bar.
Today in the shops you can find professional tools, which significantly speeds up the work. Its price is, of course, much higher, but it is worth it.
You will need this set:
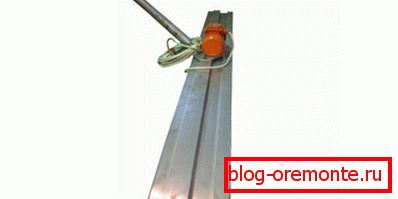
- Vibrolath (it replaces the rule).
- Stroke machine (instead of trumpets).
- Construction probe.
In this case, in any case, you will need tools for working with the mixture:
- Construction mixer.
- Grid (for sifting sand).
- Several shovels (depending on the number of workers).
- Tanks.
Tools you have prepared.
Now it is time to stock up on all the necessary materials:
- Metal beams to strengthen the supporting structures. Thickness depends on the length of the span, so it is better to consult with the seller - consultant.
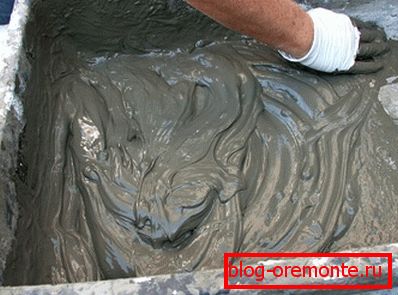
- Concrete of high grade (not lower than 250) or already ready mix.
- Armature section of at least 1 cm.
- Boards.
- Ruberoid or sheet steel.
Prepare formwork
In order for the roof of aerated concrete to come out of the house is flat and durable, first of all it is necessary to build a formwork and install a reinforcing layer in it.
This is done as follows:
- Bottom shelves of beams are covered with boards. On them we lay a layer of ruberoid. At the same time, cracks should not appear, because a solution will flow through them, which will affect the strength of the structure.
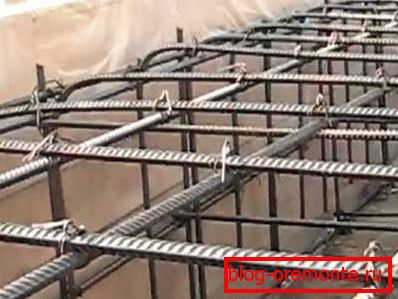
- Then we lay reinforcement along and across the beams. At the same time, the resulting cells should be no more than 20x20 cm. The armature must be tied up with wire so that it does not disperse during pouring.
- Further we enclose crushed stone under the reinforcement network.. This will allow to get an even coating. In addition, this measure reduces the consumption of the mixture.
If a concrete cover with a hatch is supposed, then an additional layer of reinforcement is required to be installed in the places of its installation.
Pour concrete
Now it was the turn of the most important part. In fact, this is a simple procedure that will require only a lot of physical strength.
Remember a few simple rules when laying the solution:
- The mixture is laid in stripes, and you can navigate along the beams.
- It is desirable to make the layer thickness of at least 15 cm, because only in this case the required structural strength will be achieved.
- In order to ensure proportional drying, the calculation of the solution must be carried out continuously.
- Make sure that the reinforcement layer does not begin to move. However, if you securely secured it, this will not happen.
- Lubricate the inner walls of the formwork with a lubricant (suitable, for example, engine oil). This will allow no problem in the future to remove it.
In general, the casting procedure is performed in the following sequence:
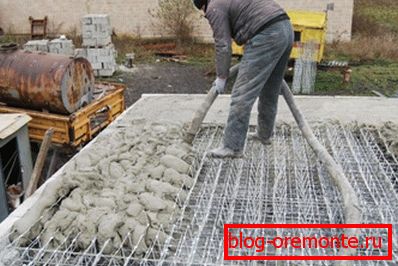
- Fill the mixture in even portions.
- Level it with a rule (or a vibrating rail).
- Next, compaction tamper.
Tip: if there are too large bubbles, they will need to pierce the probe (rod).
- The formwork also need to knock from time to time. This will allow the solution to lie as evenly as possible.
- Generally ram until the surface becomes glossy as a result of moisture release. Remember that without this, the monolith will not turn out qualitative.
- Well laid solution level off first with a shovel, and then with a construction trowel.
- Now carefully evaluate your work - you can not allow the appearance of cracks or cracks. If they nevertheless appeared, we are abundantly moistened with water and poured over the cement. Then you need to rub the mixture with a paint brush until the surface becomes perfectly smooth.
Dry
After pouring, the lion's share of builders simply covers the surface with a film and leaves to dry for some time. However, such a measure does not carry the proper efficiency.
To ensure maximum strength, a special “drying” should be done:

- We cover the roof with some loose material (for example, sawdust).
- Carefully wetted surface. The first three days this procedure should be carried out every 4 hours.
- After that, you need to moisten three times a day for a week.
- Shed roof, cover it with a film (this is done every time).
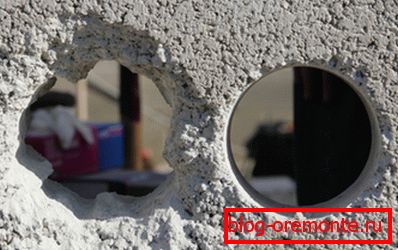
After 10 days the construction will be fully prepared and the formwork can be safely removed. If necessary, can be made cutting of reinforced concrete with diamond circles (for example, if the need to make a recess).
Finishing work
Do not forget that precipitation can cause serious harm to any material. For this reason, waterproofing the concrete roof is a mandatory procedure.
It is produced quite simply:
- During construction we make a coupler with a slope of the desired side. This part will need to be made of special concrete, which does not let moisture in at all.
- After complete drying, we apply special mastics. They can be bitumen based or polyurethane.
- Apply them better spray. However, in his absence, you can use a brush or roller.
- After some time, a film forms on the surface, which will protect the floors from moisture for many years.
Do not forget that before covering the concrete roof of the garage with any substance, it must be cleaned of dirt and dust. Otherwise, it will not be as effective as possible.
Conclusion
На этом мы закончим свой рассказ, но перед этим дадим возможность дополнить полученные знания. В представленном видео в этой статье вы найдете дополнительную информацию по данной теме. Его просмотр позволит вам постичь все тонкости, описанной нами процедуры (см.также статью «Декоративный бетон – практичное и симпатичное решение для вашего интерьера»).