Self-concreting inclined surface. arrangement of a slope of
In a number of articles on our portal we talked about how to make a flat cement screed correctly. Perhaps it's time to talk about how to pour concrete with a sloping surface.
The topic of this article is relevant, as in any house there will probably be a certain number of surfaces that are not located exactly, but at a certain angle to the horizon. That's it about these surfaces and the methods of their manufacture will be discussed further.
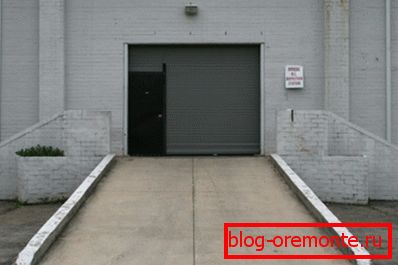
Floor screed, angled
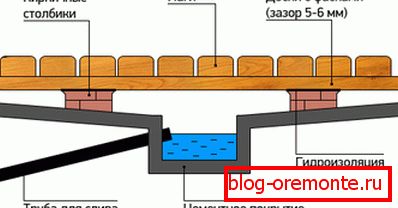
In construction practice, it is often necessary to install inclined screeds. As a rule, this is done in order to compensate for the difference between adjacent surfaces, in order to arrange access ramps and ramps with unorganized diversion of melt water from the building.
Of course, there are many other reasons in order to cement surfaces with a slope relative to the horizon line, and all this work is easy to do if you have any experience in working with mortars.
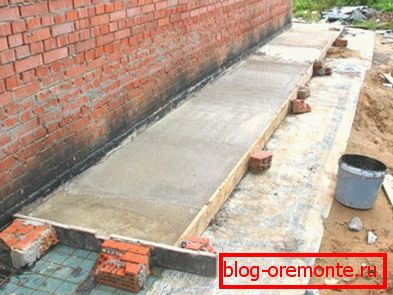
Conventionally, inclined screeds can be divided into two categories, namely, the external and internal. Consider the features of the implementation of each of these two categories, but first we will determine the general features of the manufacture of cement floors.
Features of the construction of the base floor
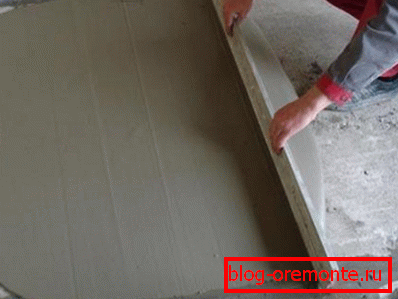
Regardless of whether you make a concrete floor - flat or sloping, there are general rules that you will have to follow.
The instructions for arranging a concrete floor are phased and consist of the following points:
- Work surface preparation (this and the next two stages are relevant when working on the ground). At this stage, the soil is cleared, all vegetation is removed, which can later grow and damage the finished structure. Then the entire surface is thoroughly rammed.
- Sand cushion filling. At this stage, sand is poured. The thickness of the layer is determined in accordance with the estimated thickness of the screed. If the exit from the garage to the street is made, the layer of backfill in thickness can be up to 5 cm. The sand is carefully rammed.
- Rubble filling. At this stage a layer of medium-sized rubble is lined, which is also rammed so that it is imprinted in the sand. The thickness of this layer is no more than 5 cm.
- Installation of beacons. Install beacons, which will align the mortar. This is probably the most difficult and crucial stage, since the configuration of the finished structure depends on its implementation.
- Preparation of the solution It is carried out with standard proportions: 1 part of cement of mark M200 to 3 parts of sifted sand without clay impurities. When preparing the solution, water is added gradually so that the finished product crawls off the tilted trowel, instead of lingering on it and not falling off of it.
- Lay out the solution. If the floor is made with the expectation of a low mechanical load, then the concrete is laid at once and leveled with a rule or a large trowel on the beacons. If we are talking about external screeds, which will be subject to substantial mechanical loads, during the laying of the mortar it is necessary to reinforce the structure with a mesh or reinforcing bars.
- We protect the laid solution from drying out.. To prevent the concrete base from cracking, for 3-7 days the surface must be watered with water so that the layer of the laid material dries out evenly.
Features of the arrangement of the slope of the tie in the shower room
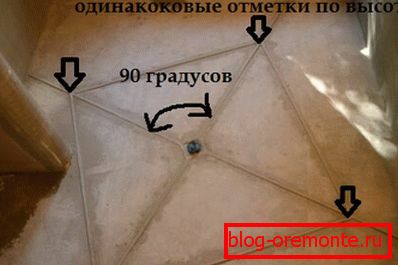
The floor in the shower room differs from the floor in another room by the presence of a ladder (built-in drain siphon) into which the used water goes. In order for the water to go into the siphon, and not to stand in different parts of the shower, the floor is made in the form of four faces converging from the corners of the room to the sink.
Drain should be located below the line of junction of the walls and floor. Before pouring the mortar, it is necessary to check the efficiency of the drain, otherwise repair and diamond drilling of the holes in the concrete will be required later.
Important: When arranging showers in individual houses or apartments, it is not recommended to make a level difference of more than 2 cm per meter. Having a greater slope will make the base of the floor unsuitable for normal use. In addition, excessive level difference significantly complicates the subsequent laying of the tile with his own hands.

The traditional layout of the drain is the positioning exactly in the center or the placement offset to one of the corners.
The first scheme is easier to implement, since the beacons (metal guides) will have to be placed at one angle. In the second case, the lighthouses will be located in a different order. It is logical to assume that the lighthouses in the part where the drain is located closer to the wall will be shorter.
In the first case, the installation procedure for the beacons is as follows:
- the first lighthouse is set in the direction from the drain to the opposite corner of the room;
- then along the level on the wall we mark the location of the remaining lighthouses relative to the first lighthouse.
Important: In most showers it will be inconvenient to work with a full-sized rule, therefore it is better to use a wide (at least 60 cm) and narrow (up to 20 cm) spatula to work with concrete.
In the event that the drain is displaced, we work, just as in the previously described method, but with the difference that the length of the lighthouses will be different, and therefore it will be necessary to take a more responsible attitude to the measurements.
The solution for the manufacture of such screeds are made thicker than when forming flat surfaces. It will be easier to form the slope. In the extreme case, working with the mortar, it is possible to admit the presence of small irregularities, since they can be corrected with tile adhesive in the process of finishing. To eliminate major defects will require cutting of reinforced concrete with diamond circles.
Features of the arrangement of a sloping driveway to the garage
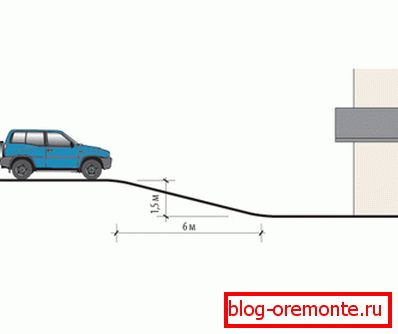
External screeds, made with a slope, are commonly used when arranging the exit from the garage to the street.
Considering that a vehicle with a mass of about a ton will periodically move along this construction, it is necessary to take care of the appropriate reinforcement of the concrete. In order for the F / B design to withstand heavy loads, cement M300 is used in the preparation of mortar. In addition, it is necessary to perform reinforcement using a mesh with a minimum thickness of 2 mm and a mesh width of 50 mm.
Reinforcing mesh should be placed at a height of 75% of the total thickness of the screed. So, first make a layer of screed height in? from the thickness of the layer in the place where it is adjacent to the garage. Then the grid is laid, and on top is an additional layer of mortar.
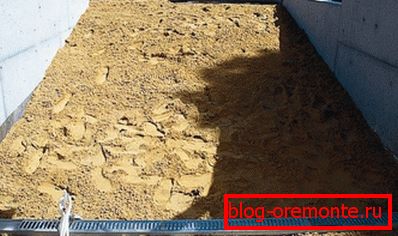
As in the first case, the only significant difference between the inclined base and even screeds is the need to install beacons at the required angle.
Since there is no special tool for inclined installation of beacons, we apply a water level and hand-made templates. The template consists of two strips, securely fastened at an angle with which the screed is adjacent to one of the walls. The level difference in the case of exit from the garage can be up to 5 cm per 1 meter.
How to make a formwork for casting inclined surfaces
To begin, consider the features of the manufacture of formwork on the example of a ramp at the exit of the garage.
Formwork for the construction of an inclined surface is made either from boards of 100 * 20 mm, or from laminated plywood, the price of which is low. Measure the height of the difference between the levels of the exit and, in accordance with these measurements, cut out the side walls, which will have the shape of a triangle.
The prepared walls are installed on the sides of the future congress and propped up with wooden stakes and props of boards. The load on the formwork for concrete is low, so in the manufacture of props, you can apply various improvised means.
If the level difference is insignificant, in addition to the side walls, lighthouses are mounted and a thick cement mortar is laid with a trowel. If the slope of the exit is large, in the process of pouring concrete, the upper open part of the formwork will have to be additionally sheathed with plywood to prevent the solution from flowing out.
Using the formwork with the upper lining, it is unlikely that it will be possible to pour the solution perfectly evenly. But irregularities can be sealed with cement mortar immediately after the formwork is dismantled.
It is an order of magnitude harder to make formwork for the manufacture of sloping floors. This design is used in the construction of the roofing system of large buildings, as well as garages and a number of economic objects.
For industrial casting of sloping floors, ready-made metal collapsible formwork is used. An example of such a construction you can see in the diagram.
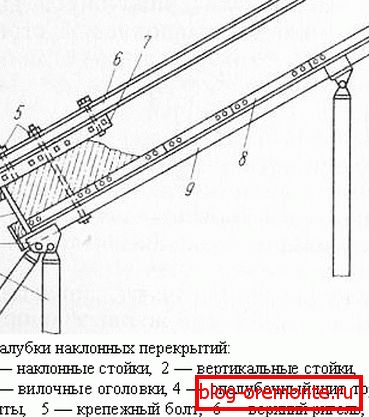
Making your own formwork for casting sloping floors is also possible. But you need to understand that the weight of the cast solution will be impressive and the load on the entire structure will be high. Therefore, the formwork should be as durable and reliable as possible. As a plan for the construction of such formwork, you can apply the above scheme of metal construction.
Conclusion
Now you know how to pour concrete at an angle and be able to cope with this task yourself. If you have any questions, watch the video in this article.