Rules for heating concrete. home use
For civil, industrial, as well as artisanal (home) construction at low temperatures, there are various ways of heating concrete, allowing not to stop work for winter time. Such auxiliary procedures make it possible not only to continue installation work in the cold, but also increase the rate of hardening of the solution, especially with the addition of special chemical solidification accelerators.
Below we will talk about such methods, in general, and one of them (the most popular) will be considered in particular, and we will also show you a video in this article on the topic of electric heating of concrete.

All about warming up
What methods are used to warm up
- The most primitive method of pouring mortar in the winter, is the arrangement above the ground of the most ordinary tent made of cellophane film with your own hands, where you can install a burning blowtorch or a heat gun in the middle. The method is extremely simple, only it can be used only on objects with a small area, and it is difficult to build such a dome over vertical structures.
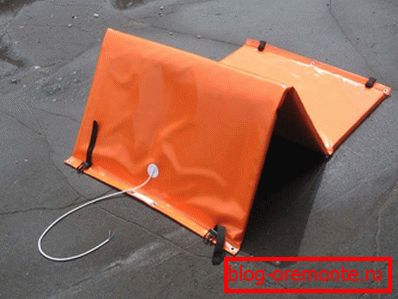
- In such a situation, it is somewhat easier to use electric mats that simply cover the pouring area by setting the regulator in the desired mode, depending on the outside air temperature.. But there is also a serious drawback - it is inconvenient to use electromatics when pouring large areas, besides, only horizontally arranged reinforced concrete structures can be covered with mats, but not walls, supports or columns.

- The ultraviolet installation of concrete heating is perhaps the most convenient of all existing, as it does not involve contact with the solution itself, and the thermal intensity of the device is simply controlled by the distance between the UV emitter and the object. Another advantage of this method is the ability to heat structures of any configuration and in any position (both horizontal and vertical), and the formwork is not an obstacle. However, this method is used quite rarely - it requires a large number of heaters.
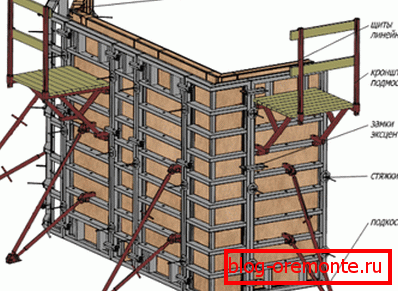
- Another method of creating monolithic reinforced concrete structures in the winter, is the use of heated formwork, it is only applicable for vertical ZBK (walls, partitions, supports). This is very convenient, since the shields are reusable here, and the heating elements on them must be replaced, and it is quite simple to do so. The main drawback of such formwork is a very high price, which, however, pays off when it is used frequently.
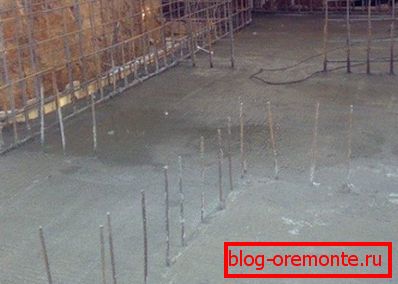
- For electrode heating of reinforced concrete structures, reinforcement or wire rod with a cross section of 8 to 10 mm and a step-down transformer is used, but this method is more suitable for vertical standing reinforced concrete structures. It is not the electrodes that are heated here, but the moisture between them (the two-blade boiler works on the same principle), only here the distance between the pins is from 60 to 100 cm - it all depends on the air temperature. The main disadvantage, despite its simplicity, is a very large energy consumption (one electrode consumes about 45-50A), therefore, the cost of construction increases.
| t? C during pouring | Voltage (V) | The distance between the pins-electrodes (cm) | Received power (kW / m3) |
| 1 | 2 | 3 | 4 |
| -5 | 55 | 20 | 25 |
| 63 | 30 | ||
| 75 | 50 | ||
| -10 | 55 | 10 | 3,0 |
| 65 | 25 | ||
| 75 | 40 | ||
| 85 | 50 | ||
| -15 | 65 | 15 | 3,5 |
| 75 | 30 | ||
| 85 | 45 | ||
| 95 | 55 | ||
| -20 | 75 | 20 | 4,5 |
| 85 | 30 | ||
| 95 | 40 |
Warm up table
- In this case, to maintain the desired temperature, it is checked every two hours and for this purpose special wells are made in advance.. During the heating of the solution, such testing is performed every hour. During the passage of the entire process, you must constantly monitor the status of rations and contacts.
PNSV wire and step-down transformer
Note. PNSV (Steel Heating Wire Vinyl Isolation) may have a different cross section and is used once. After solidification of the mass, it remains there forever.
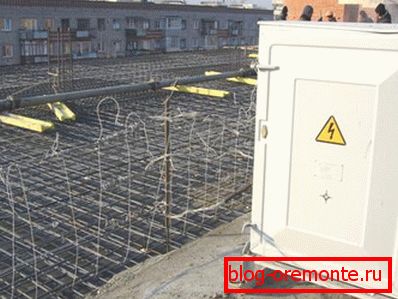
The above-mentioned methods of heating concrete are not as popular as the one that will be discussed now - the use of a PNSV wire as a heater and a step-down transformer to convert electricity. The essence of this method is as follows - the cable is laid in loops at the place of pouring the solution, and its cross section will depend on the transformer capacity and the air temperature outside (in the building) where the work is being done.
Depending on the air temperature, the load on the loops is fed from the step-down transformer and heating begins, but the structure of the concrete does not change, but the rate of hardening of the mortar significantly increases.
| Core diameter in mm | 1,2 | 2,0 | 3,0 |
| Ohm / meter | 0,15 | 0,05 | 0,02 |
PNSV resistance depends on the wire cross section
Note! Before laying the PNSV, it is imperative to verify the integrity of the wire and its shell. The fact is that the control of concrete heating is carried out only with respect to temperature, and the wire itself, in the event of its burnout, cannot be replaced, since it is completely immersed in the solution (besides, its closure can cause a fire). Therefore, for such purposes it is better to use new material.
| Transformer voltage (kV) | Section (mm2) no more | Reinforced concrete type (presence of reinforcement cage) | PNSV length (m) | Reinforced concrete type (presence of reinforcement cage) | PNSV length (m) |
| 10 | 1,1 | + | 9,95 | - | 8,4 |
| 15 | 1,1 | + | 22,85 | - | 18,9 |
| 20 | 1,1 | + | 39,8 | - | 33,6 |
| 10 | 1,4 | + | 18,9 | - | 15,5 |
| 15 | 1,4 | + | 42,6 | - | 34,93 |
| 20 | 1,4 | + | 75,6 | - | 32,09 |
| 10 | 2,0 | + | 54,6 | - | 46,18 |
| 15 | 2,0 | + | 123,8 | - | 103,0 |
| 20 | 2,0 | + | 218,2 | - | 184,7 |
| 10 | 4,0 | + | 148,57 | - | 373,0 |
| 15 | 4,0 | + | 1009,0 | - | 841,0 |
| 20 | 4,0 | + | 1974,0 | - | 1495,0 |
Table of the optimal loop length for different wire sections and types of concrete
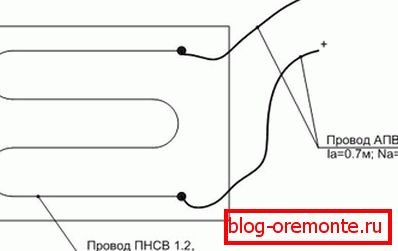
При укладке ПНСВ инструкция требует, чтобы на этом месте не было никакого мусора, который может повредить оболочку, что в свою очередь, приведёт к короткому замыканию и перегоранию кабеля (как мы уже говорили - заменить его невозможно). Кроме того, при создании петли недопустимо делать резкие изгибы и оставлять «барашки», что приводит к излому провода - все повороты следует выполнять плавно.
Сама укладка обычно производится либо «змейкой», как это показано на схеме, либо одинарной петлёй - всё будет зависеть от длины ПНСВ и площади заливаемой конструкции. Нельзя ни в коем случае допускать пересечения греющих проводов друг с другом - оптимальное расстояние между жилами порядка 100 мм, хотя его можно изменять, в зависимости от длины и сечения ПНСВ, а также, от размеров рабочей площадки.
In any case, the heating wire must be completely filled with concrete (including twisting), since it will overheat in air, and as a result, both the insulation and the steel core will burn out. In addition, you should take care to protect the transformer and, as a result, the entire heating structure from voltage surges, as a surge can cause a sharp overheating and burnout.
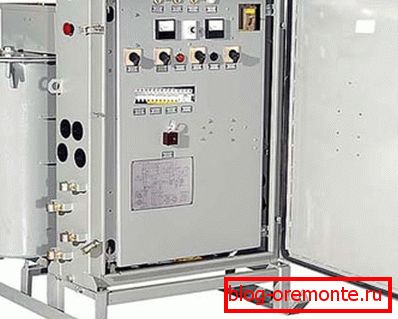
To visualize the wiring diagram, let's consider how this is done in accordance with SNiP 111-4-80 / ch.11 and GOST 12.1.013-7 - in this case, the step-down transformer KTPTO-80 is used, as in the photo above.
This unit, before assembling the electrical circuit, should be zeroed out, and this is done with the help of the fourth conductor of the power cable to the clip N from the XT6 unit, bypassing it with the metal case of the control cabinet. Grounding is made from the legs of the unit, where for this there is a special bolt with a nut, and the circuit is made of steel wire with a cross section of at least 4 mm.

In terms of safety, the insulation resistance must be at least 0.5 MΩ, which should be ensured before connecting, and also check all twists and contact connections. Then install the SQ1 and SQ2 limit switches so that it is possible to reliably close the contacts of the same name when opening the casing cover and the control panel. Also, be sure to check the integrity of the fuses in case of a short circuit.
Переключатель силового трансформатора устанавливаете в положение 1 (соответственно - 55В), а автовыключатель и SA3 приводите в положение «ВЫКЛ». После всех этих процедур цепь, установленная в бетонной или железобетонной конструкции, подсоединяется зажимами ХТ6 к блоку.
На ввод подаётся питание 380В, проверяем напряжение HL1 и HL3, после чего замыкается QF1 и, используя SB1 (аварийная кнопка «ВЫКЛ») пробуем аварийное отключение. После такого теста делается повторное включение - на KL1 подаём питание кнопкой SB3, после чего срабатывает магнитный пускатель KM1.

In accordance with SNiP 3.03.01-87 (for heating the supporting and enclosing reinforced concrete structures at temperatures down to -40? C), a routing for electric heating with PNSV type wires is used. This document contains technical and organizational-technological solutions to issues on the method of wired heating with all the technical and technological parameters used, that is, the entire schedule of concrete heating.
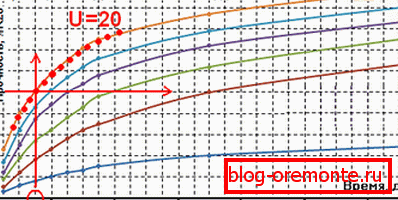
To control the heating, as well as to predict the quality of reinforced concrete structures after the final hardening, a concrete heating sheet is used - a form for which can always be downloaded from the Internet. Such data allows you to accurately align the time and order of hardening of the filled solution, that is, it is like a step-by-step guide to achieving the greatest strength.
Control or calculation of the heating of concrete is carried out with the help of a technical thermometer - special funnels are made in the filled mass, where the tube is laid, and the thermometer is already lowered into it. The temperature is fixed every two hours, and if the thickness of the structure does not exceed 10-115 cm, then this is done every 4-5 hours.
We should not forget that during normal heating of PNSV - up to 80? C - the temperature of the concrete during heating reaches 40? C-50? C, and it happens in the cold!
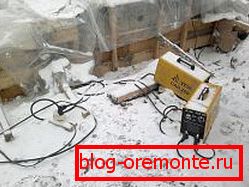
At home, as a step-down transformer, you can use a welding machine with a capacity not lower than 250A, as in the photo above, and the resistance, therefore. The number of PNSV wires in such cases can be calculated using the formula R = U / I.
As a rule, we will have 220-230V U, and if we use the aggregate of the above mentioned power, then I = 250A. in this case, R = U / I = 220/250 = 0.88 ohm and, on this basis, you can use the tables to determine the desired cross section and length of the wire.
It should be said that by immersing the PNSV in the mass of concrete, it should be connected with a transformer with aluminum wire of the ARC type with a cross section of not less than 4 mm, but the twist should be in solution.
We mentioned this moment for good reason - you will have to connect two heterogeneous metals - steel and aluminum, therefore, the connection may be loose, which will lead to sparking, overheating and burnout of the wire. But it will no longer be possible to alter the twist poured in with a solution, so pay special attention to this point - the possibility of completing the process in general will depend on it.
Conclusion
In conclusion, we can say that the lowest cost of concrete heating works is in the case of using a PNSV cable and a step-down transformer, and although this method is rather inconvenient to use for vertical reinforced concrete structures, it is still sometimes used to save money. Despite the complexity of laying the wire (takes a long time), the wire heating of RC constructions is most often used.