Projects of baths from a bar - features of the correct
The design process can be called one of the most crucial moments in the construction of a country house. This does not mean that the other stages are easier and more accessible, but it depends on how the plan-sketch is made correctly that the reliability and durability of the future structure depends.
In our article we will consider all the features of this process and for example we will study the projects of baths from bar 3 by 3.
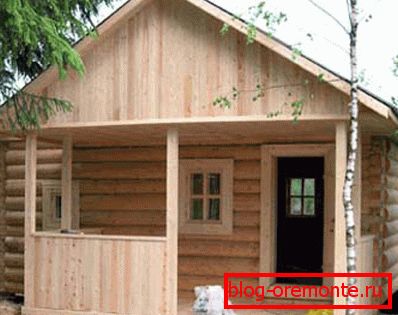
How to start
First of all, you should decide on the opportunities that you have, this will help you choose the material for our project. Of the existing species, the most accessible is the usual rectangular (unplaned) timber. And the most expensive can be called glued.
Tip: If you do not care that the building was wooden (visually), then it is better to get a more affordable option, at least, you will save money on finishing materials.
On the other hand, he has a couple of drawbacks:
- A large percentage of shrinkage is about 10% of the total size of the building.
- The difference in size even at the boards from the same batch.
If the price is not as significant for you as the desire to build a wooden bath, it is better to choose a profiled or glued. The difference between them is that the glued laminated timber consists of several separate elements that have passed through the natural moisture and are treated with antiseptics. The processing procedure you can do by hand.
The appearance of the bath
Having decided on the material, you can begin to create an image of a bath in your head - visual contact with the object that you want to build is essential for drawing up clearer projects.
Note! We are in order to base it and took the projects of small baths from a bar, so that it would be easier to present them externally, to pay attention to all the minor details of the structure.
- Start by choosing the shape of the structure. Recently, the projects of corner baths made of timber became popular; it is easier to place them on the site, placing them in the corner.
- Select the desired color of the structure, for this it is better to examine the entire palette of varnishes and paints for wood.
- Mentally divide the total area of the room to accommodate everything that is required for a bath.
After you properly present the final image of the design in your head, you can start creating a drawing.
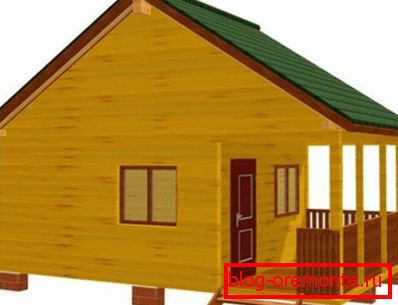
- Draw on paper the outer contour of the bath, as long as you do not care whether the scale is observed or not.
- Specify the exact size of the building. You remember that for the sake of example we took a 3 by 3 bath, so the following information will be on the drawing - 3 meters long and 3 meters wide. The height can be arbitrary, but optimally for a small bath 2.5 meters.
- Separate the structure with a dotted line (inner wall) so that you get a steam room, washing and changing room. For a steam room, 3x1 is enough, that is, to place it along a single log wall. The remaining squares are divided and it turns out that they will be 2x1.5 m2.
- Specify the location of the furnace, it is usually located between the steam room and the sink. Since we have a steam room of 3 meters in length, half a meter can be easily allocated for the arrangement of the heating structure.
Note! Certainly, the project of a bath from a 5x5 bar would look more practical, it would be possible to increase the space for cleaning and take a rest room with a pool. But do not forget that we tell only by example, we specially consider a small option.

- When the separation of rooms is complete, you need to place the doors and windows on the drawing. If you think that the bath does not need windows, then you are mistaken in this. Small windows in the steam room and the sink should be for ventilation and smoke removal, as a last resort. And place the doors so that when opening, they do not touch anyone or anything.
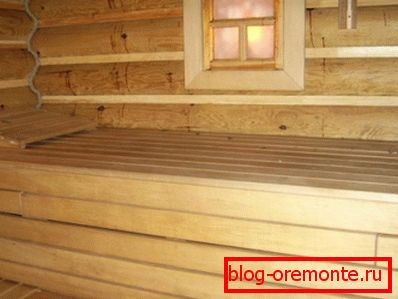
Technical details
In this section, we describe the main points that must be observed during the construction phase.
- First of all, a monolithic slab foundation cannot be erected under the building, since it requires a place where water will be merged. The tape or column variant is best suited, only in this case should a drainage system be provided to divert water from under the supports.
- As for the furnace, then it is necessary to prepare the most solid foundation for it, if the foundation is on poles, then install additional support for the furnace. In the tape version to build a small platform.
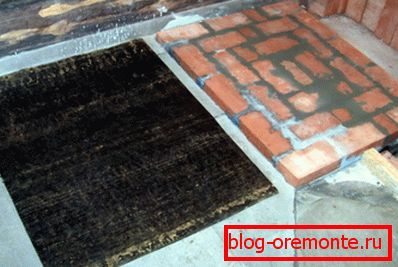
Note! In addition to the supporting elements, fire-resistant materials should also be installed, for example, lay out the opening under the furnace with bricks, or, if the construction is metal, install it on stainless steel sheets.
- In order for water to be easily removed from the premises, it is necessary to make a set of through holes in the floor with a diameter of no more than 10 mm. Please note that the ventilation in the room must be good, otherwise moisture will form, which will cause a fungus that is harmful to wooden materials. Also, one should not allow the washing to be too cold, otherwise it will be possible to catch a cold, especially people who are not tempered.
- The stove chimney should be hidden in a special metal casing with layers of basalt cotton wool protecting wooden products from contact with the heated pipe. Additionally, such a casing itself heats up and keeps heat for a long time in itself, warming the surrounding rooms. As for the external exit of the pipe, it should be made a little higher or flush with the upper level of the roof.

- Before starting construction, do not forget to observe the standards regarding the location of the wooden bath. So, for example, any other wooden buildings should be located no closer than 15 meters so that, in the event of a fire, the fire does not spread to them.
- Many build baths with a terrace so that they can calmly breathe fresh air after a steam room, sitting at the table and sipping tea. Most often, the terraces are made open, although they can be glazed, then you will get a room that is not blown in, where you can hide from the winter frosts.
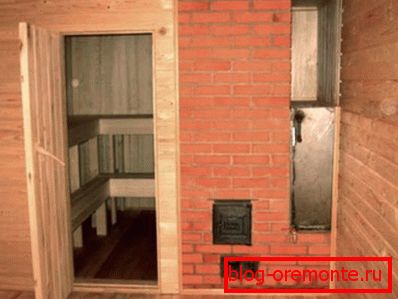
- For small buildings, the best option is a metal furnace, as there are products that take up very little space in the room.
- Since the bath is built from a bar, it is required to thoroughly process the sawn timber with antiseptics and fire-resistant means to prevent the wood from burning. You can not save on this, dry bars can catch fire from the slightest spark and high temperature that is present in the bath.
Difficulties at work
The main difficulties in the work may be the moments associated with the installation of the furnace, the device proper ventilation and drainage of water.
In this section, we consider the optimal solutions to these problems:
- For reliability, a stove should be supported (we have already talked about this), and the heating structure itself should be positioned as far as possible so that it “warms” all the rooms. For a 5 by 5 bath, it will be optimal to set it in the center: a set of water (tank) in the sink, stones in the steam room, and one wall comes out into the rest room, trimmed with clapboard for safety.

- All rooms should be well ventilated, you can install multiple vents that will connect the entire structure. Just do not forget to make them lockable to prevent heat loss in the steam room and increased humidity in the rest room.
- To drain the water turned out to be the most effective, you can fix the logs at a small angle, which does not allow water to stagnate. 5 degrees is enough for the water to flow into the holes, but you will not feel this difference.

Finally, I would like to remind you that there is a high humidity in the bath, so the use of metal fasteners should be left in question. It is better to lay the timber on the wooden dowels, trying to fix steel brackets as little as possible.
Conclusion
As you can see, in order to make a project of baths from a bar, it is necessary to take into account many factors and hidden moments that an ordinary builder (private developer) may not even be aware of. Well, now, having read the above information, you will probably cope with all the work yourself, up to the construction of the structure.
Instructions on how to build a bath from a bar are on our website, you need to find only the relevant topic.