Paving street tile on concrete at arrangement of the yard
Recently, street pavement tiles are widely used as a material for arranging the local area, paving garden paths or decorative and protective finishing of the blind area of the basement on individual garden plots and other private households.
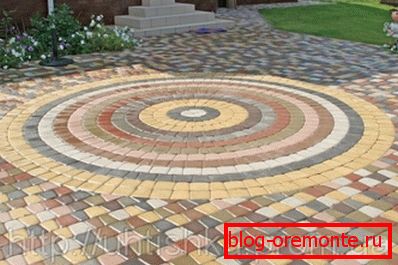
Usually in landscape gardening and landscape construction use two methods of laying outdoor tiles:
- on sand and gravel bed;
- on the basis of a concrete screed.
And, accordingly, each of the options has its own characteristics.
Laying paving slabs on a concrete base
In order to study this issue in detail, this article will discuss the main technological features of laying outdoor paving slabs with their own hands on the foundation of monolithic concrete.
In addition, there will be presented a detailed instruction, which gives a step-by-step description of the technological process of laying paving slabs of natural or artificial stone.
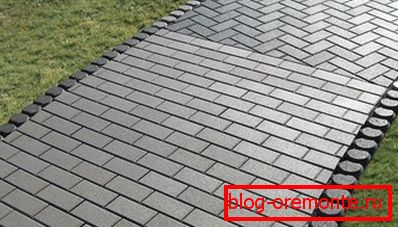
Concrete screed use
First of all, it should be noted that laying tile on a concrete floor significantly complicates the execution of work by the fact that for this it is necessary to make a high-quality concrete base. For this reason, this method is resorted to only in those cases when it is really necessary.
As a rule, there are several objective reasons that do not allow the use of a usual sand and gravel pad as a base.
- Increased soil moistureas well as weak, mobile or unstable ground under the site of the garden path.
- Projected project, high dynamic load on the paving area as a result of heavy traffic of pedestrians or the arrival of cars.
- Presence of existing concrete base (ready sidewalk paths, blind area of the foundation, etc.).
- Installation of porcelain tiles or other materialswhich is designed for laying on a hard, hard surface.
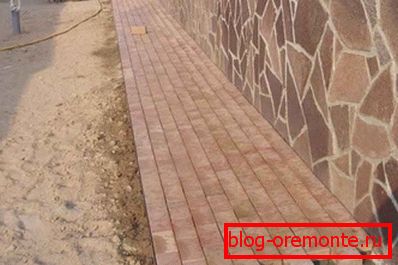
Features laying on a concrete surface
This method of performing work is more reliable, and with the right approach provides an even and durable road surface.
Paving slabs of concrete or natural stone, paved on a hard, hard surface can withstand high dynamic loads and is not destroyed by seasonal fluctuations in temperature and groundwater levels.
However, to obtain a quality result, it is necessary to comply with certain requirements that relate to the arrangement of such road surfaces.
- The surface of the concrete screed should be perfectly flat, without dents, sagging, bumps and other defects, while at the time of pouring it must be given a small slope (2-5 °).
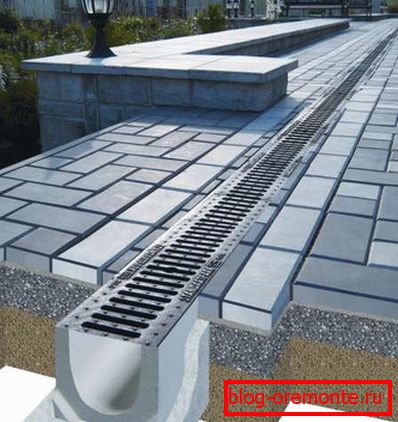
- A monolithic slab, unlike a sand-gravel pillow, does not let water through, therefore it is necessary to provide a drain along the walkway or sidewalk, otherwise water, penetrating between the tiles, when freezing will squeeze them out.
- In that case, if paving slabs are laid on aerated concrete, you need to perform high-quality waterproofing from the ground, because porous materials absorb moisture well, which can lead to the destruction of the base.
Tip! It makes sense to equip the concrete base under the tile at the entrance to the courtyard or on the parking lot of a personal car. The complexity and high price of such works will be justified by the long-term service life of the road surface.
Making the base
The monolithic base is made in accordance with general construction standards, the method of pouring the liquid concrete mix in the pre-installed formwork, which follows the contours of the future garden path or sidewalk.
To increase the strength and uniform distribution of the load in the formwork, a rebar of metal mesh is installed.
- On a selected piece of land, remove a layer of soil at least 200 mm thick, and remove the plants along with the root system.
- At the bottom of the formed pit, compact the soil, and then fill it with fine gravel to a height of 50-80 mm.
- Along the contour of the future structure, install a formwork for concrete and lay a metal reinforcing mesh on the low spacers on the bottom.
- Pour the formwork with liquid concrete solution to the required level and leave until it is completely cured.
Table 1 shows the composition of the concrete mix for paving slabs of various brands.
| Class (grade) of concrete | Bulk composition, Cement: Sand: Crushed stone (kg) | Volumetric composition of 10 liters of cement, Sand: Crushed stone (l) | Amount of concrete per 10 liters of cement (l) |
| B7,5 (M100) | 1 : 4,6 : 7,0 | 41 : 61 | 78 |
| B12.5 (M150) | 1 : 3,5 : 5,7 | 32 : 50 | 64 |
| B15 (M200) | 1 : 2,8 : 4,8 | 25 : 42 | 54 |
| B20 (M250) | 1 : 2,1 : 3,9 | 19 : 34 | 43 |
| B22,5 (М300) | 1 : 1,9 : 3,7 | 17 : 32 | 41 |
| B25 (M350) | 1 : 1,6 : 2,7 | 14 : 28 | n / a |
| B30 (M400) | 1 : 1,2 : 2,7 | 11 : 24 | 31 |
| B35 (M450) | 1 : 1,1 : 2,5 | 10 : 22 | 29 |
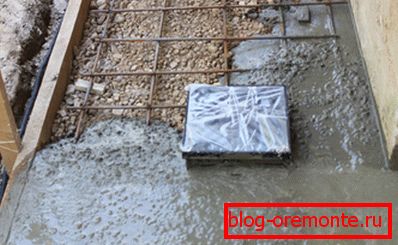
Tip! Instead of pouring a monolithic base, you can use ready-made reinforced concrete blocks or slabs of a suitable size, placing them in a level on the bottom of the pit, after pouring out a sand pillow.
Paving tiles
After solidification of the base, you can proceed to further work. For laying paving slabs one of two types of mortar is usually used.
As a rule, natural stone and tile under concrete are laid on cement-sand mortar, and for porcelain or artificial stone it is necessary to use a special glue, which is sold as a dry mix and prepared at the work site.
- Along the perimeter of the monolithic slab, dig up a shallow trench and install curbs in it so that their upper plane is slightly above the finishing level of the paving slab, then backfill the trench.
- Clean the work surface from debris and dust.
- Apply masonry mortar in small portions. For even distribution it is convenient to use a notched construction spatula.
- To start laying tiles you need from one of the corners, tightly fitting them to each other with a rubber hammer.
- While working with the help of the level, constantly monitor the horizon and do not forget about the need to respect the slope of the water flow.
- After setting the glue or cement-sand mortar, fill the seams between the tiles with a special trowel of suitable color.
After installation, the pavement must be left for several days and do not operate until the mortar is completely cured.

Tip! When installing curbs between them, it is necessary to leave gaps for the smooth flow of rain and melt water.
Conclusion
The technologies described in this article are fairly simple and do not require the use of special equipment, therefore they are available for independent performance by any owner of their own backyard.
Additional information on the subject of interest can be obtained by watching the video in this article or by reading similar materials on our website.