Partitions made of aerated concrete - the main nuances of
In most apartments of the Soviet period, the layouts are standard, that is, you can find the exact same apartment in another city as yours. In this case, the location is not always thought out, and sometimes you want to change the layout, and this is associated with the demolition of the old and the erection of new walls. Partitions of aerated concrete are the best option in terms of the ratio of factors of price-quality, so in this article we will look at them.
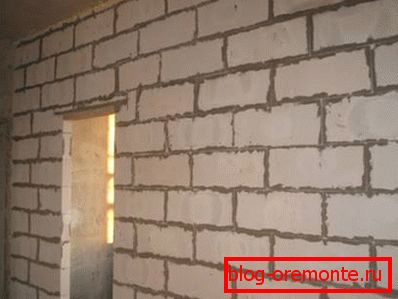
Features of the preliminary stage
Works begin with calculations of the amount of material needed. It is quite simple to do this: first, the area of the future wall is measured, after which this indicator should be divided by the area of one element.
Then, to the result obtained, you need to add 3-4 pieces in reserve, as you will most likely have to trim some elements. Of course, this is not cutting reinforced concrete with diamond circles, everything is much simpler, and you can do with a special hacksaw.
The thickness of the walls of aerated concrete depends on the size of the blocks, but if you are guided by the norms of SNiP, then with a ceiling height of not more than three meters, products with a thickness of 10 centimeters are sufficient. If the height is greater, then it is necessary to acquire blocks with a thickness of at least 20 centimeters.
It is important to acquire the material of the desired density, to ensure the best insulation performance, the best product option with a density of 500-600 kg / m3. It is difficult to determine this indicator, but you can simply weigh the product, its weight with a thickness of 100 mm should vary from 14 to 18 kg, if the mass is less, then the density is low.
Installation of partitions of aerated concrete blocks is made using a special adhesive composition, which provides ease of operation and reliability of fastening. You can buy it in any hardware store.

You will also need a tool for the work: a trowel, a bricklayer's hammer, a hacksaw on aerated concrete and level (it can be both ordinary and laser). To fix the partition to the walls, you must purchase an anchor or special plates.
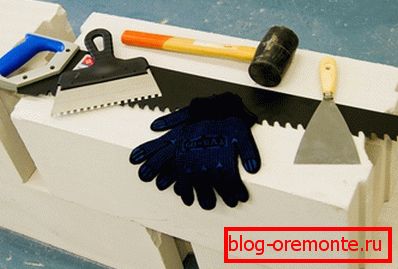
If you purchased an anchor, then you will need a drill with a drill (if new partitions also imply the laying of communications through concrete walls, then diamond drilling of holes in concrete is necessary).
How to organize a workflow
After all the materials are purchased, you can get to work. The device walls of aerated concrete - the process is quite simple, but any error can lead to cracking of the walls in the future. Therefore, each stage is of great importance.
Training
Note! Do not start work until the redevelopment is agreed with the municipal authorities. Only after obtaining permits, you can begin work, any unauthorized change of layout is a violation and is punishable by a fine.
Works are performed in the following order:
- First you need to deliver to the place all the necessary material so as not to be distracted in the process. In this case, do not forget that for the preparation of the adhesive composition will need water, and if there is no running water in the room, it must be stored in advance.
- Next, you should mark the future wall, it is very important to do this as accurately as possible, since errors at this stage have irreversible consequences, in order to fix them, you have to destroy the wall. It’s best to do this with a laser level, but you can get by with the usual one, you need to mark up the floor, walls and ceiling to see how the partition should be located.
- It is necessary to put a strip of roofing material or other waterproofing material on the base, this will create a barrier to moisture and improve the sound insulation characteristics of the future wall.
Main stage
After preparation, you can proceed to the main stage, in which the following work is carried out:
- Initially, the glue is prepared for the blocks, depending on the brand and manufacturer, the finished solution retains its properties for 20-60 minutes, so you should not make large batches. The proportions of the mixture and water will prompt the instructions on the package.
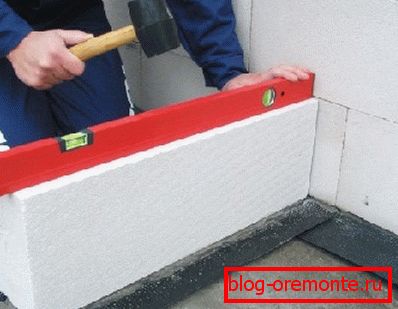
- Laying the first row - a very responsible process, which largely depends on the result of the work. As noted above, a do-it-yourself aerated partition is a project that can only be done if the technology is observed, therefore stacking the bottom row, constantly monitor its position by level. The block adjacent to the wall is additionally fixed with a plate.
- The adhesive is applied evenly, the easiest way to do this is with a notched trowel or a special masonry bucket. It all depends on which device you prefer to work with (as a rule, it is easier to use a trowel, it costs a little, which is also very important, because after the end of the work you hardly need the tool). (See also the article Aerated concrete facing: how to do.)
- The masonry is carried out according to the classical scheme: each successive row bandages the previous one, that is, the vertical seams are shifted relative to the previous ones by 40-50% of the length of the aerated concrete block.
- The laying of partitions from aerated concrete blocks will be much stronger if a metal strip 4-5 centimeters wide or two rows of steel wire is laid in the seams. If your partition will dock perpendicularly, fastening plates should be left in the seams at the joint, so you will ensure high structural strength without additional efforts.
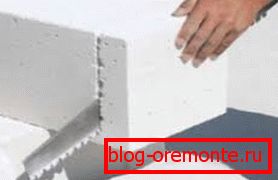
- As noted above, aerated concrete can be easily cut with a special hacksaw with a hard tipping. You just need to mark the cut element and draw lines on it to simplify the work and control the correctness of the cut. It is necessary to work with a hacksaw carefully and not press too hard, so as not to damage the teeth.
- In order to eliminate the appearance of cracks on the surface due to the movement of structures due to temperature fluctuations, a small gap should be left between the upper unit and the ceiling measuring 1-2 centimeters.. After completion of the work, this cavity is best filled with mounting foam, it has excellent heat and sound insulation properties and is well-tolerated by minor movements of the structures. (See also the article Plastering walls of aerated concrete: how to do.)
Tip! If your partition is decorative, you can leave a niche in it. After finishing, you can put in them various elements of decor, and if you put the backlight there, then the partition will look even more interesting.

Conclusion
The walls in the house of aerated concrete is not difficult to do, any person can cope with this work, the main thing is to follow all the recommendations and use quality materials. The video in this article will help to understand the features of the process even better.